
Ask, Predict, Test, and Share: A Sound Investigation
Students use a grade-appropriate inquiry cycle to ask which objects make sound when they vibrate, make a prediction, conduct a simple test, record observations, and share evidence.

Illustrations are auto-generated and may be placeholders. They can be refreshed to match the narration.
Notice and Ask a Question
Scientists begin by noticing something and asking a question. Gently pluck a stretched rubber band while watching it closely. You may see the rubber band move back and forth quickly. This repeated back-and-forth motion is called vibration. You also hear a sound. Think about other classroom objects, such as a ruler, a paper cup, or a metal spoon. A useful investigation question is, “Which objects make sound when they vibrate?” This question can be answered by testing objects and observing what happens. Real objects are helpful sources because they provide direct evidence. Pictures, books, and a teacher can also help you learn how to test safely. Write or draw the question before beginning so everyone knows what the investigation will try to answer.
Make a Prediction
A prediction tells what you think will happen before you test. It is not a wild guess. Use what you have noticed or learned to give a reason. Look at the rubber band, ruler, paper cup, and soft sponge. Decide which objects you think will make sound when they vibrate. You might say, “I predict the ruler will make sound when it vibrates because I have heard a ruler twang before.” You might predict that the soft sponge will not make a sound you can hear. Record each prediction with words, drawings, or check marks. Different students may make different predictions, and that is okay. Do not change your prediction after testing. Instead, compare it with your observations to see whether the evidence supports it.
Plan a Safe, Fair Test
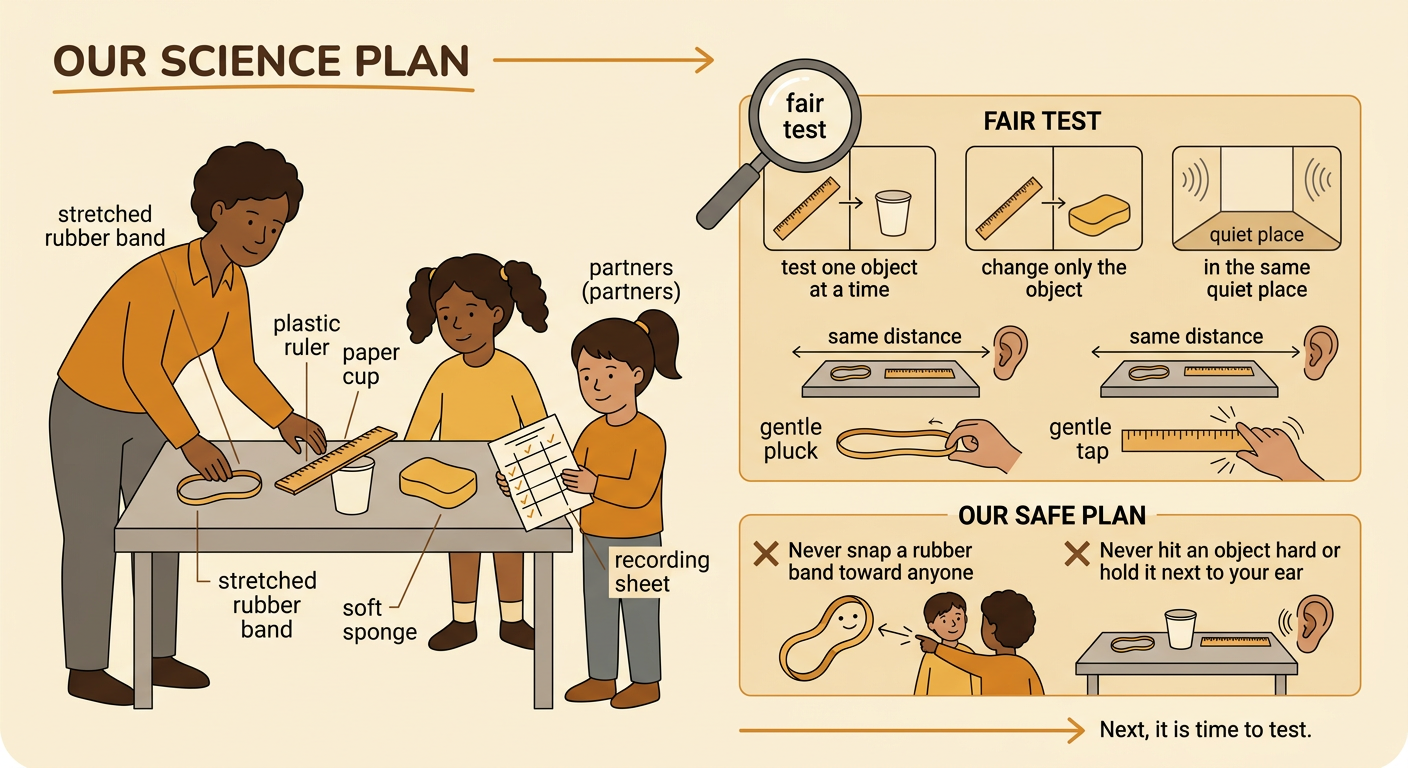
Plan the test before touching the materials. Choose safe objects and ask an adult to help set them up. Use a stretched rubber band, a plastic ruler, a paper cup, and a soft sponge. Test one object at a time in the same quiet place. Keep your ear about the same distance from each object. Use one gentle pluck or tap, then look and listen. A fair test keeps as many conditions the same as possible. Only the object should change. Never snap a rubber band toward anyone, strike objects hard, or place an object next to your ear. Your eyes and ears are useful sources of evidence. A partner can also observe, but both partners should follow the same steps. Agree on the plan and prepare a recording sheet before testing.
Test Vibrating Objects
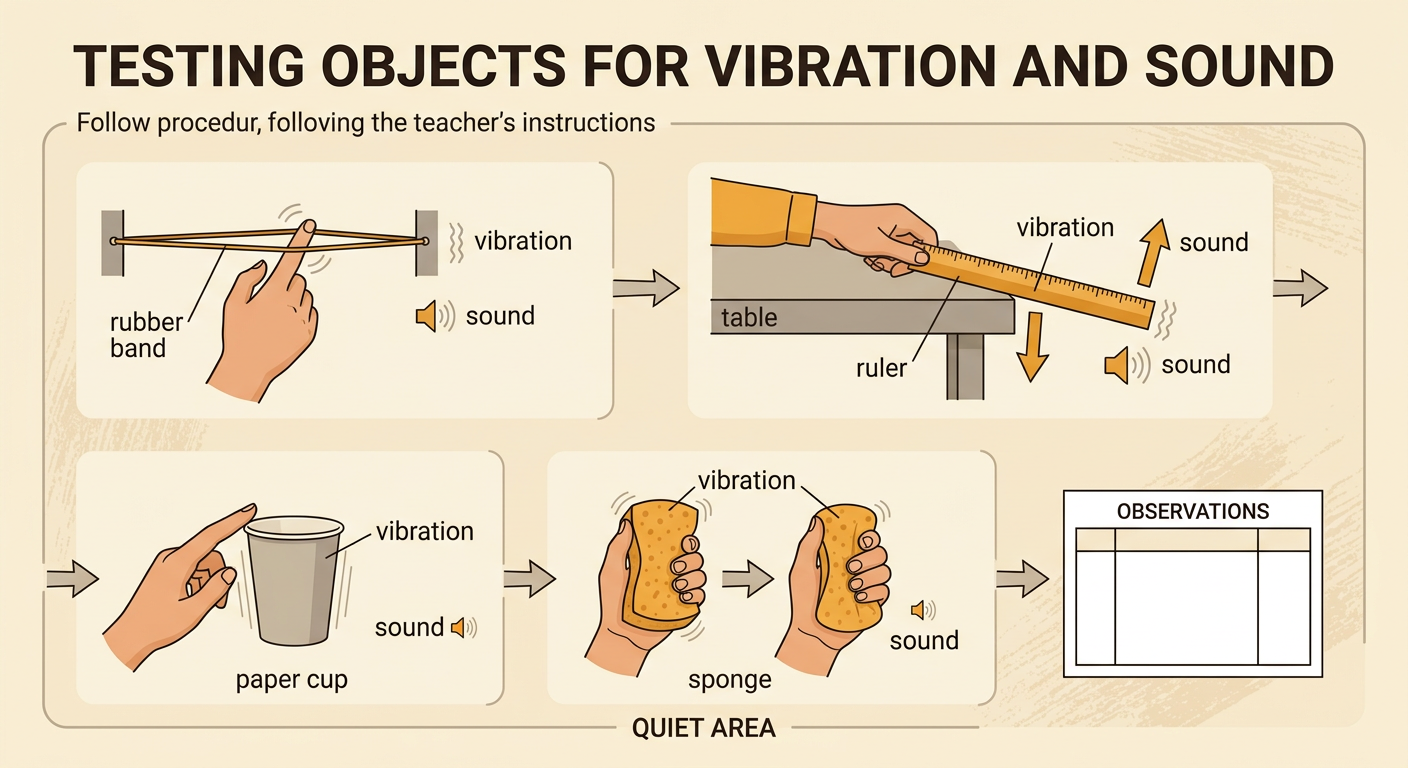
Now follow the plan and test each object. First, pluck the stretched rubber band gently. Watch for back-and-forth motion and listen for sound. Next, place part of a plastic ruler over the edge of a table while an adult or partner holds it steady. Gently push down and release the free end. The ruler may vibrate and make a twanging sound. Tap the side of a paper cup gently and observe it. Then squeeze and release the sponge as planned. Test every object in the same quiet area. After each test, ask two questions: “Did I see vibration?” and “Did I hear sound?” Repeat a test once if you are unsure. Do not decide from your prediction. Use only what you actually see and hear as evidence.
Draw and Record Observations
An observation is something you notice during the test. Record observations right away so they are not forgotten. Use a chart with one row for each object. In the “Vibration observed?” column, mark yes or no. In the “Sound heard?” column, mark yes or no. You can also draw the object and add arrows to show back-and-forth motion. For example, after testing the ruler, you might write, “The end moved up and down quickly. I heard a twang.” Record only what happened, not what you hoped would happen. If you could not tell whether an object vibrated, write “not sure” and test it again. The completed chart is a source of evidence. It helps the class compare objects and look for a pattern between vibration and sound.
Share Evidence and Conclusions
After testing, share what you found with classmates. Begin by stating the investigation question. Then name the evidence from your observation chart. You might say, “The ruler moved back and forth, and I heard a twang. The rubber band also moved back and forth and made sound.” A conclusion answers the question using evidence. One conclusion could be, “Our evidence shows that vibrating materials can make sound.” Explain whether your prediction was supported. It is fine if it was not supported because investigations help us learn. Listen as classmates share their results. If results differ, compare the test steps, repeat a test, or ask another helpful source, such as the teacher. Work together to make a class poster with the question, drawings, observations, and conclusion. This shared project shows how the class answered the question.