
Build a Ball Stopper
Students design and test a simple barrier that uses a push to stop a rolling ball, then explain how well it worked.

Illustrations are auto-generated and may be placeholders. They can be refreshed to match the narration.
Watch a Ball Roll
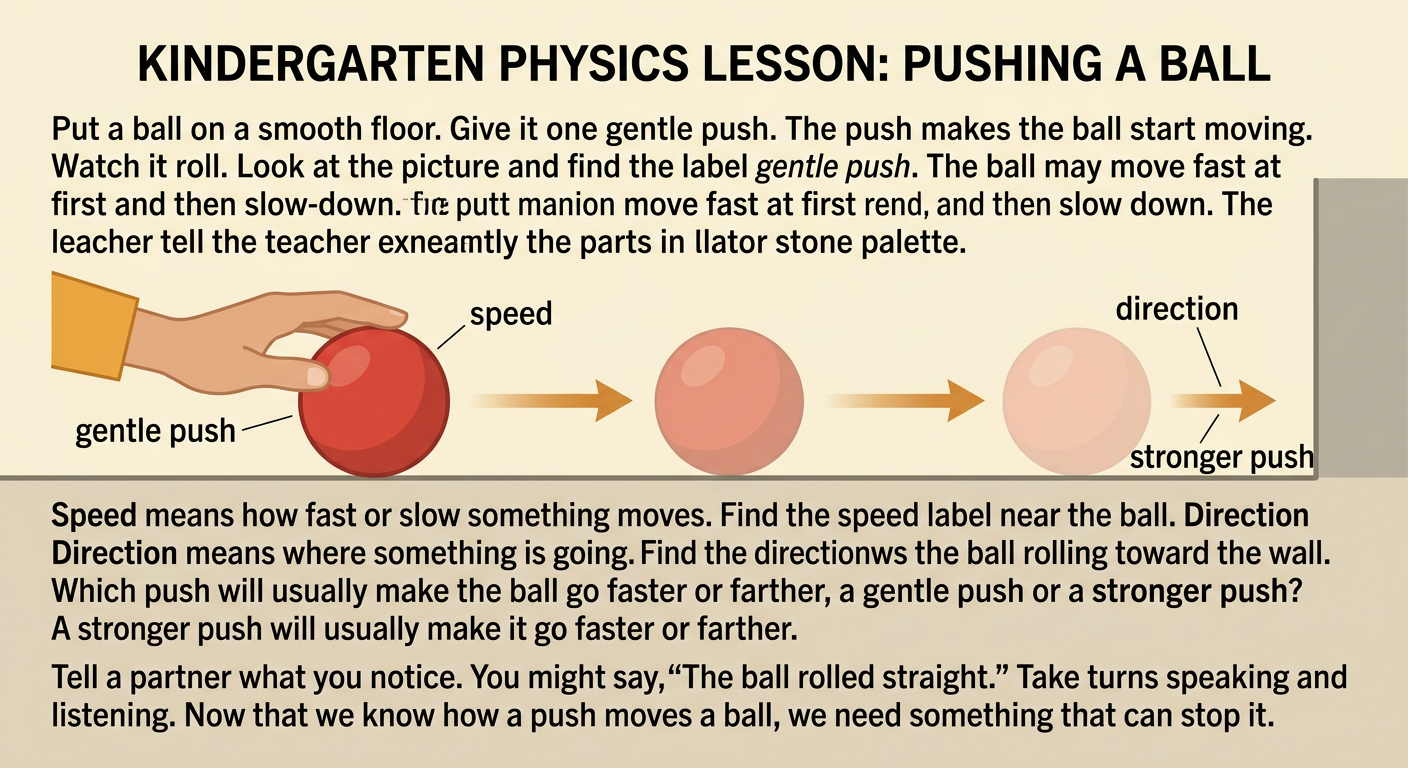
Place a ball on a smooth floor. Give the ball one gentle push and watch what happens. The push makes the ball start moving. The ball rolls forward, but it may slow down as it travels. Look closely at its speed and direction. Speed tells how fast or slow something moves. Direction tells where it is going. For example, a red ball may roll quickly toward a wall and then slow down. Talk with a partner about what you notice. Take turns speaking and listening. You might say, “The ball rolled straight,” or “The ball moved slowly after the push.” You can also compare how far the ball rolls after a gentle push and after a stronger push. A stronger push will usually make the ball move faster or farther.
Introduce the Stopping Challenge
Your challenge is to build a barrier that stops a rolling ball. A barrier is something that blocks the ball’s path. When the ball hits the barrier, the barrier pushes back on the ball and changes its motion. A successful ball stopper keeps the ball from rolling past the marked stop line. It should also stay standing when the ball touches it. For example, two blocks placed close together might stop a small foam ball. Before building, look at the available materials, such as blocks, cardboard, cups, craft sticks, or modeling clay. Describe their measurable attributes. Which pieces are long, short, tall, or wide? Work safely and share ideas with your group. Listen when a classmate explains a possible design, and ask a question if you need more information.

Plan and Build a Barrier
First, make a simple plan with your group. Decide which materials will form the front, sides, and supports of the barrier. Think about length and width. The barrier must be wide enough to cover the ball’s path. It should also be strong enough to stay in place. For example, place a long piece of cardboard across the path and use two blocks behind it as supports. You may use connecting cubes to measure the cardboard. You could say, “The barrier is eight cubes long.” Draw your idea before you build it. Then take turns adding materials. One student can hold the cardboard while another places the supports. Check that the barrier stands by itself and has no sharp edges. Compare the finished barrier with your plan and make small changes if needed.

Test the Ball Stopper
Put the barrier in the marked testing area. Place the ball at the same starting line for every test. Give it a similar gentle push each time so the tests are fair. Watch what happens when the ball reaches the barrier. Did the ball stop? Did it roll past, bounce away, or knock the barrier over? Test the design three times. After each test, record the result with a simple picture, tally mark, or yes-or-no answer. For example, if the barrier stops the ball in two of three tests, record two stops and one pass. Do not stand in front of the rolling ball. Group members can take turns pushing, watching, and recording. Using the same ball, starting place, and kind of push helps you learn whether the barrier works as intended.

Compare Results
Look at the results from every test. Count how many times the barrier stopped the ball and how many times the ball passed it. Then compare your results with another group’s results. Use clear comparison words such as more, fewer, same, longer, shorter, wider, and narrower. For example, one group may have three successful stops, while another group has two. The first design stopped the ball more times. Notice differences between the barriers. Was one barrier wider or longer? Did one have stronger supports? Data from the tests can help you decide which features worked well. Take turns sharing observations, and listen carefully to your classmates. Remember that a design that did not work every time still gives useful information. It shows what the group might change before another test.

Explain What Worked
Use the test results to explain how well your ball stopper worked. Tell what happened in the correct order: first you planned and built, next you tested, and last you studied the results. Include information that supports your idea. For example, you might say, “First, we built a wide cardboard wall with two block supports. Next, we tested it three times. Last, we counted three stops. It worked because the wall covered the path and the supports kept it standing.” If the ball passed the barrier, explain what you would change. You might make the barrier longer, add a support, or use a heavier base. Share your explanation with the class. Speak clearly, listen to questions, and answer using what you observed. Your evidence helps others understand why the design worked or how it could improve.
