
Build It Right: Choosing Materials for a Model Shelter
Students test the strength, flexibility, and transparency of common materials, record results, and use evidence to select the best material for part of a model shelter.
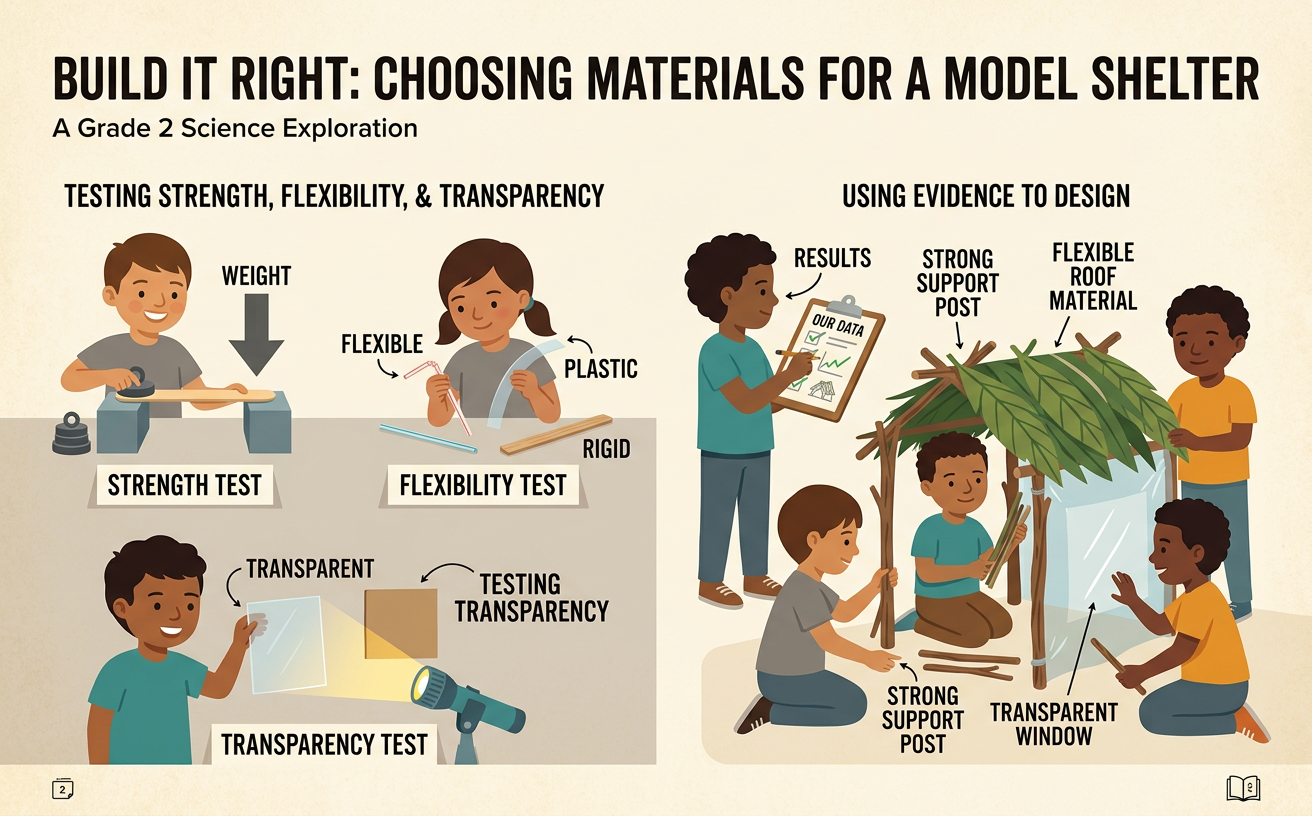
Illustrations are auto-generated and may be placeholders. They can be refreshed to match the narration.
Identify the Shelter Challenge
A shelter protects people or animals from weather such as rain, wind, and bright sunlight. Your challenge is to choose a material for one part of a small model shelter, such as its roof, wall, or window. The shelter must be safe and useful, but your class has only a limited amount of each material. This means your group cannot use everything it wants. You must discuss choices, listen to others, and decide what matters most. For example, a roof should be strong enough to stay up, while a window should let light pass through. Look at the available cardboard, craft sticks, plastic sheets, wax paper, and fabric. Ask, “Which material has the properties needed for this shelter part?” Testing will help you answer with evidence instead of guessing.

Predict Useful Material Properties
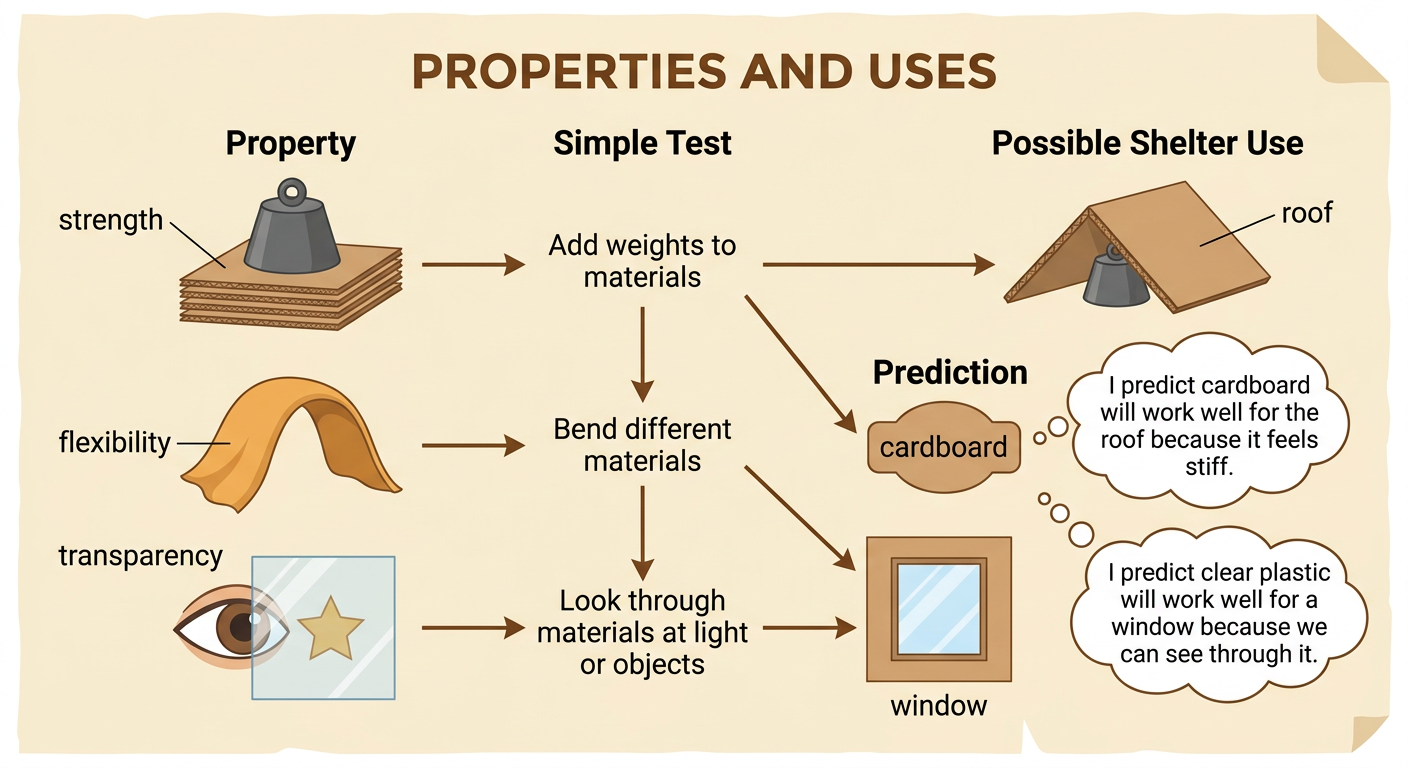
A property is something you can observe or test about a material. Strength tells how well a material holds weight without bending or breaking. Flexibility tells how easily it bends. Transparency tells how much light passes through and whether you can see through it. Think about the shelter part your group will build. Then predict which properties will be useful. For example, you might predict that cardboard will make a good roof because it feels stiff and may hold weight. You might predict that a clear plastic sheet will make a good window because you can see through it. Record each prediction before testing. Use a sentence such as, “I predict the plastic sheet will be best for the window because it is transparent.” Predictions do not have to be correct. They help you compare your first ideas with the evidence you collect.
Test Strength, Flexibility, and Transparency
Test every material in the same way so the comparison is fair. To test strength, place a material across two blocks and add pennies one at a time, up to five. Record how many pennies it holds without falling or folding. To test flexibility, gently bend the same-sized piece around a paper cup. Record “yes” if it bends without tearing or cracking and “no” if it does not. To test transparency, hold the material in front of a large printed star. Record “clear” if you see the star clearly, “some” if you see only part of it, or “none” if you cannot see it. One student can test, one can observe, and one can record. Take turns and discuss what you notice. For example, cardboard may hold five pennies but block the star, while clear plastic may show the star and hold fewer pennies.

Graph the Test Results
A graph makes test results easy to compare. Begin with the strength data. Write the material names along the bottom of a bar graph and the numbers 0 through 5 along the side. Draw one box for each penny a material held. For example, if cardboard held five pennies, clear plastic held three, and wax paper held one, their bars should reach 5, 3, and 1. Give the graph a title such as “Pennies Held by Each Material.” You can also make picture graphs for flexibility and transparency. Include a key, such as one bend symbol meaning the material bent without damage. Look across the graph and ask questions together. Which bar is tallest? Which material held two more pennies than another? Remember that the tallest bar shows the strongest material in this test, but strength may not be the most important property for every shelter part.

Choose a Material Using Evidence
Use the test results to choose the material that best fits one shelter part. First, name the part and the property it needs most. Next, point to data from your table or graph. Finally, explain your choice to your group. For example, you might say, “We chose cardboard for the roof because it held five pennies, more than the other tested materials.” For a window, you might choose clear plastic because the printed star was easy to see through it. Your class may have only one sheet of clear plastic or a small number of craft sticks. Groups must share, reuse scraps, or select another material. These limited resources require choices. Listen to each idea and ask whether the evidence supports it. A strong explanation names the material, the shelter part, the useful property, and the test result. Build the model, then check whether your evidence led to a useful choice.
