Chemical Energy in a Battery: Lighting an LED
Students build a simple closed circuit to observe how a battery changes stored chemical energy into electrical energy and evaluate the benefits of rechargeable and disposable batteries.
Illustrations are auto-generated and may be placeholders. They can be refreshed to match the narration.
Energy Stored in Batteries
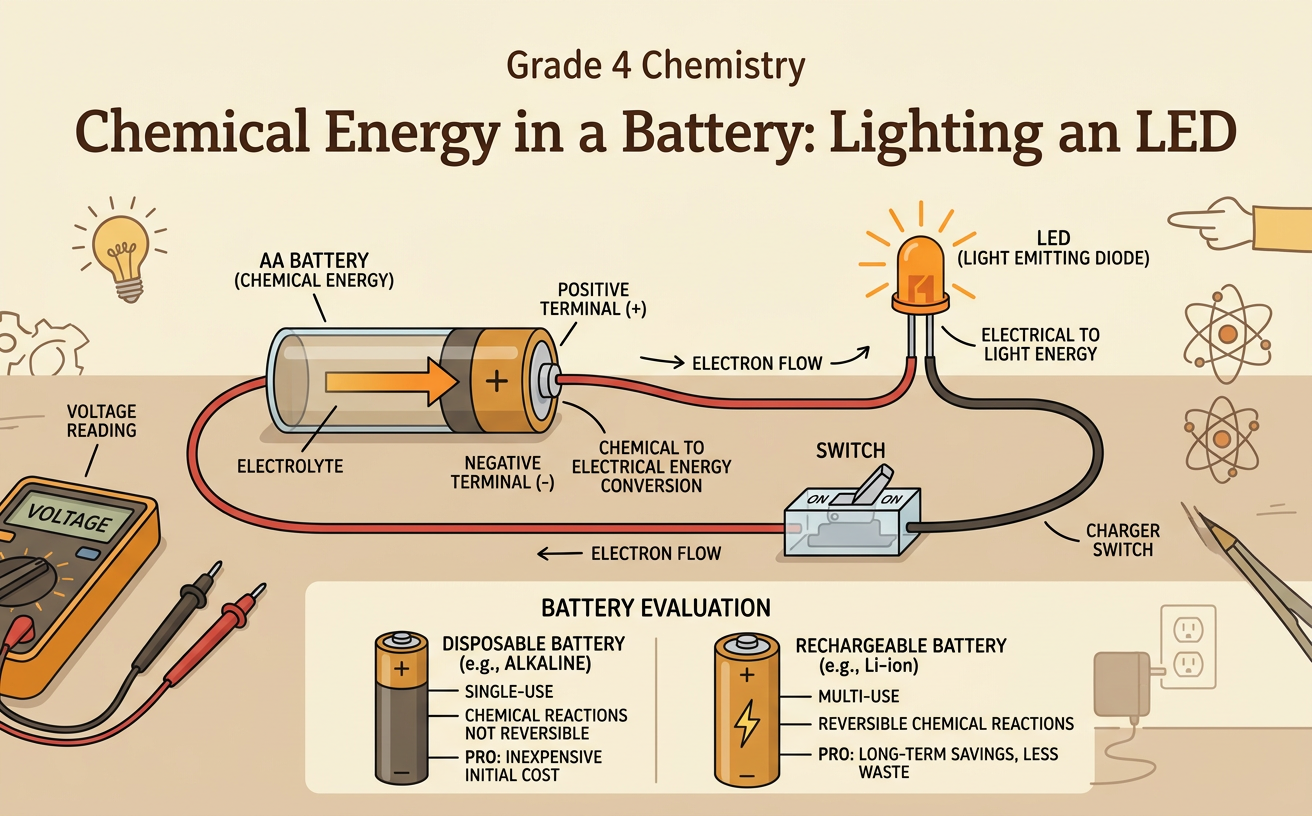
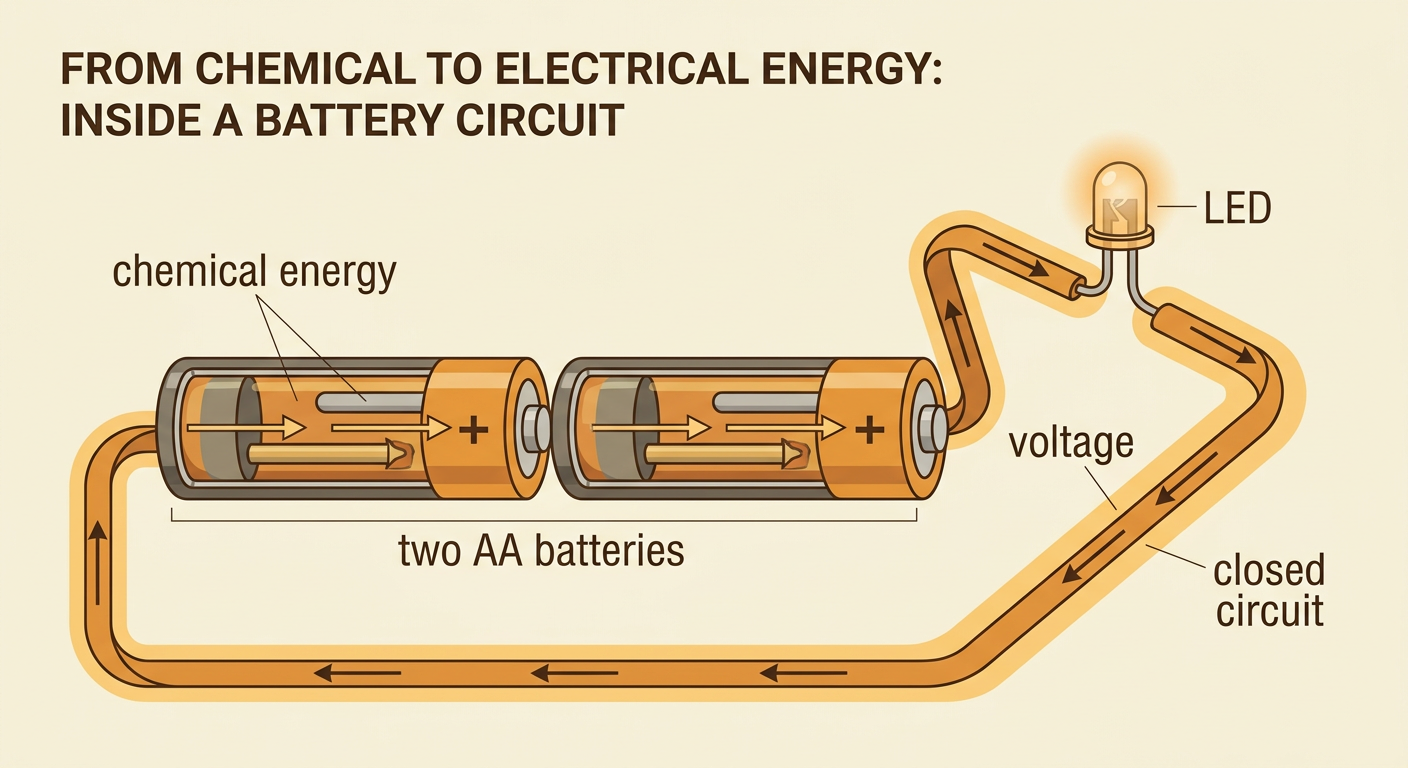
A battery stores chemical energy in materials inside its case. When the battery is connected in a closed circuit, chemical reactions help separate electric charges and create a push called voltage. This allows electric current to move through the circuit. The battery is not a container filled with electricity. Instead, it changes chemical energy into electrical energy while the circuit is operating. For example, two AA batteries in a battery holder can provide enough energy to light a small LED. As the chemical materials are used, a disposable battery eventually can no longer maintain enough voltage. Never cut open, heat, or crush a battery because the chemicals inside may be harmful. Also, connect only classroom batteries, not wall outlets, during this investigation.
Parts of a Simple Circuit
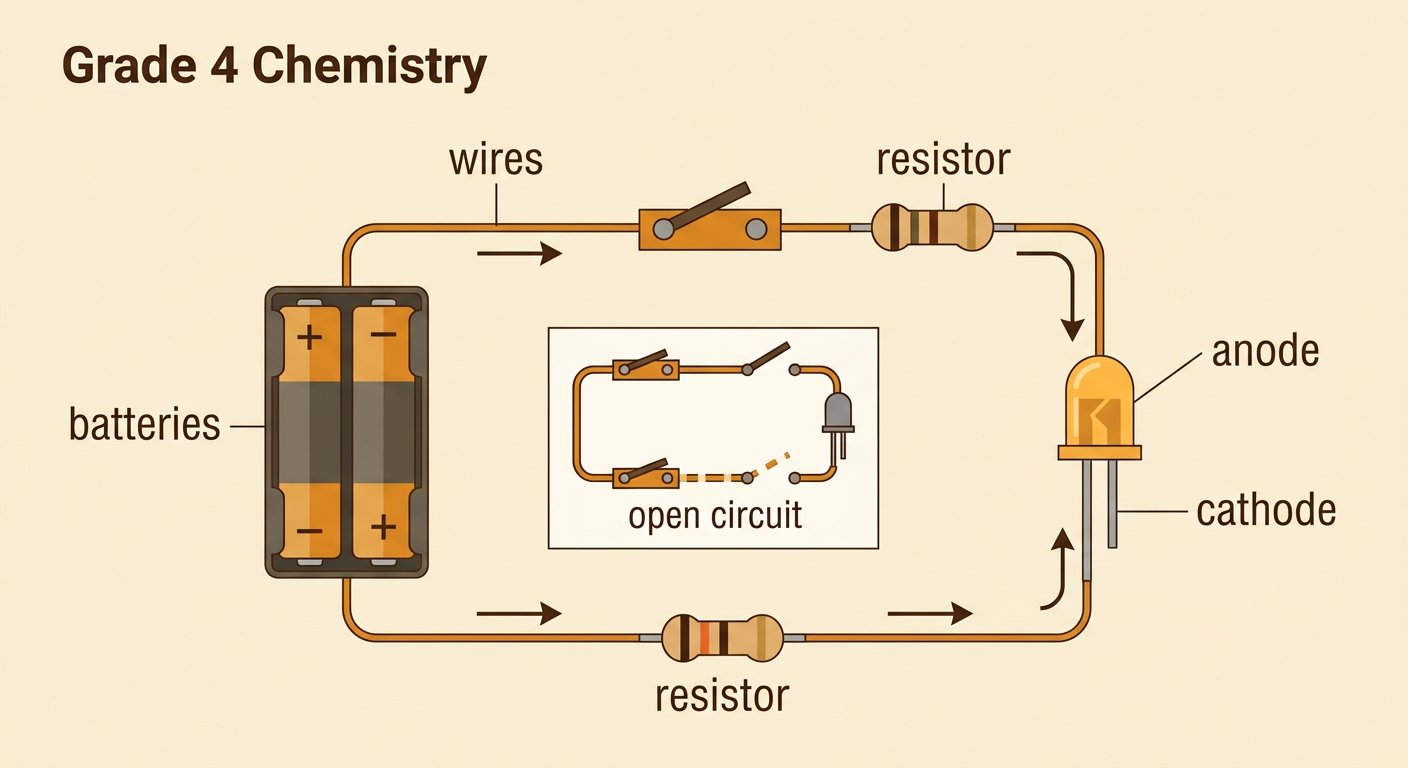
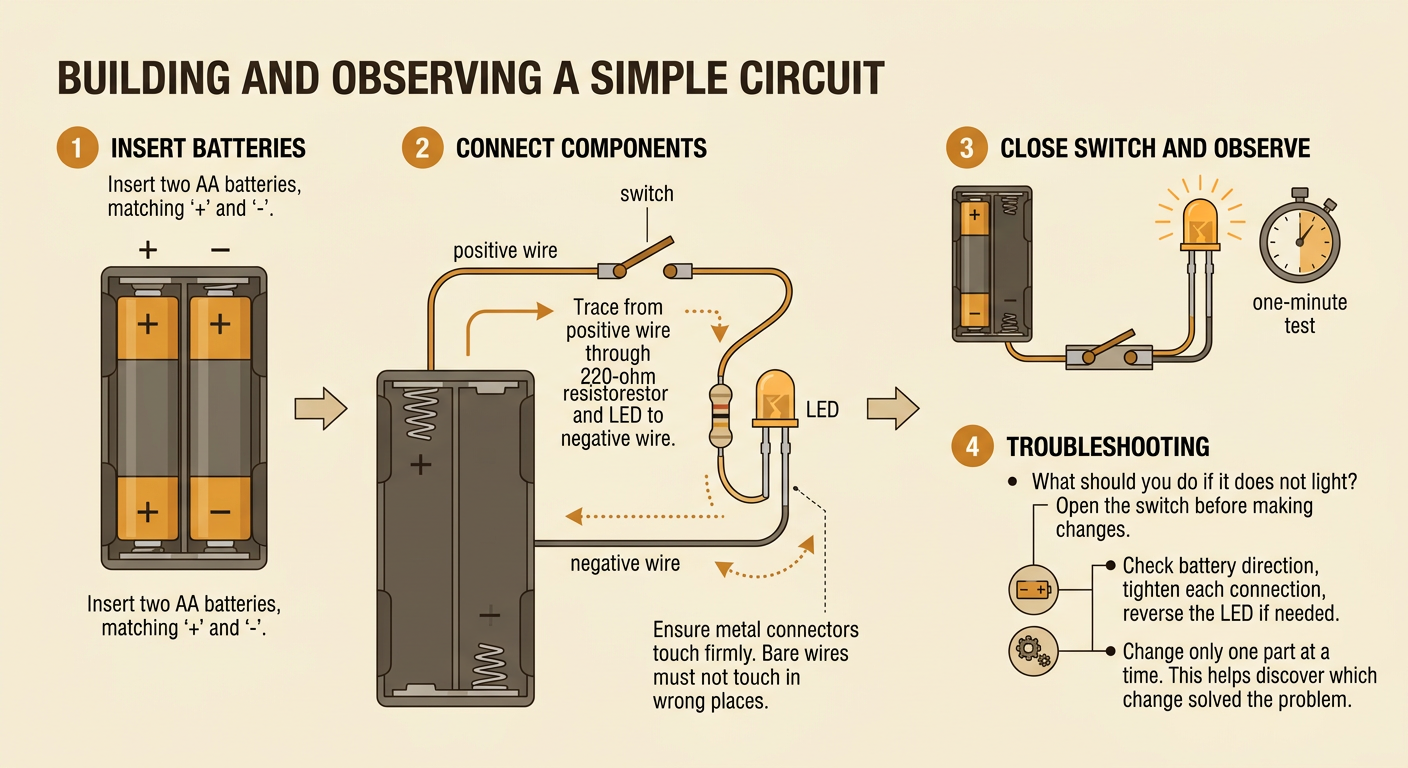
A simple circuit needs an energy source, a conducting path, and a device that uses energy. In this lesson, the batteries are the energy source, wires form the path, and the LED is the device. A resistor limits the current so that too much current does not damage the LED. An LED has two legs and must face the correct direction. Its longer leg, called the anode, connects toward the battery’s positive terminal. Its shorter leg, called the cathode, connects toward the negative terminal. When every part is connected from one battery terminal to the other, the path is closed and the LED can light. A loose wire creates an open circuit. For example, opening a switch breaks the path, so the LED turns off even though the battery still contains chemical energy.
Build and Light the LED
Place two AA batteries in the holder by matching the positive and negative marks. Keep the switch open while building. Connect the holder’s positive wire to one end of a 220-ohm resistor. Connect the resistor’s other end to the LED’s longer leg. Then connect the LED’s shorter leg to the holder’s negative wire. Check that metal connectors touch firmly and that bare wires do not touch each other in the wrong places. Close the switch and observe the LED. Record whether it lights and measure how long it stays on during a one-minute test. If it does not light, open the switch before changing anything. Check the battery direction, tighten each connection, and turn the LED around if its legs were reversed. Change only one part at a time so you can identify which revision solves the problem.
Trace the Energy Changes
The working circuit converts energy from one form to another. Chemical energy in the battery becomes electrical energy when chemical reactions create a voltage and the closed circuit carries current. Electrical energy is transferred through the wires to the LED. Inside the LED, some of that energy changes into light energy. Some also becomes thermal energy, which warms the LED, resistor, wires, and battery slightly. Energy is not created by the LED; it is transferred and changed. Trace the process as a chain: chemical energy, electrical energy, light energy and thermal energy. For example, when the switch is open, the battery still stores chemical energy, but the broken path prevents current from flowing through the LED. Closing the switch completes the path, and the energy changes can be observed as light.

Rechargeable or Disposable?
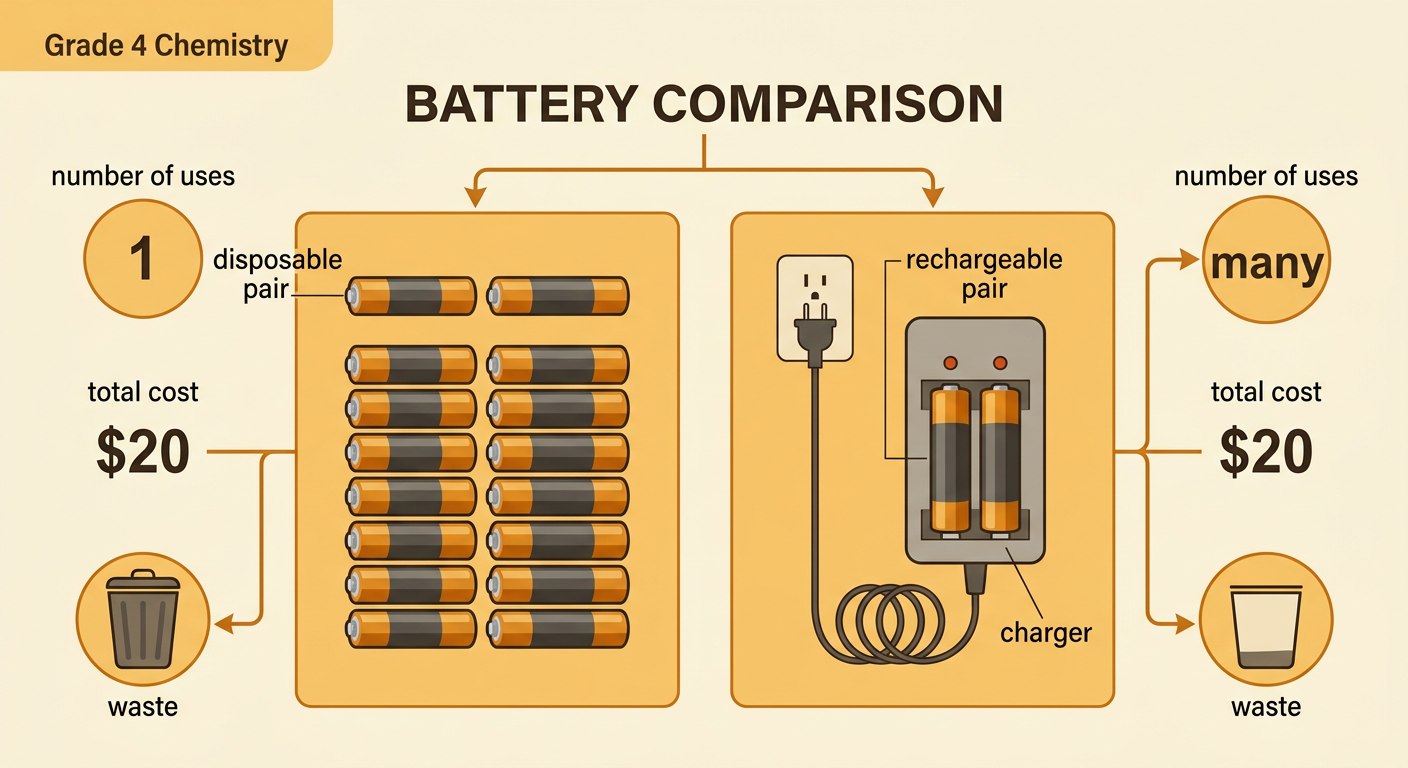
Disposable batteries are used until their chemical reactions can no longer provide enough voltage, and then they must be recycled or discarded according to local rules. Rechargeable batteries use an outside electrical source and a charger to reverse some chemical changes, allowing the batteries to be used many times. Rechargeable batteries and a charger usually cost more at first, but repeated use can lower the cost per use and reduce waste. Suppose a device needs two batteries. If a disposable pair costs $2 and is replaced 10 times, the total is $20. If a rechargeable pair and charger cost $20, the starting cost is equal after those 10 replacements, and later uses may save money. However, disposable batteries can be useful when charging is unavailable. Compare purchase cost, number of uses, operating time, convenience, and waste before choosing.
Explain the Evidence
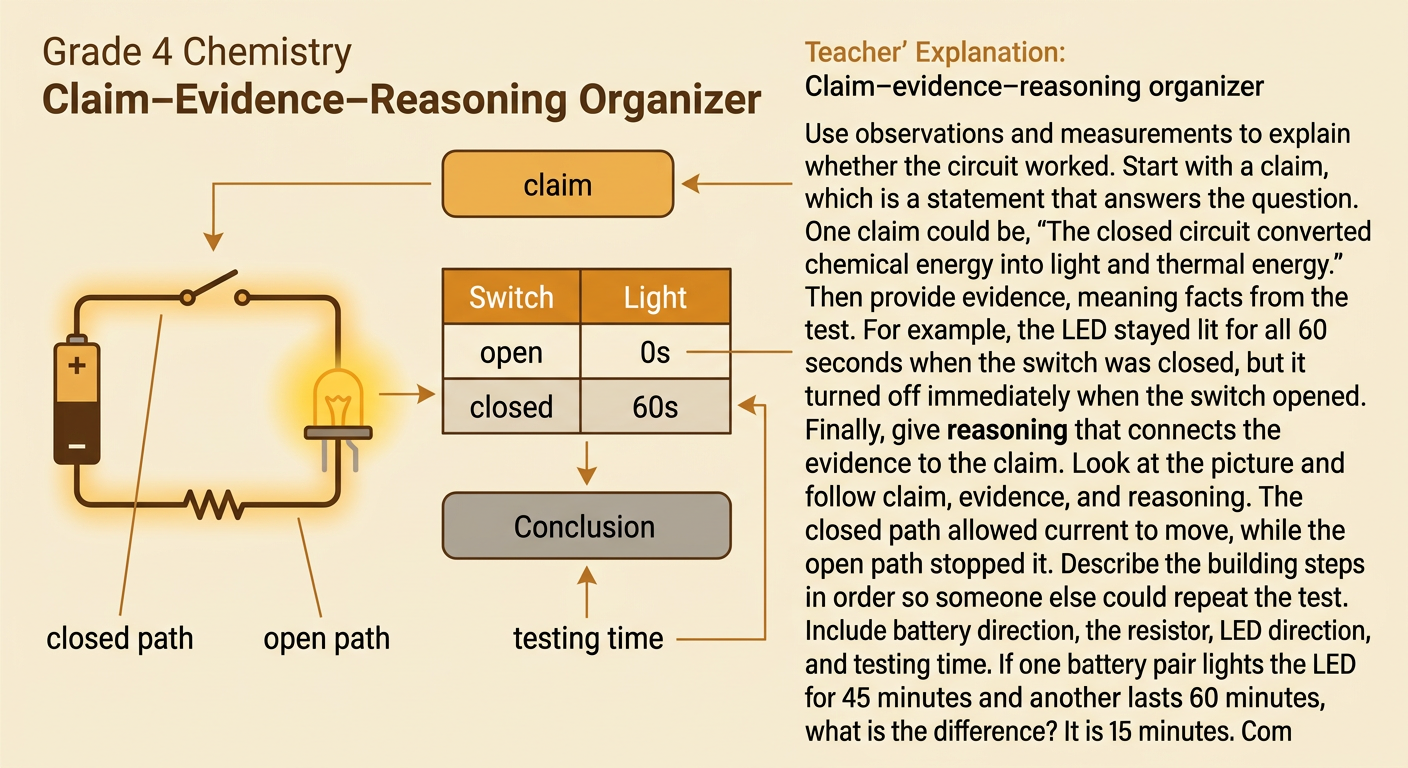
Use observations and measurements to explain whether the circuit design worked. Begin with a claim, such as, “The closed circuit converted chemical energy into light and thermal energy.” Next, give evidence from the test. You might report that the LED stayed lit for all 60 seconds when the switch was closed but turned off immediately when the switch was opened. Then explain the reasoning: the closed path allowed current, while the open path stopped it. Describe the procedure in order so another student could repeat it, including the battery direction, resistor, LED direction, and testing time. If you tested more than one battery type, compare equal time periods. For example, if one pair lit the LED for 45 minutes and another for 60 minutes, the difference is 15 minutes. Finish by stating which design or battery choice best meets your goals and why.