Choosing Materials for Everyday Objects
Students observe, describe, and measure properties of common materials to decide which materials are best suited for making everyday objects.

Illustrations are auto-generated and may be placeholders. They can be refreshed to match the narration.
Everyday Objects and Their Materials
Everyday objects are made from materials. A spoon may be made of metal, wood, or plastic. Each material has properties, or features we can observe. Metal can be hard and shiny. Wood can be stiff and rough. Some plastic is smooth and light. Makers think about these properties when they produce goods for people to use. They use skills and knowledge to cut, shape, join, and test materials. For example, a maker may choose metal for a cooking spoon because metal is strong and does not bend easily. The maker may add a wooden handle because wood does not heat up as quickly as metal. Knowing what an object must do helps a maker choose suitable materials.

Observe Material Properties
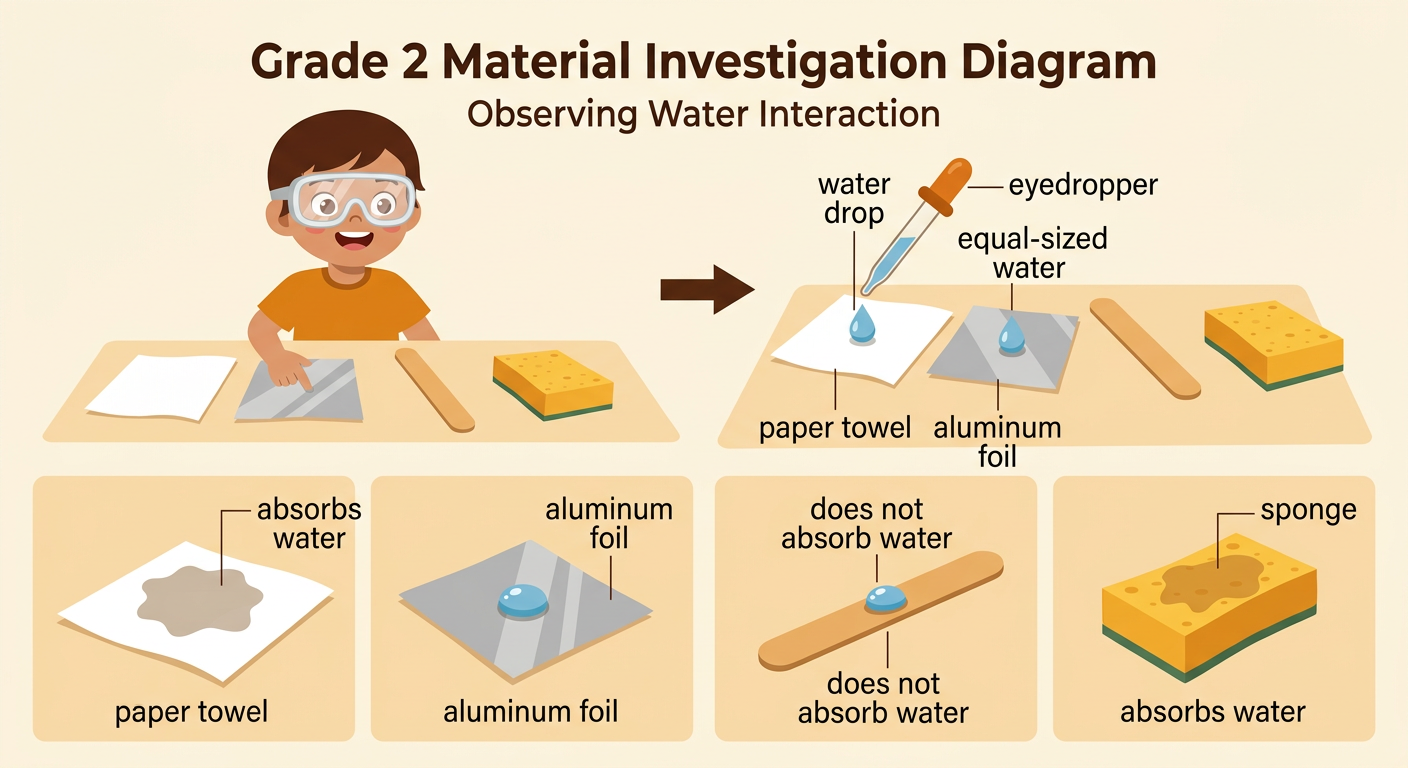
Scientists learn about materials by observing them carefully. You can use your eyes and hands, but you should never taste an unknown material. Look for color, shape, and shine. Gently touch a safe sample to decide whether it is smooth or rough, hard or soft, stiff or flexible. You can also test whether it absorbs water. Place one drop of water on each sample and watch what happens. For example, a paper towel absorbs the drop, while aluminum foil does not. Record only what you observe, not what you guess. You might write, “The foil is smooth, shiny, flexible, and does not absorb water.” Observations help you sort materials into groups with shared properties.
Measure and Compare Samples
Measurements give exact information that helps us compare materials. To measure length, choose a ruler marked in inches or centimeters. Place one end of the sample at the ruler’s zero mark. Keep the sample straight, and read the number at its other end. Always include the unit in your record. Suppose a cardboard strip is 12 centimeters long and a plastic strip is 9 centimeters long. The cardboard strip is 3 centimeters longer because 12 minus 9 equals 3. A fair comparison uses samples with the same shape when possible. You can make a table with each material’s name, length, texture, and flexibility. Measurements and observations work together to give strong evidence about how materials are alike and different.

Choose the Best Material
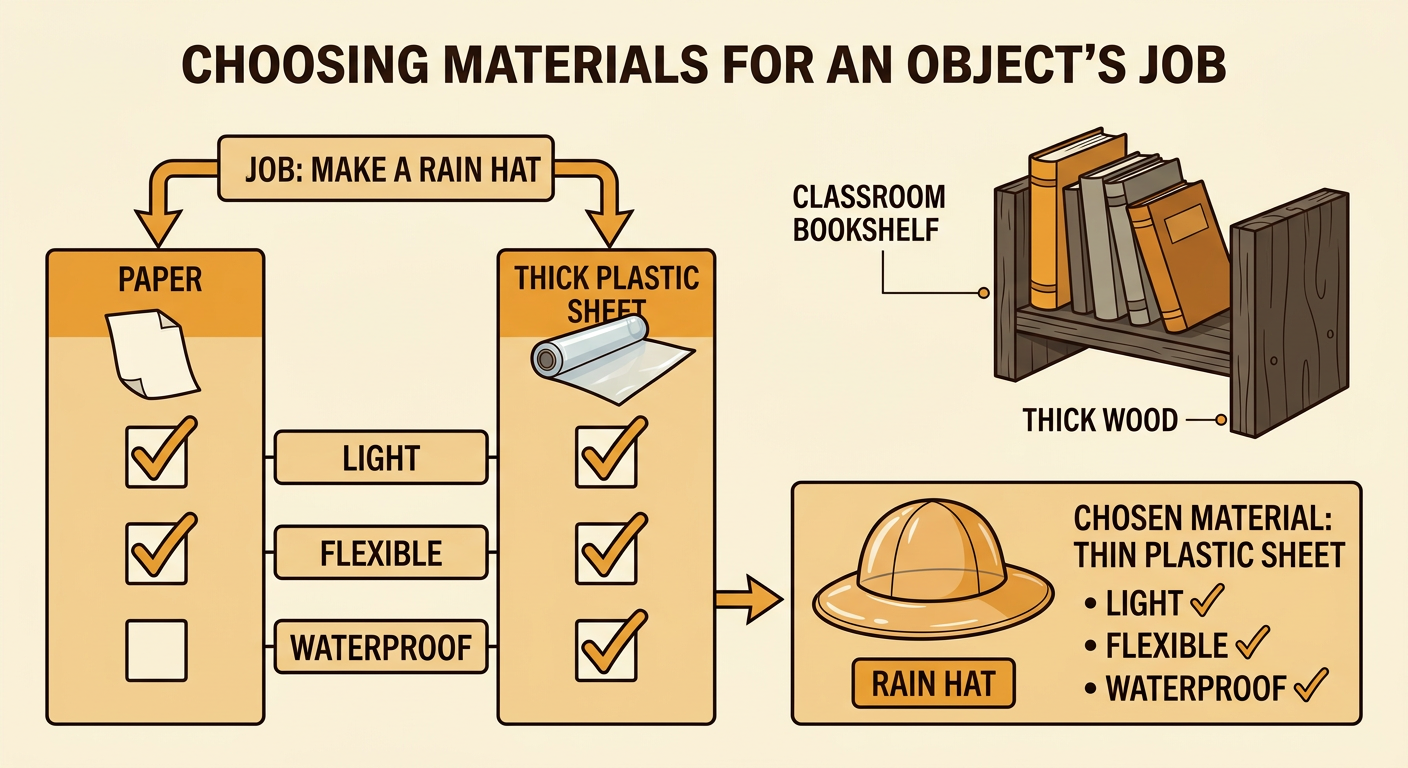
The best material depends on what an object needs to do. First, name the object’s job. Next, list the properties it needs. Then compare the evidence from your tests. Imagine that you are choosing a material for a rain hat. The hat should be light, flexible, and waterproof. Paper is light and flexible, but it absorbs water and becomes weak. A thin plastic sheet is light, flexible, and does not absorb water. Based on those properties, plastic is the better choice for this job. Another object may need a different material. A classroom bookshelf must be strong and stiff, so thick wood may work better than thin plastic. People who design and produce goods use knowledge of materials to make useful choices.
Explain and Share Evidence
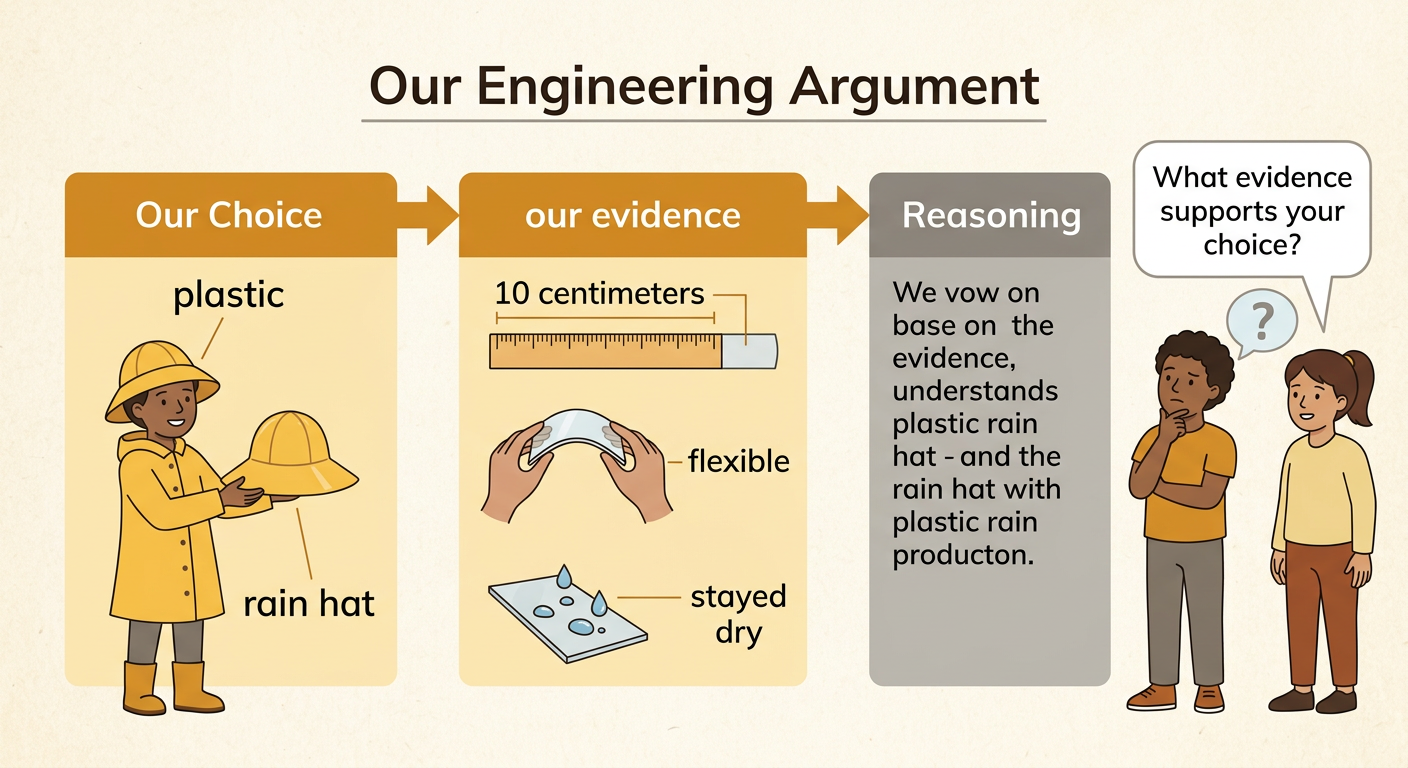
After an investigation, explain your choice with evidence. Begin by naming the material you chose. Then tell which properties make it suitable for the object. Include observations and measurements from your table. You might say, “I chose plastic for the rain hat because it was flexible and did not absorb water. Our plastic sample was 10 centimeters long and stayed dry during the water test.” This statement connects the test results to the choice. You can share your explanation by speaking, writing, or drawing a labeled model. Listen to classmates and ask questions such as, “What evidence supports your choice?” If new evidence shows that another material works better, it is reasonable to change your choice. Scientists, designers, and makers improve ideas by testing and sharing evidence.