
Compose New Shapes
Students combine two-dimensional shapes to create larger shapes and explain which smaller shapes they used.
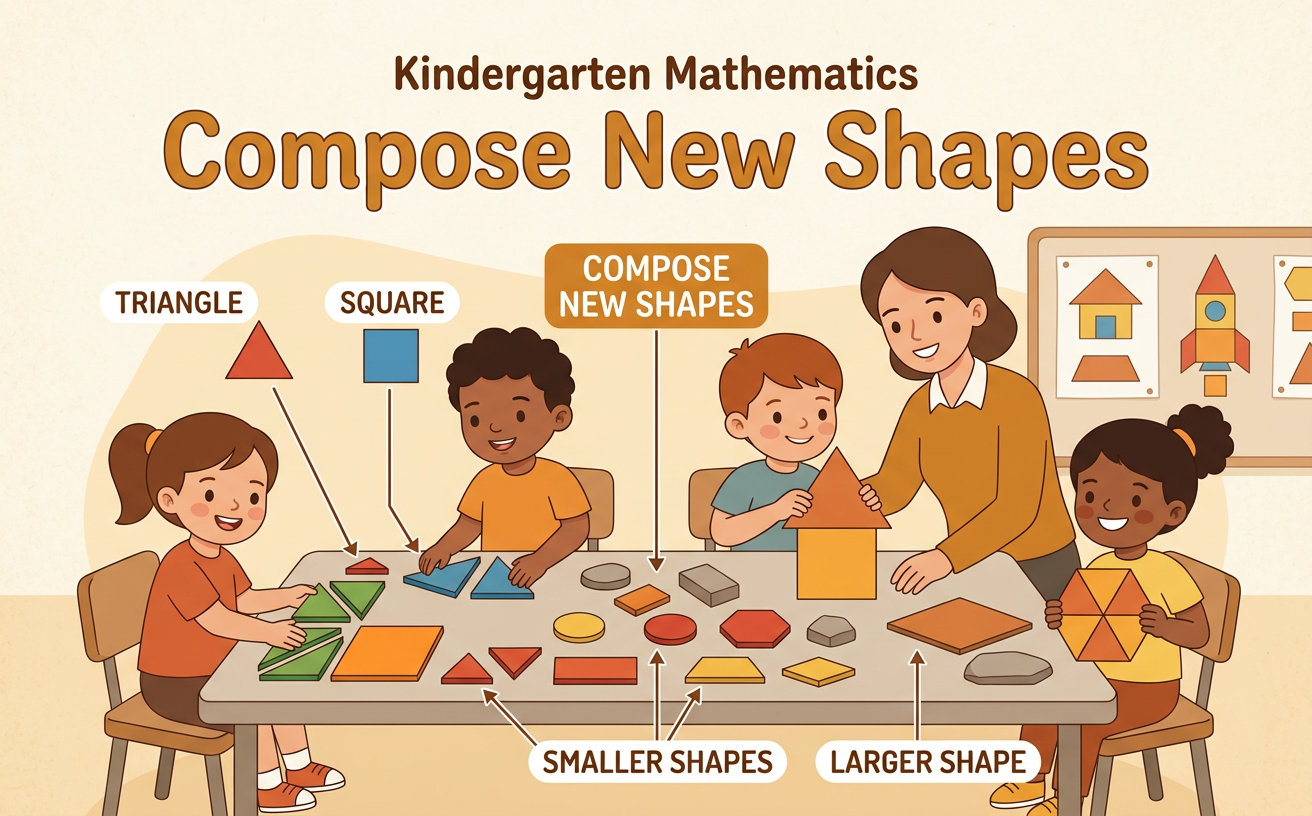
Illustrations are auto-generated and may be placeholders. They can be refreshed to match the narration.
Review Familiar Shapes
Look at some familiar flat shapes. A circle is round and has no straight sides. A triangle has 3 straight sides and 3 corners. A square has 4 equal sides and 4 corners. A rectangle also has 4 sides and 4 corners, but two sides can be longer than the other two. We can turn or slide a shape, and it is still the same shape. For example, a square may look like a diamond when it is turned, but it still has 4 equal sides. Point to each shape and trace its sides with your finger. Then count its corners. Knowing the parts of small shapes will help us fit them together to make larger shapes.

Model Combining Shapes
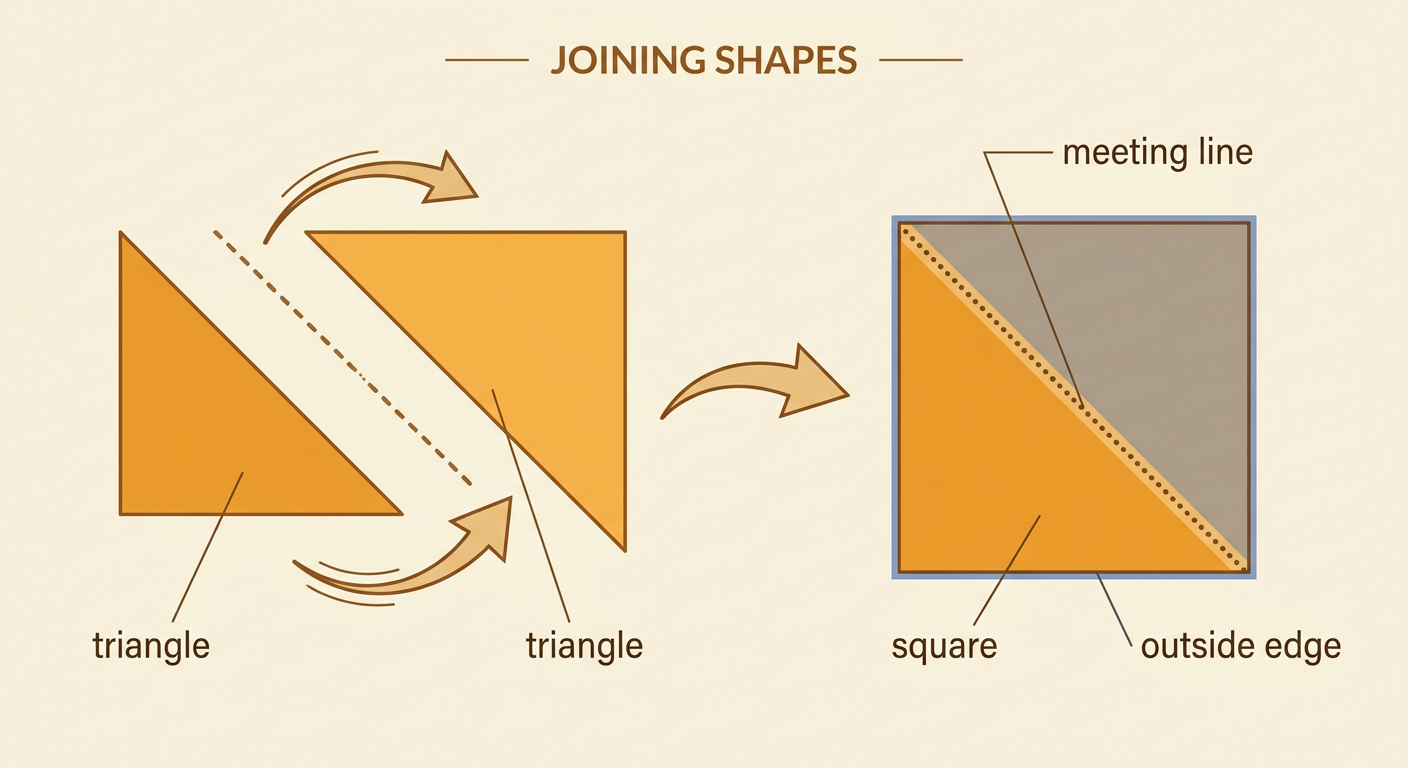
Small shapes can be joined to make a larger shape. Watch what happens with two matching triangles. Place the triangles so that one equal side of each triangle touches completely. Do not leave a gap, and do not let the shapes overlap. Together, the two triangles make one square. The line inside the square shows where the triangles meet. We can say, “I used 2 triangles to make 1 square.” Turning a triangle does not change what it is. Turning helps its side line up with the side of the other triangle. Check the outside edge of the new shape. It has 4 equal sides and 4 corners, so the larger shape is a square.
Build a Larger Shape
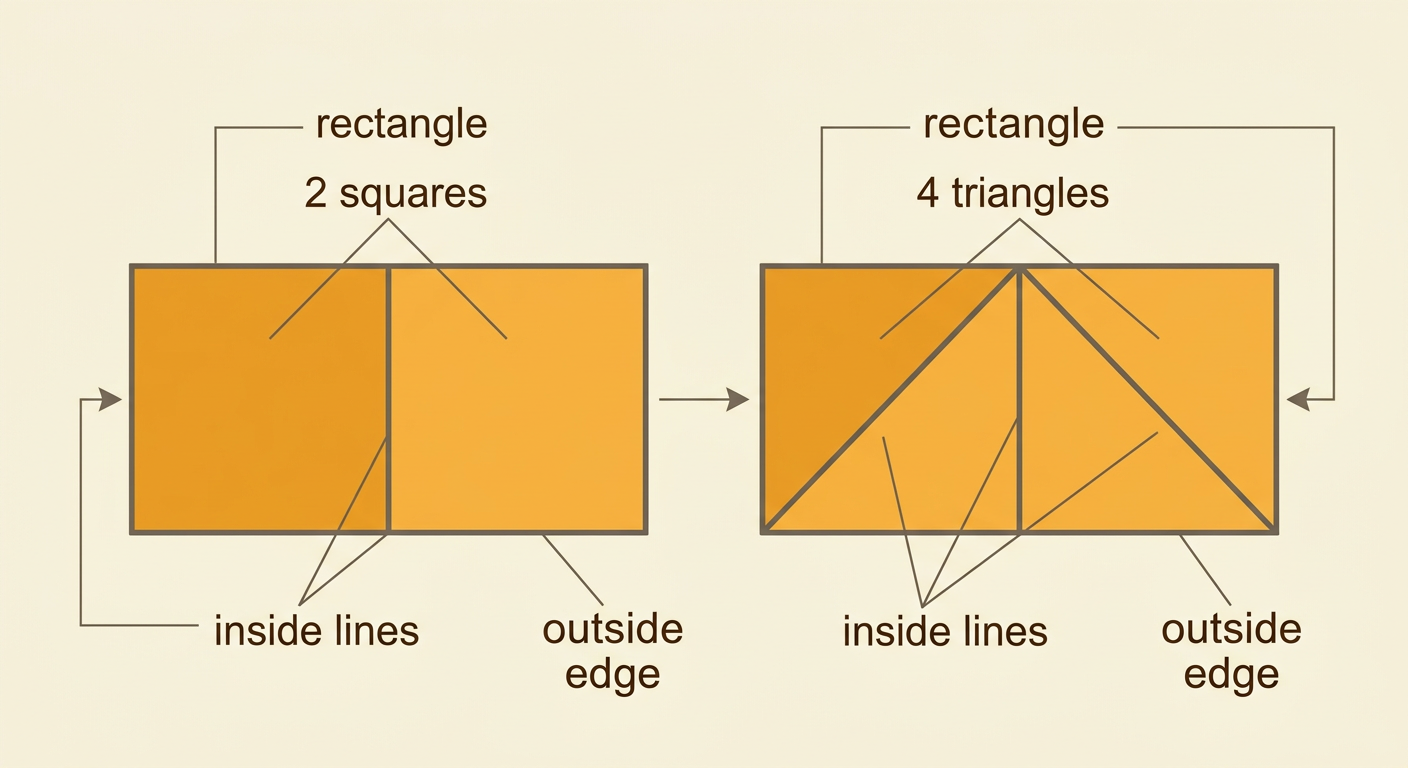
Now use two squares to build a larger shape. Put one square beside the other square. Make sure one whole side of the first square touches one whole side of the second square. The squares should not overlap, and there should be no space between them. Look at the outside edge of your creation. It has 4 corners and 4 sides. Two sides are long, and two sides are short. You made a rectangle. Say, “I used 2 squares to make 1 rectangle.” Try sliding the squares together from different directions. If you place one square above the other, they still make a rectangle. Count the small shapes first, and then name the larger shape they form.

Try Different Combinations
A larger shape can sometimes be made in more than one way. First, place 2 equal squares side by side to make a rectangle. Next, use 4 matching triangles. Join each pair of triangles to make a square. Then place the 2 new squares side by side. The 4 triangles make a rectangle that is the same size and shape as the rectangle made with 2 squares. Compare the two creations. Both have the same outside edge, but the lines inside are different. One rectangle has 2 small parts. The other has 4 small parts. Try turning and moving the pieces until all sides fit. Remember to avoid gaps and overlaps. Explain how many pieces you used for each rectangle.
Share and Describe Creations
Show your creation to a partner and tell how you made it. Name each small shape, tell how many you used, and name the larger picture or shape. For example, place 1 triangle above 1 square so the bottom side of the triangle touches the top side of the square. The two shapes make a picture that looks like a house. You can say, “I used 1 square and 1 triangle to make a house.” Point to each part as you speak. Your partner can check that the shapes touch without overlapping. Then listen while your partner explains a creation. Ask, “Which shapes did you use?” or “How did you fit them together?” Clear shape words help everyone understand your mathematical thinking.
