Contamination Control: Protecting People, Samples, and Workspaces
Students examine how personal protective equipment, clean-to-dirty workflows, and organized lab stations prevent cross-contamination and improve the reliability of scientific investigations.

Illustrations are auto-generated and may be placeholders. They can be refreshed to match the narration.
How Contamination Affects Evidence
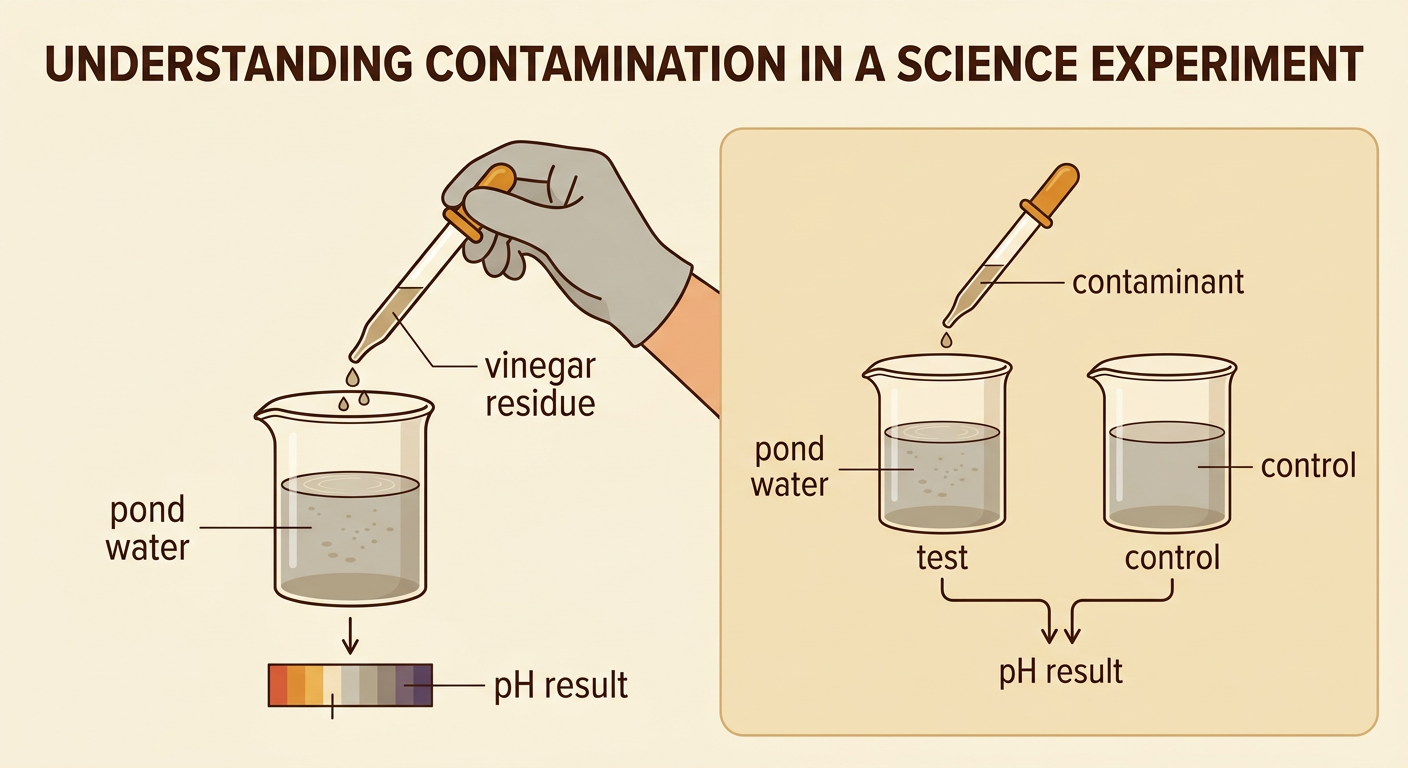
Contamination occurs when unwanted material enters a sample, tool, surface, or investigation. It can change measurements and make evidence less reliable. Contamination may come from skin cells, food, dust, chemicals, microorganisms, or residue left from an earlier experiment. For example, suppose students test pond water for acidity. If a dropper previously held vinegar and was not cleaned, vinegar residue could lower the sample’s pH. The class might incorrectly conclude that the pond is unusually acidic. Scientists reduce this risk by identifying possible contamination sources, following the same procedure for every sample, and including a control when appropriate. Careful records also help investigators determine whether an unexpected result came from the sample or from an error in handling. Reliable evidence depends on keeping samples unchanged except for the variable being tested.
PPE as a Protective Barrier
Personal protective equipment, or PPE, creates barriers between hazards and a person’s skin, eyes, clothing, and respiratory system. Common school laboratory PPE includes splash goggles, gloves, a lab apron or coat, and closed-toe shoes. The correct equipment depends on the task and its hazards. During an investigation using a dilute acid, for example, goggles protect the eyes from splashes, gloves reduce direct skin contact, and an apron protects clothing and skin. PPE also protects samples by limiting the transfer of hair, skin oils, and microorganisms. However, PPE does not replace careful behavior. Students must inspect equipment, tie back long hair, follow directions, and report damaged PPE. Gloves should never touch phones, door handles, or the face during sample work because contamination can travel from the gloves to those surfaces.

Clean-to-Dirty Workflows
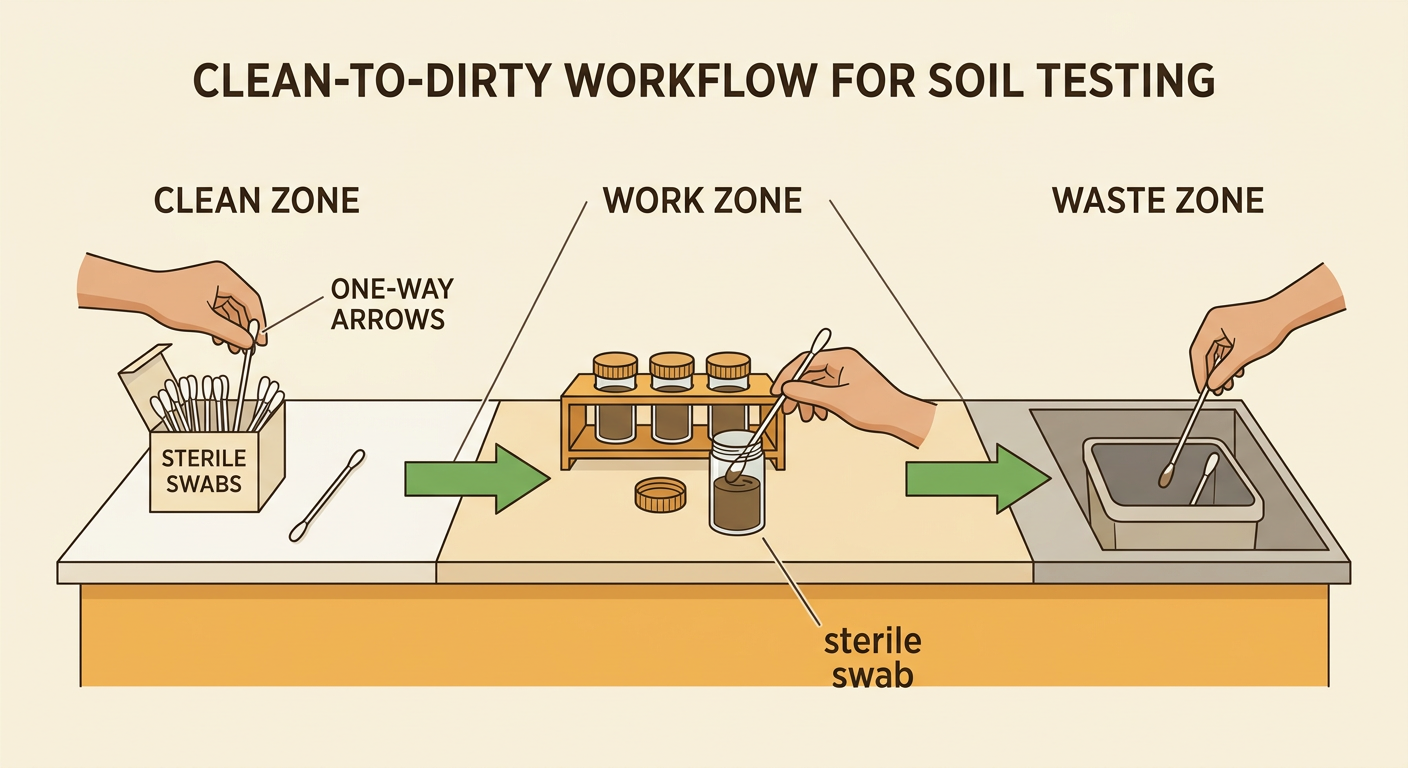
A clean-to-dirty workflow means handling the least contaminated materials first and moving toward materials that may contain more contaminants. This order limits the chance that unwanted material will be carried backward into clean supplies or untreated samples. A station should have clearly separated zones for clean tools, active work, and used materials. For example, when testing three soil samples for microorganisms, a student first collects a sterile swab from the clean zone, opens one sample in the work zone, and then places the used swab in the waste zone. The student changes gloves or cleans hands as directed before beginning the next sample. Movement should follow one direction rather than crossing back and forth. Written steps, arrows, and labeled containers make the sequence easier to follow precisely and allow team members to share responsibility for safe work.
Preventing Cross-Contamination
Cross-contamination is the transfer of material from one person, sample, object, or location to another. It can happen through hands, reusable tools, splashes, shared containers, or surfaces. To prevent it, students should use a new disposable tool for each sample or clean reusable tools according to the written procedure. Samples must remain covered when they are not being handled, and every container should be labeled before use. Imagine comparing bacterial growth from a desk and a water fountain. If the same swab touches both surfaces, the samples become mixed and the comparison is invalid. Separate swabs and labeled tubes preserve the identity of each sample. Team members should also communicate before passing tools or moving containers. Sharing responsibility, politely reminding others of procedures, and reporting spills immediately are civic behaviors that help protect the entire laboratory community.

Evaluating Lab Station Designs
A good lab station design should meet clear criteria while staying within constraints. Criteria are qualities the design should achieve, such as preventing cross-contamination, keeping PPE available, supporting one-way movement, and making waste disposal easy. Constraints are limits, such as bench size, available supplies, time, and cost. Students can compare competing designs with a scoring table. For example, a team might rate two station layouts from 1 to 4 for safety, workflow, organization, and use of space. Each design should be judged with the same categories and scale. Evidence, not personal preference, should support the final choice. A layout with a nearby waste container and clearly separated clean and dirty zones may score higher even if it has less open space. Team members should discuss scores respectfully, listen to different viewpoints, and agree on improvements that increase safety for everyone.

Resetting the Workspace
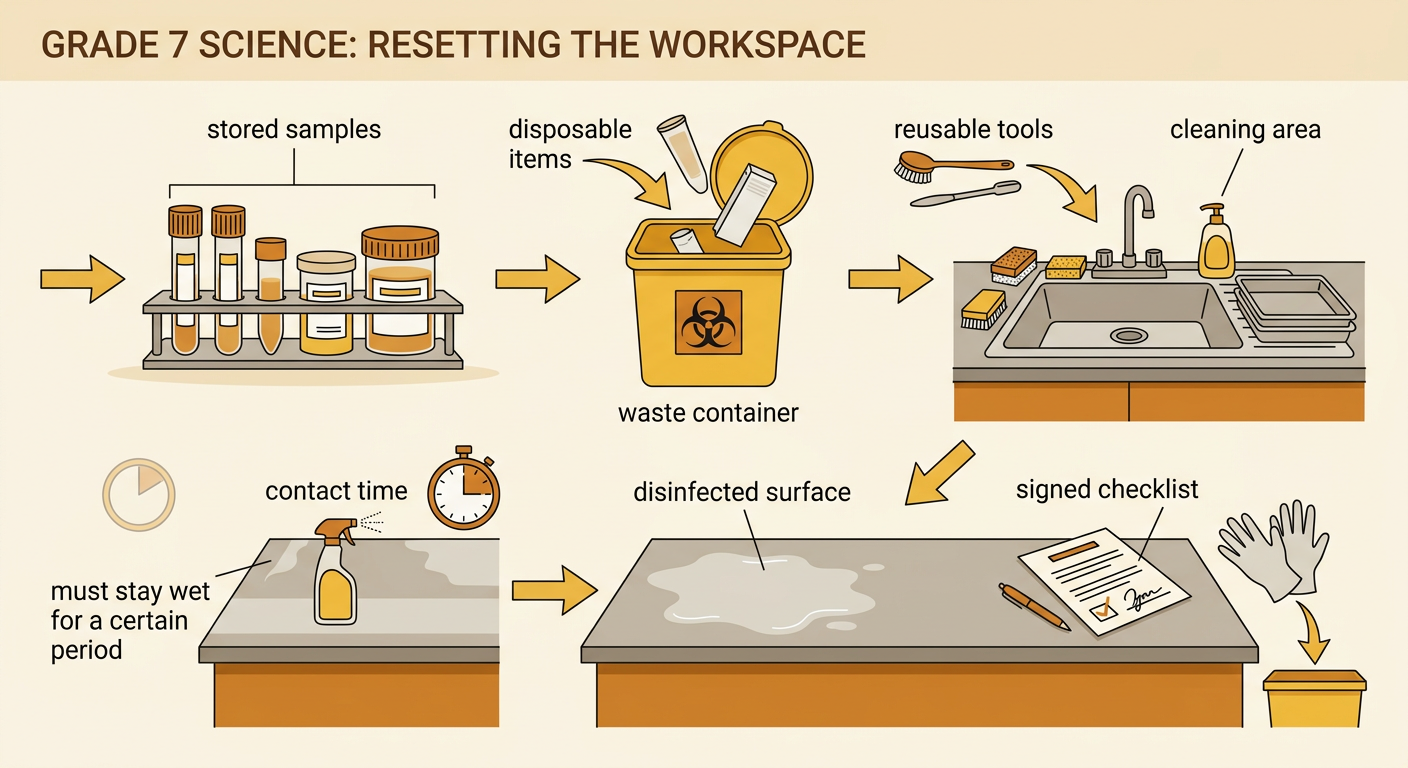
Resetting the workspace prepares the laboratory for the next group and prevents contamination from spreading. Students should follow the teacher’s procedure in the stated order rather than cleaning randomly. First, cap and label any samples that must be stored. Next, place disposable items in the correct waste container and move reusable tools to the designated cleaning area. Clean and disinfect work surfaces as directed, allowing the required contact time if a disinfectant is used. Then remove gloves without touching the contaminated outer surfaces, discard them, and wash hands with soap and water. Finally, return clean equipment, inspect the station, and report spills, damage, or missing supplies. For example, leaving an unlabeled soil tube on a bench could expose the next group to unknown material. A signed checklist makes each team member accountable and confirms that the shared space is safe and ready.