
Create a Digital Map with Symbols and a Key
Students use a drawing tool to create a simple land-and-water map, place symbols for important features, and explain the map key.

Illustrations are auto-generated and may be placeholders. They can be refreshed to match the narration.
Explore Digital Map Tools
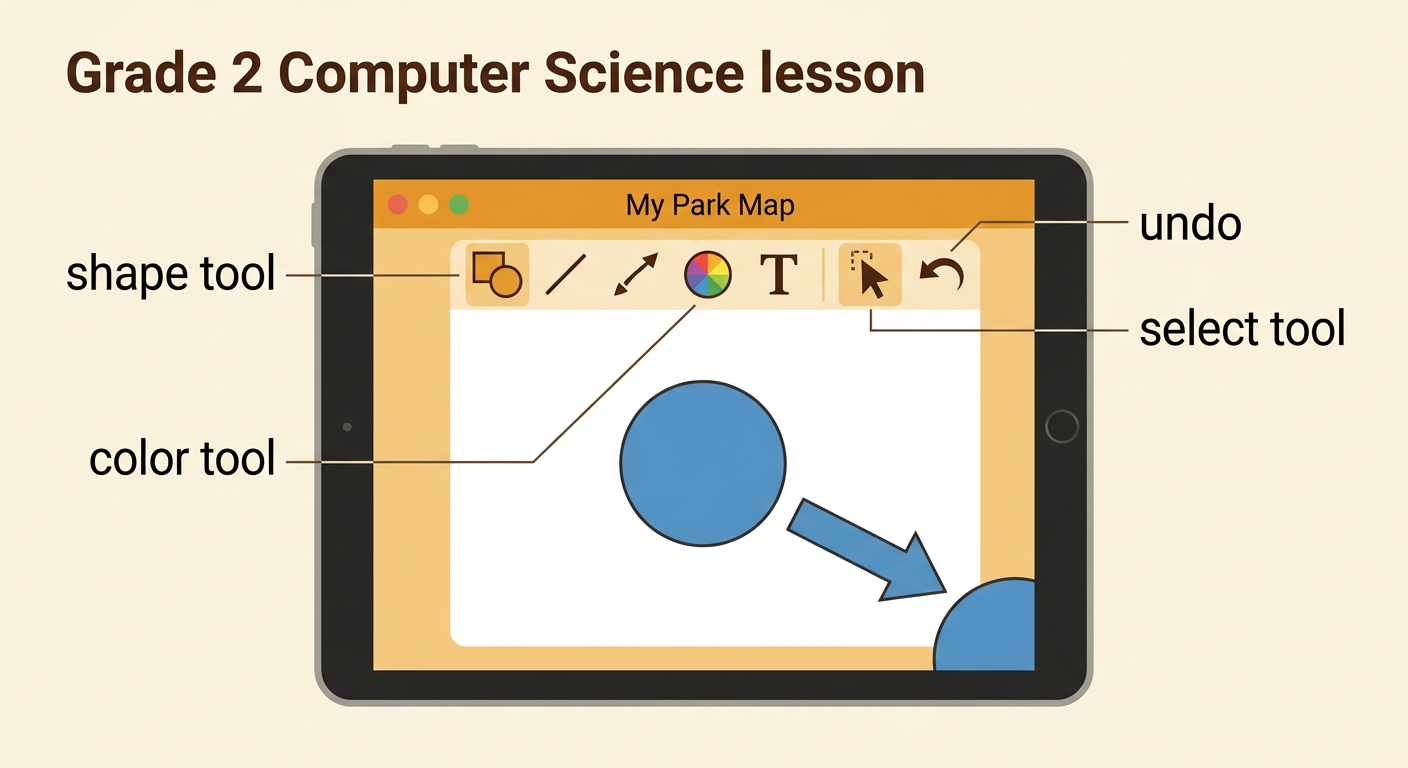
A digital map is a picture of a place made on a computer or tablet. It usually shows the place as if you were looking down from above. Before you begin, explore the drawing tool. Find the shape, line, color, text, select, delete, and undo tools. The shape tool can make circles, rectangles, and other forms. The color tool can fill a shape. The select tool lets you move or resize an object. Undo removes your most recent change without erasing the whole map. For example, draw a blue circle, select it, and move it to the corner. Then use undo to move it back. Save your work with a clear file name, such as My Park Map.
Add Land and Water Shapes
Begin your map with large shapes for land and water. Think about the place from a bird’s-eye view, looking straight down. Use green, tan, or brown shapes for land. Use blue shapes for bodies of water, such as a pond, lake, river, or ocean. Different bodies of water have different shapes. A pond may look rounded, while a river is usually long and winding. Land can also have many shapes. For example, make a green island in the middle of a blue lake. Leave enough open space to add other features later. Make sure the land and water do not cover each other in confusing ways. If a shape is too large, select it and resize it. Save the map after adding the main shapes.

Place Feature Symbols
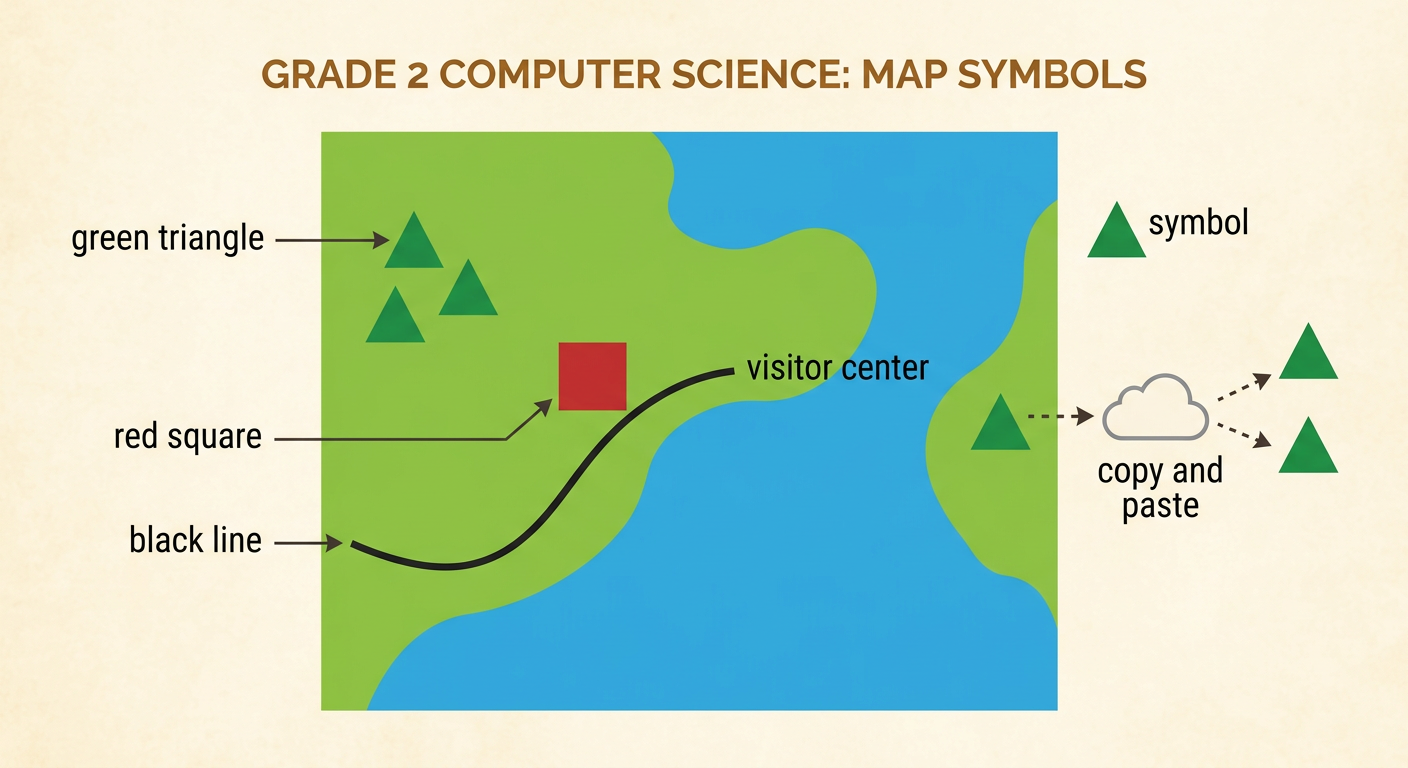
A symbol is a small picture or shape that stands for something on a map. Symbols make information easy to see without writing a long sentence. Choose simple symbols that look different from one another. A green triangle might represent a tree, a red square might represent a building, and a black line might represent a path. Place each symbol where that feature belongs. For example, put three green triangles on the land to show a group of trees. Put a red square beside the path to show a visitor center. Do not place a building in the middle of a lake unless it is really there. Copy and paste can quickly make more of the same symbol. Keep symbols small enough that the land and water shapes remain visible.
Create a Map Key
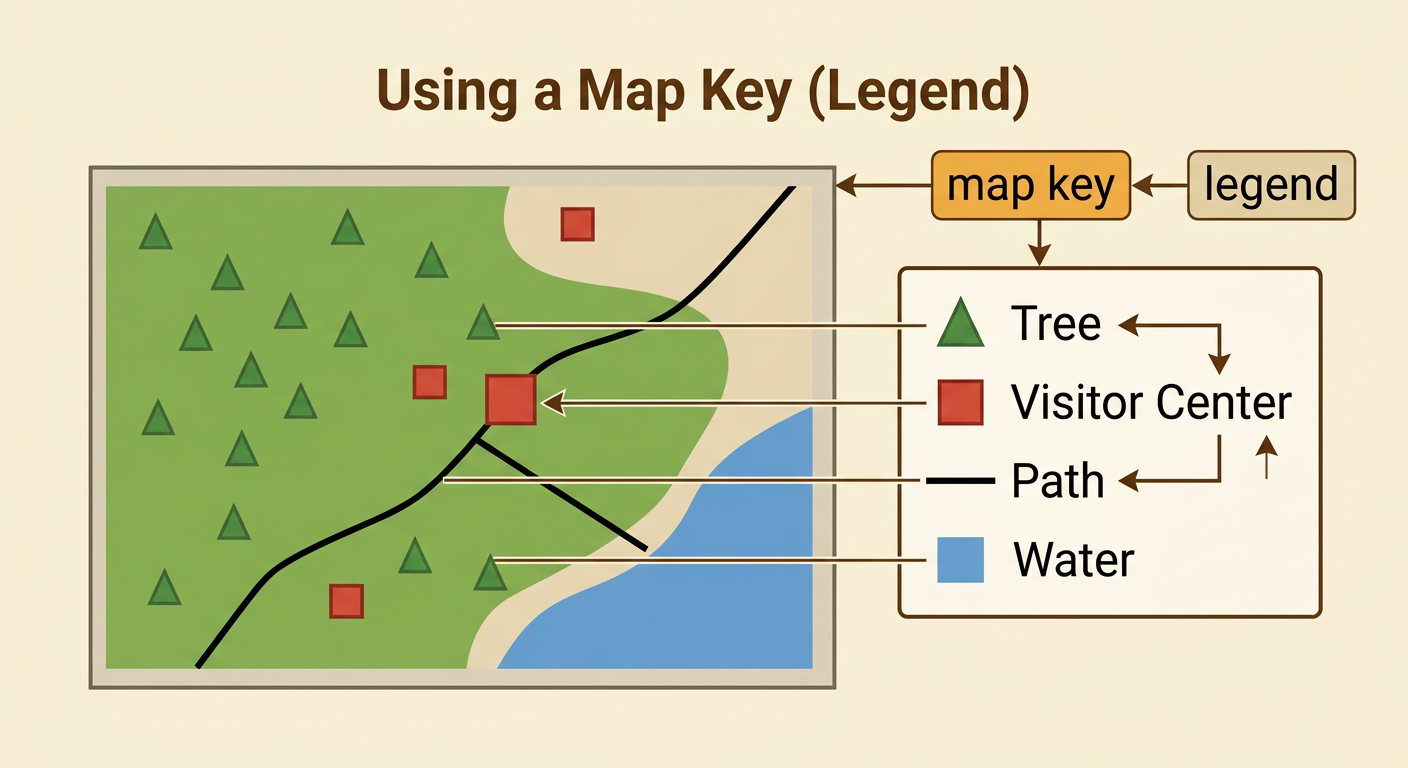
A map key explains what each symbol means. It is also called a legend. Without a key, another person might not know whether a green triangle means a tree, a hill, or a tent. Make a small box beside the map where it will not cover important features. Copy one example of each symbol into the box. Next to each symbol, type its meaning. For example, place a green triangle next to the word Tree, a red square next to Visitor Center, and a black line next to Path. Include water in the key if its blue color needs an explanation. Every symbol used on the map should match the same symbol in the key. Use text that is large, neat, and easy to read.
Check and Explain the Map
Check your map before sharing it. First, look for every symbol on the map and find its matching meaning in the key. Make sure the colors, shapes, and sizes match. Next, check that land, water, paths, and features are in sensible locations. Move any object that covers something important. Also check spelling and make sure the map has a title. Then explain the map aloud while pointing to its parts. You might say, “This is Sunny Park. The blue shape is a pond. Green triangles show trees, and the red square shows the visitor center.” Explain how the key helps a reader understand the symbols. Ask a partner to use the key to identify one feature. If the partner is confused, improve the symbol, label, or key.
