Create a Picture with Digital Drawing Tools
Students use simple drawing-program tools such as the pencil, shapes, colors, and eraser to create a picture that communicates an idea.
Illustrations are auto-generated and may be placeholders. They can be refreshed to match the narration.
Explore the Drawing Tools
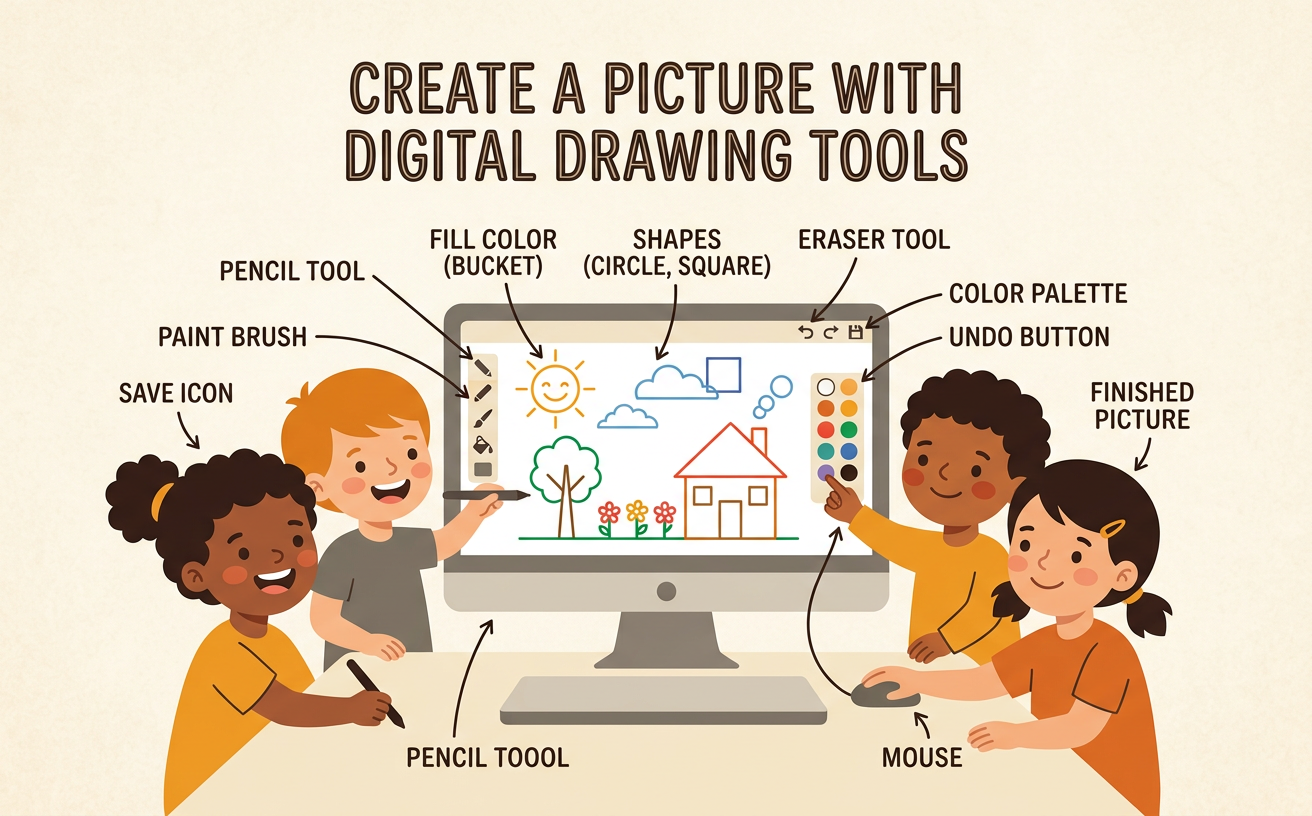
A digital drawing program gives you tools for making pictures on a screen. The pencil tool makes lines when you move the pointer. The shape tool can make circles, squares, rectangles, and triangles. The color choices let you pick a color before you draw. The eraser removes marks you do not want. Try each tool in an empty space. Draw a blue line with the pencil. Make a red circle with the shape tool. Then erase part of the line. You can also use the undo button to take back your most recent action. Explore gently and notice what each tool does. It is okay to try, change, and try again. Testing the tools helps you learn how to use them for your own picture.

Choose an Idea
Before you draw, choose an idea that your picture will show. Think about a person, place, animal, object, or event that matters to you. You might draw your family, a pet, a sunny playground, or a favorite story scene. Picture the idea in your mind. Ask yourself, “What should someone notice in my picture?” For example, if your idea is a fun day at the playground, you could include a slide, a swing, the sun, and children playing. These details help another person understand your idea. You can say your plan aloud before you begin: “I will draw my friend and me playing on the slide.” A clear idea gives you a helpful starting point, but you may add new details while you work.

Draw with Lines and Shapes
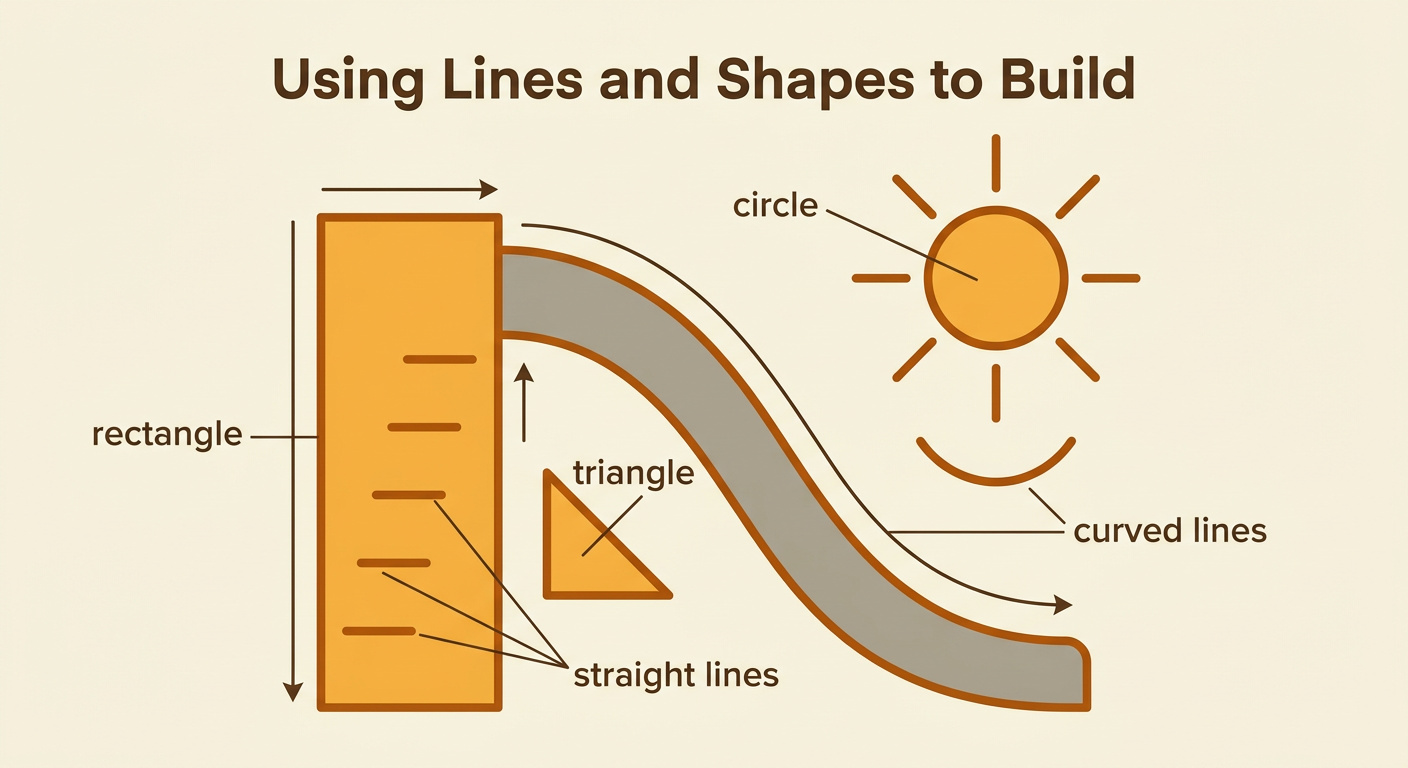
Use lines and shapes to build the big parts of your picture. Start with the largest objects so you have room for everything. A circle can become a sun or a face. A square or rectangle can become a house, door, or window. A triangle can become a roof. Straight lines can make arms, legs, grass, or sun rays. Curved lines can make smiles, clouds, or hills. For example, make a playground slide with a small rectangle for the ladder, straight lines for the steps, and a long curved line for the slide. Move the pointer slowly and watch where each mark appears. If a line or shape is not where you want it, use undo or the eraser. Your shapes do not need to be perfect to communicate your idea.
Add Colors and Details
Colors and small details can help people understand more about your picture. Choose a color, and then use the pencil or another coloring tool to add it. You might color the sun yellow, the grass green, and the slide red. Colors do not always have to match real life; you may use imaginative colors, too. Next, add details that tell more about your idea. Draw smiling mouths to show that children are happy. Add clouds to show the weather or a ball to show what someone is playing. Look closely at your picture. If a color goes into the wrong place, use the eraser or undo button and try again. Do not add so many details that the main idea becomes hard to see. Make each color and detail help tell your picture’s story.

Share What the Picture Shows
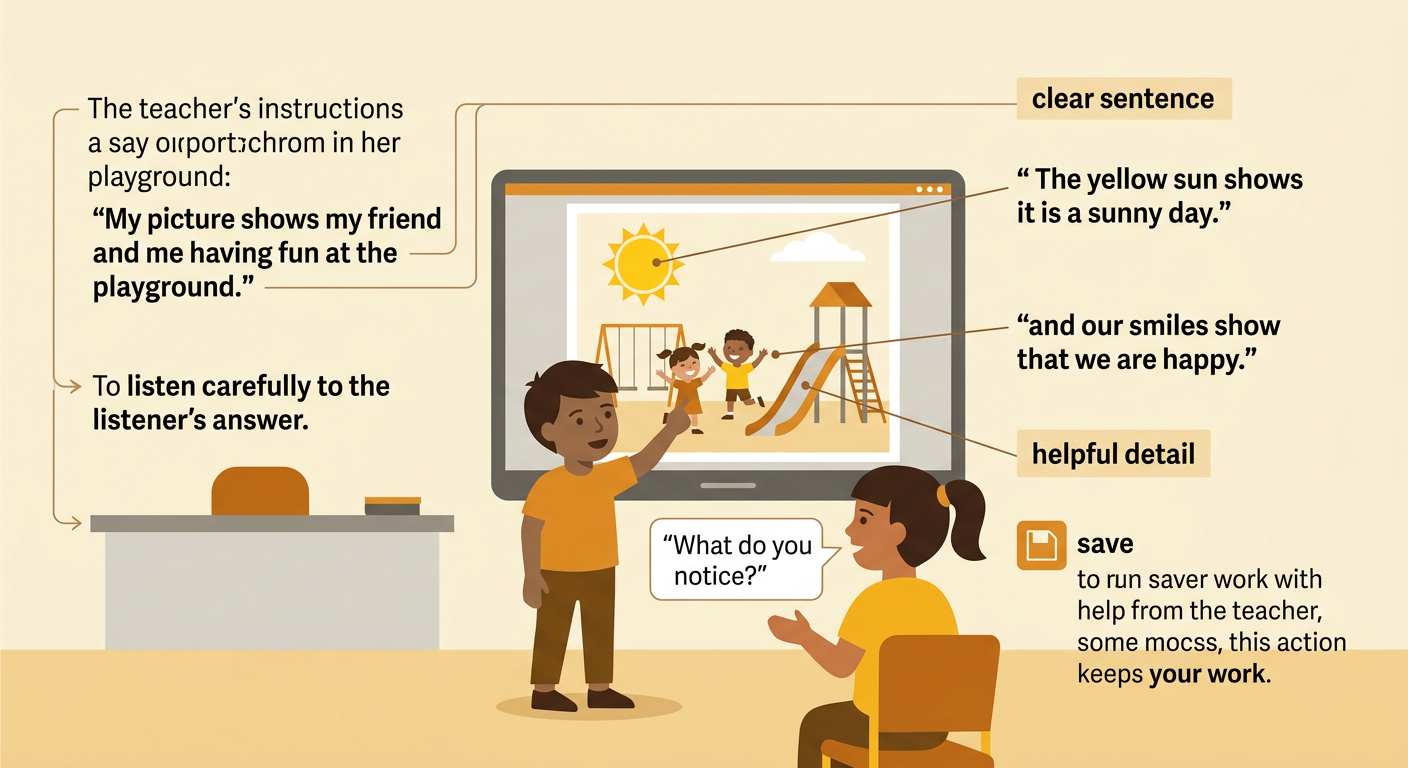
When your picture is finished, share it with a partner or the class. Show the picture and use a clear sentence to explain your idea. You could say, “My picture shows my friend and me having fun at the playground.” Then point to details that give more information. You might add, “The yellow sun shows it is a sunny day, and our smiles show that we are happy.” Your drawing helps listeners picture what you are describing. Ask your listener, “What do you notice?” Listen carefully to the answer. If the listener is confused, you can explain a detail or add something to the picture. Remember to save your work with help from your teacher. Sharing your digital picture lets your colors, lines, shapes, and words work together to communicate an idea.