Design a Ball Stopper
Students build and test a simple structure that safely slows or stops a rolling ball, then draw and describe the results.

Illustrations are auto-generated and may be placeholders. They can be refreshed to match the narration.
Can We Stop a Rolling Ball?
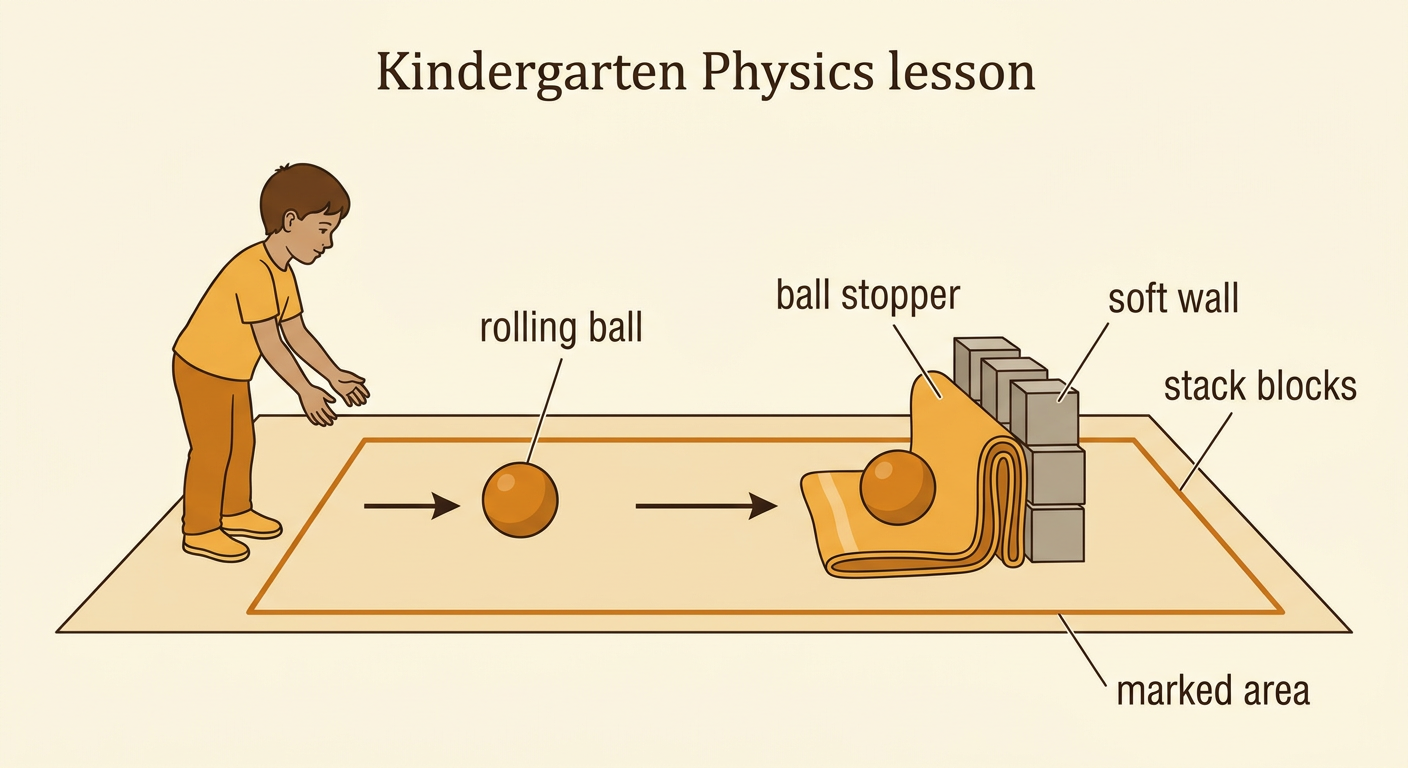
A rolling ball is moving. A push can start the ball, and an object in its path can slow it down, stop it, or change its direction. Your challenge is to design a ball stopper that stops the ball safely. You might use blocks, cardboard, cups, or a folded towel. The stopper should stay in place and keep the ball from rolling into a person or across the room. For example, a ball may bump into a soft wall made from a towel and stop. A single light cup might tip over and let the ball keep moving. We will build, test, and improve our designs. Roll the ball gently, keep hands and feet out of its path, and test only in the marked area.
Predict the Ball’s Path
Before you test, predict what the ball will do. A prediction is what you think will happen. Look at the starting point, the open path, and the place where you plan to put the stopper. Point to the path you think the ball will follow. Then use your finger or a crayon to trace that path on a simple course drawing. You can say, “I predict the ball will roll straight and stop at the blocks.” Think about speed, too. Will the ball move quickly, slow down, stop, or turn? For example, if the ball hits a slanted piece of cardboard, you might predict that it will turn to the side instead of stopping. Predictions help us know what to watch during a test.

Build a Ball Stopper
Choose classroom materials and build a structure across the ball’s path. Make the base wide so the stopper does not fall easily. Place heavier or firm pieces behind softer pieces when possible. The soft front can slow the ball, while the pieces behind it can keep the structure in place. For example, fold a small towel into a low wall and place two wooden blocks behind it. Make sure there are no sharp edges or tall pieces that could fall on someone. Check that the stopper is wide enough to catch the ball. Draw your design before testing it. Show the ball, the path, and each part of the stopper. If you work with a partner, take turns placing materials and explaining how each part may help.

Test and Observe
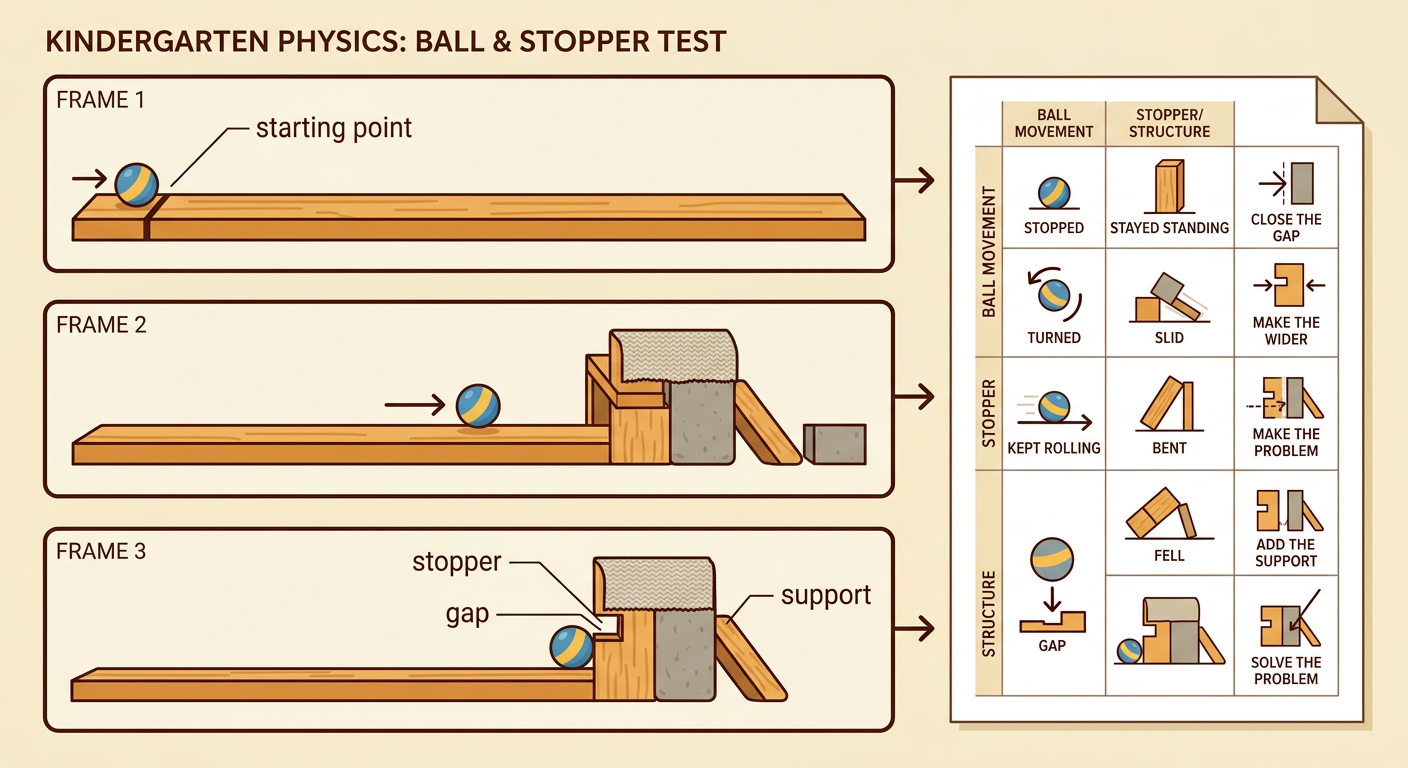
Place the ball at the same starting point for every test. Release it gently without giving it an extra push. Watch closely as it reaches the stopper. Did the ball move more slowly, stop, turn, or go through? Also observe the structure. Did it stay standing, slide, bend, or fall? Record what happened with a drawing, words, or a sentence dictated to an adult. For example, you might report, “The ball hit the towel, slowed down, and stopped. The blocks stayed in place.” Test the design more than once because each roll may be a little different. If the ball escapes, improve the stopper by making it wider, adding support, or closing a gap. Change only one part at a time so you can tell whether that change helped.
Compare Travel Distances
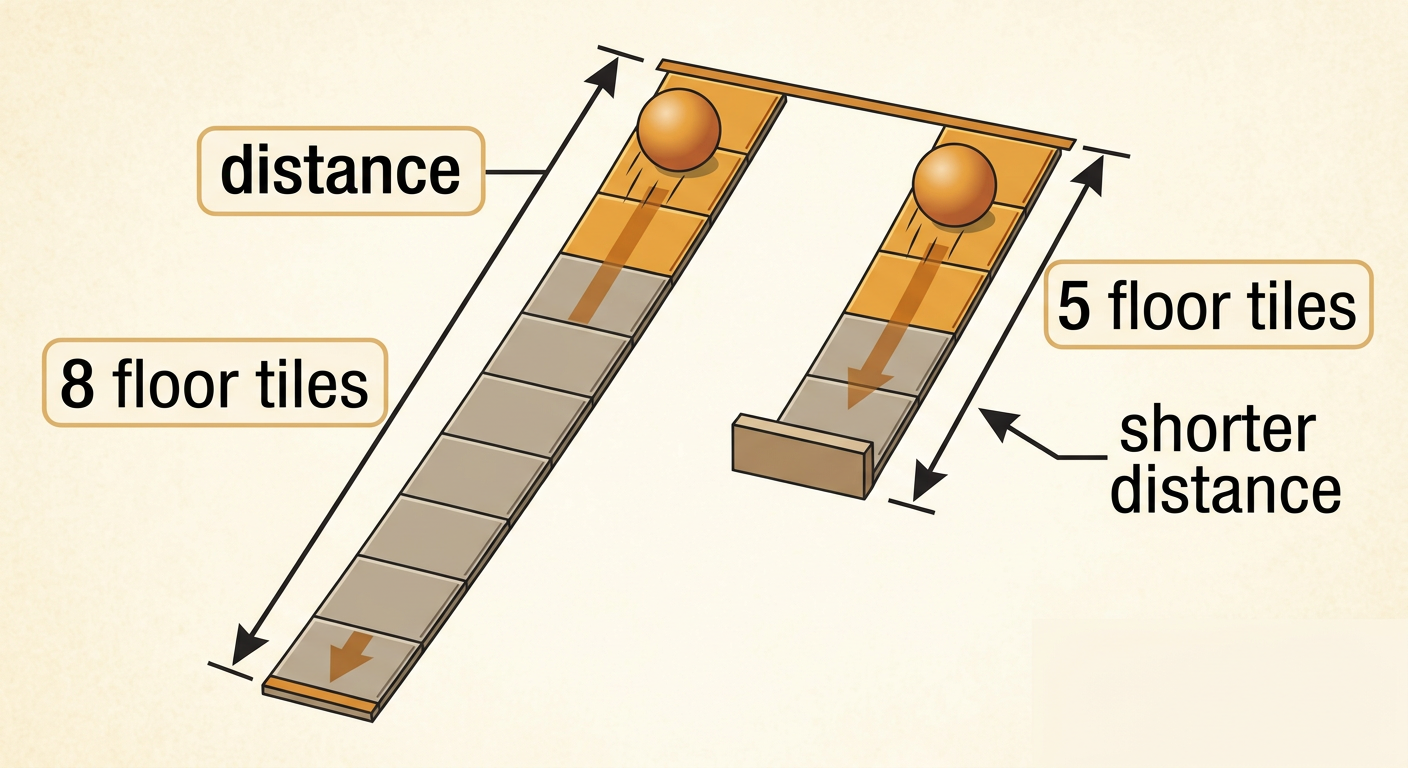
Distance tells how far the ball travels from its starting point. Mark the place where the ball stops after each test. Measure the path with equal-size floor tiles, linking cubes, or another classroom unit. Place the units end to end with no gaps or overlaps. For example, without a stopper, the ball might travel eight floor tiles. With the stopper, it might travel five floor tiles and stop. Five tiles is a shorter distance than eight tiles. Compare the results and ask, “Did our design change how far the ball traveled?” A shorter travel distance can be evidence that the stopper slowed or stopped the ball. You can also compare two designs. Record each distance with a number and the unit, such as “5 floor tiles,” so everyone knows what was measured.
Draw the Course and Share
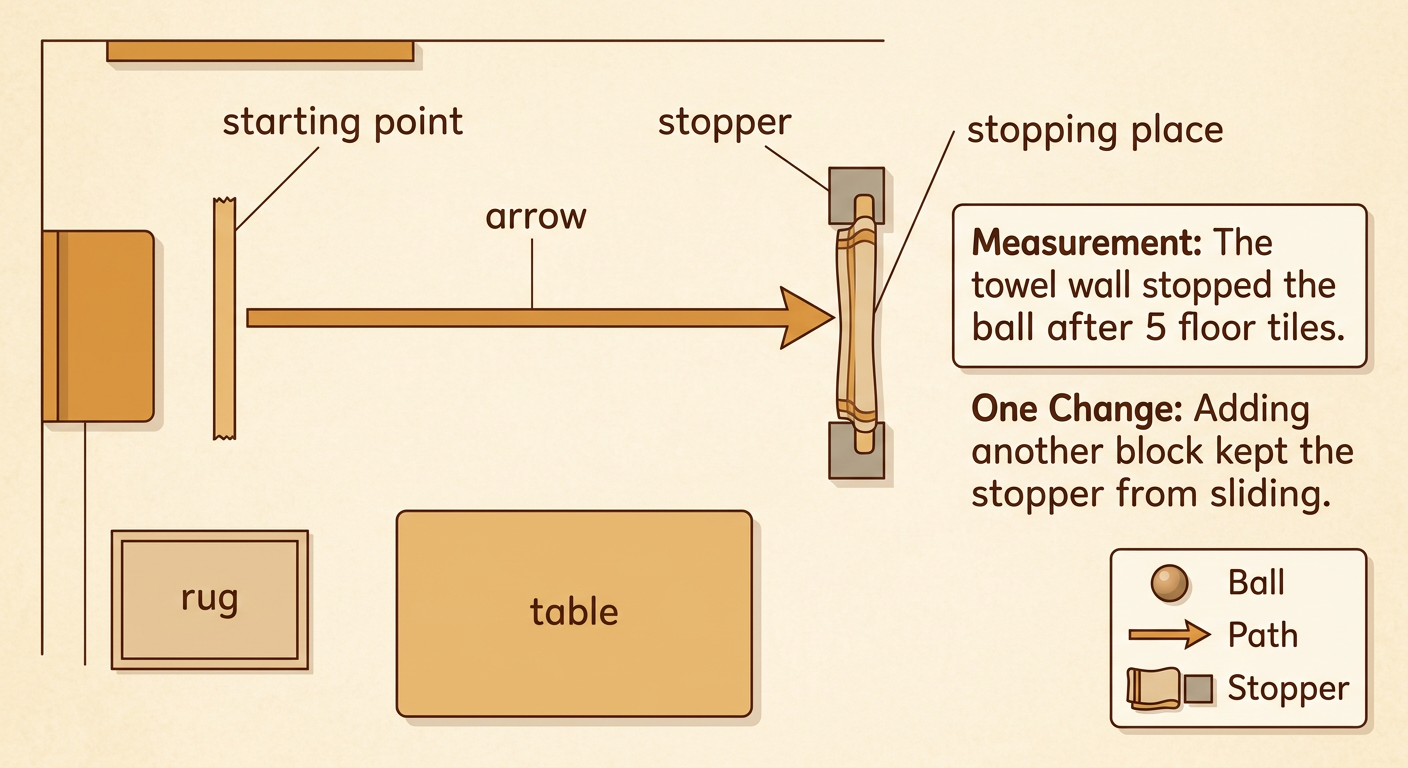
Make a simple map of the testing space as if you were looking down from above. Draw the starting point, the ball’s path, the stopper, and the place where the ball stopped. Use an arrow to show the direction of motion. Add nearby classroom features, such as a table or rug, to help others understand where the course was located. Then draw the result and share information about your design. You might write or dictate, “Our towel wall stopped the ball after five floor tiles. The ball went straight and did not pass the wall.” Explain one change you made and whether it helped. For example, adding a second block may have kept the stopper from sliding. Your map, measurement, and words work together to show what you built and what you learned.