
Exploring Patterns in Water Waves
Students create and observe water-wave models to identify amplitude and wavelength patterns and explain how waves can move objects without carrying them across the water.
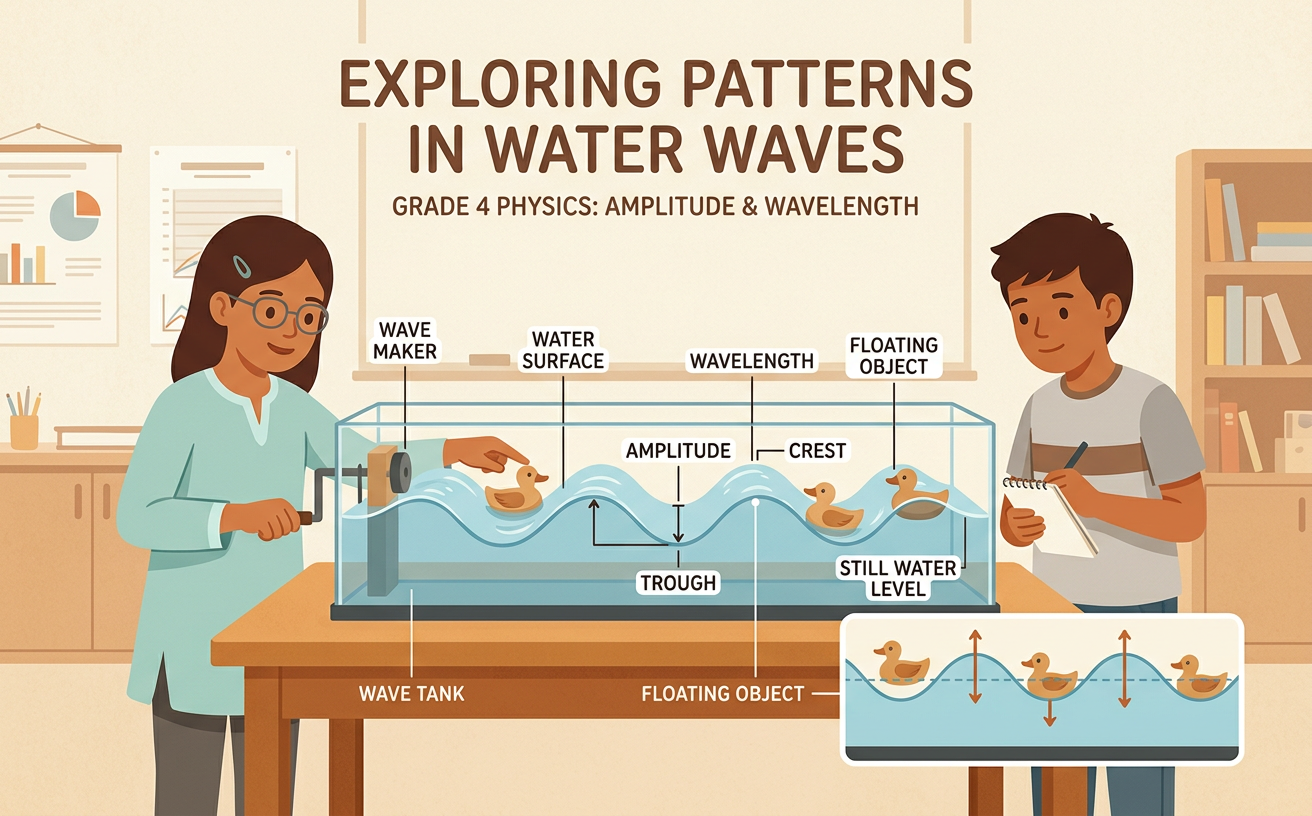
Illustrations are auto-generated and may be placeholders. They can be refreshed to match the narration.
What Is a Water Wave?
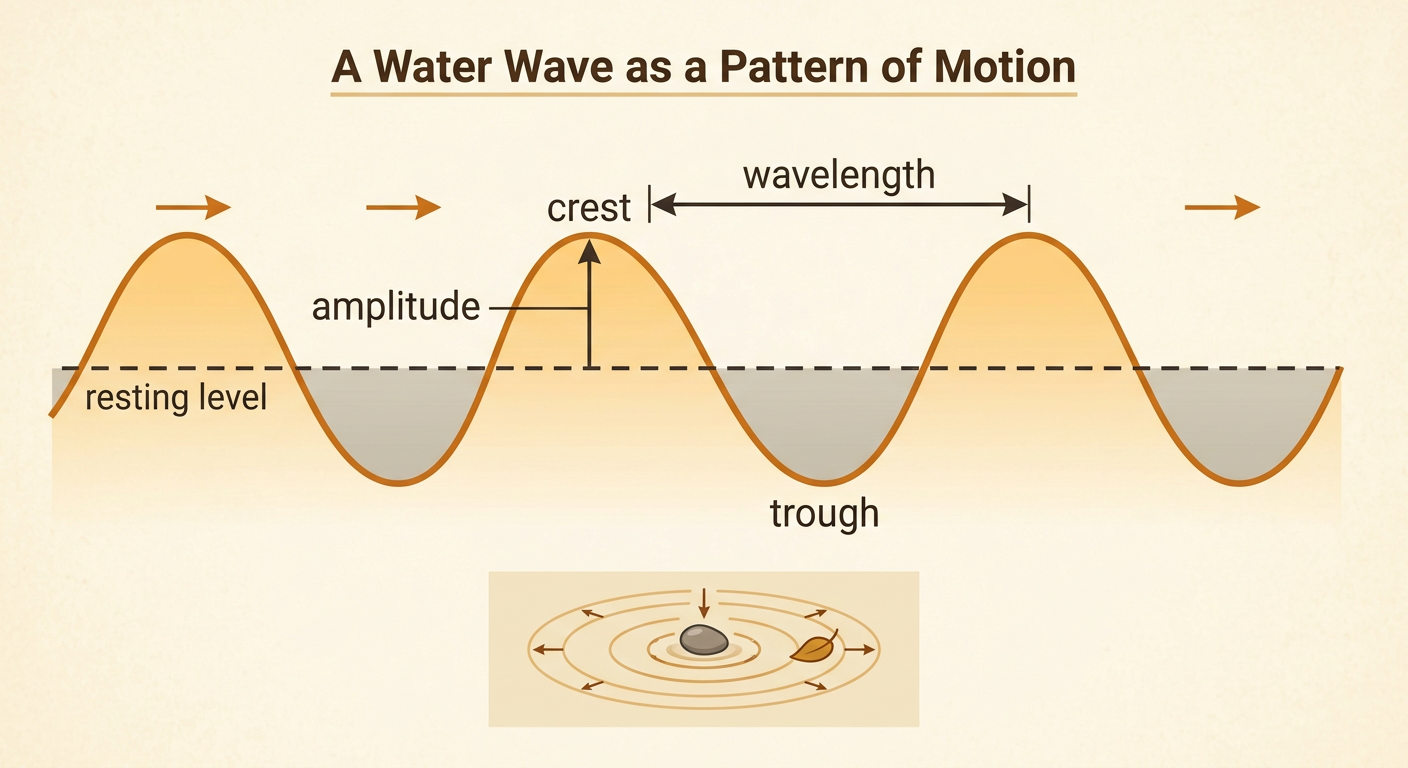
A water wave is a pattern of motion that travels across water. A wave begins when a disturbance, such as wind, a dropped pebble, or a moving hand, transfers energy to the water. The highest part of a wave is the crest, and the lowest part is the trough. Amplitude is the distance from the water’s resting level to a crest or trough. Wavelength is the distance from one crest to the next crest. For example, when a pebble falls into a pond, circular waves spread outward. The wave pattern moves across the pond, but most water particles move mainly up and down or back and forth near their original places. This shows that waves transfer energy without carrying all the water across the pond.
Creating Waves in a Model
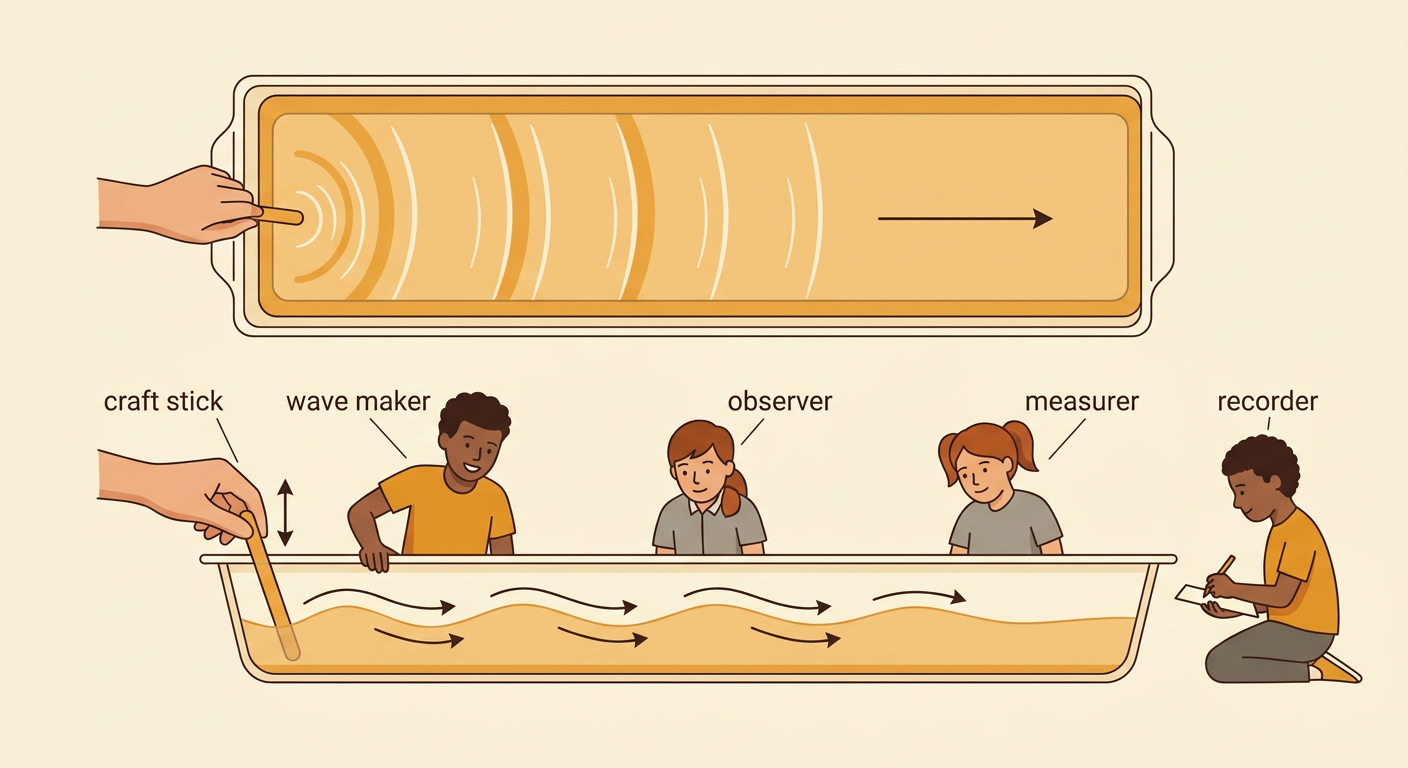
You can model water waves with a shallow, clear pan of water. After the water becomes still, gently dip one end of a craft stick into the water and move it up and down at a steady rate. The motion creates a series of waves that travel across the pan. Work with classmates to assign jobs such as wave maker, observer, measurer, and recorder. To make a fair comparison, change only one thing at a time. For example, first move the stick a small distance and observe the waves. Then move it a larger distance while keeping the speed the same. The larger movement usually creates waves with greater amplitude. Share observations, ask questions, and compare measurements with the group before making a conclusion.
Comparing Wave Height and Spacing
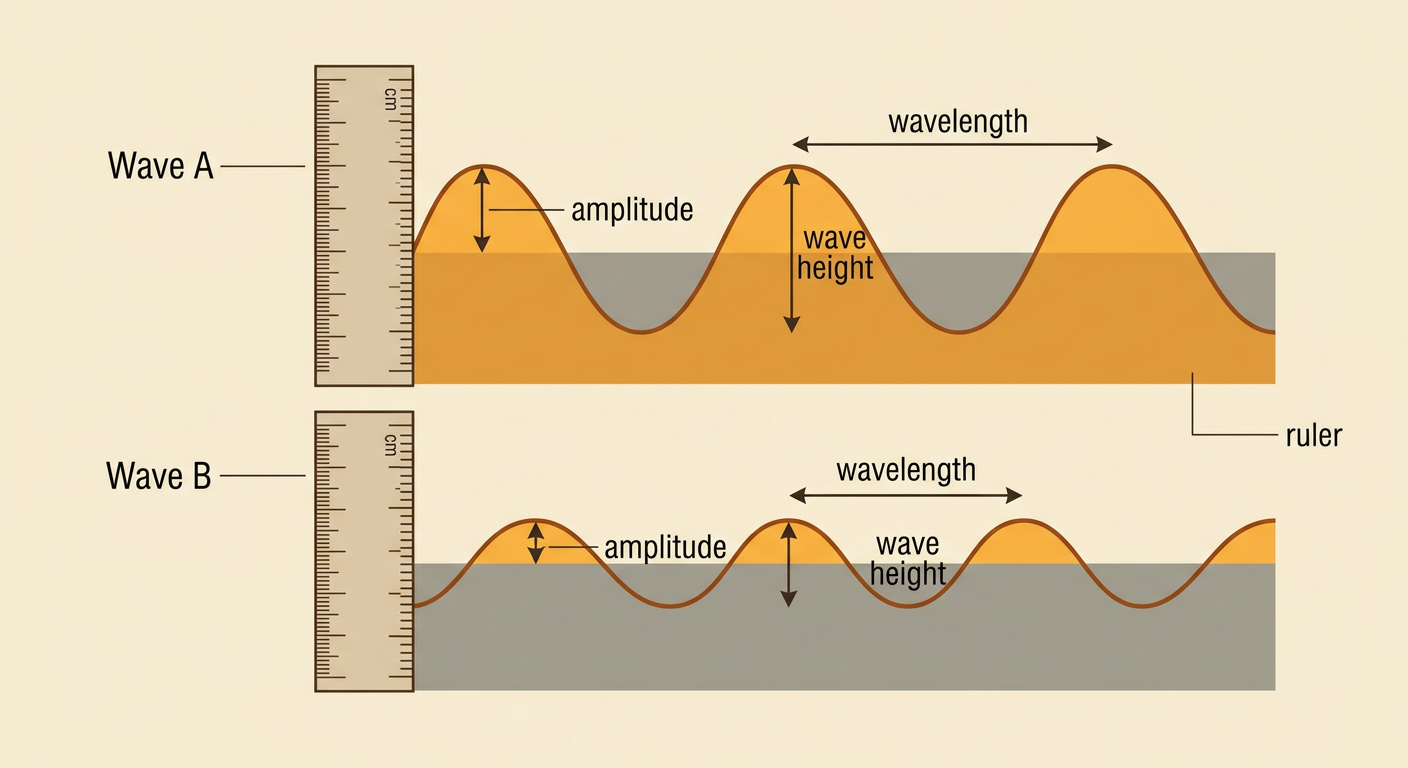
Wave patterns can be compared by measuring their amplitude and wavelength in standard units such as centimeters. Place a ruler beside the clear pan without putting it in the moving water. Amplitude is measured vertically from the resting water level to a crest. Wave height is the full vertical distance from a trough to a crest, so it is about twice the amplitude in a regular wave. Wavelength is measured horizontally from one crest to the next crest. For example, Wave A might have an amplitude of 2 centimeters and a wavelength of 8 centimeters. Wave B might have an amplitude of 1 centimeter and a wavelength of 5 centimeters. Wave A has greater amplitude and longer wavelength. Repeated measurements help students check whether a pattern is consistent.
Observing How Waves Move Objects
Waves can make objects move even though the wave does not carry all the water forward. Test this by placing a small floating cork near the center of a pan. Make gentle waves at one end and watch the cork from the side. The cork will usually rise as a crest passes and fall as a trough passes. It may also rock or move slightly back and forth. Meanwhile, the wave pattern continues across the pan. This happens because the wave transfers energy through the water to the cork. Mark the cork’s starting location on the side of the pan and compare it with its location after several waves. In a real lake or ocean, currents, wind, and breaking waves may also cause objects to drift, but the simple model highlights the wave’s repeated motion.

Connecting Waves to Coastal Communities
Water and wave conditions affect where people build communities and how they travel. Coastal settlements often grow near sheltered bays because the surrounding land can reduce the force of incoming ocean waves. Calmer water makes it easier for boats to enter a harbor, load supplies, and carry people. Strong waves can damage docks, reshape beaches, and erode cliffs, so communities may build breakwaters or place buildings farther from the shore. For example, a fishing town might locate its harbor inside a curved bay instead of along an exposed coast. People must also consider storms, flooding, and changing shorelines when planning roads and homes. By observing wave amplitude, direction, and spacing, coastal communities can make safer decisions about settlement, transportation, recreation, and protection of the shoreline.
