
Gravity: Earth’s Downward Pull
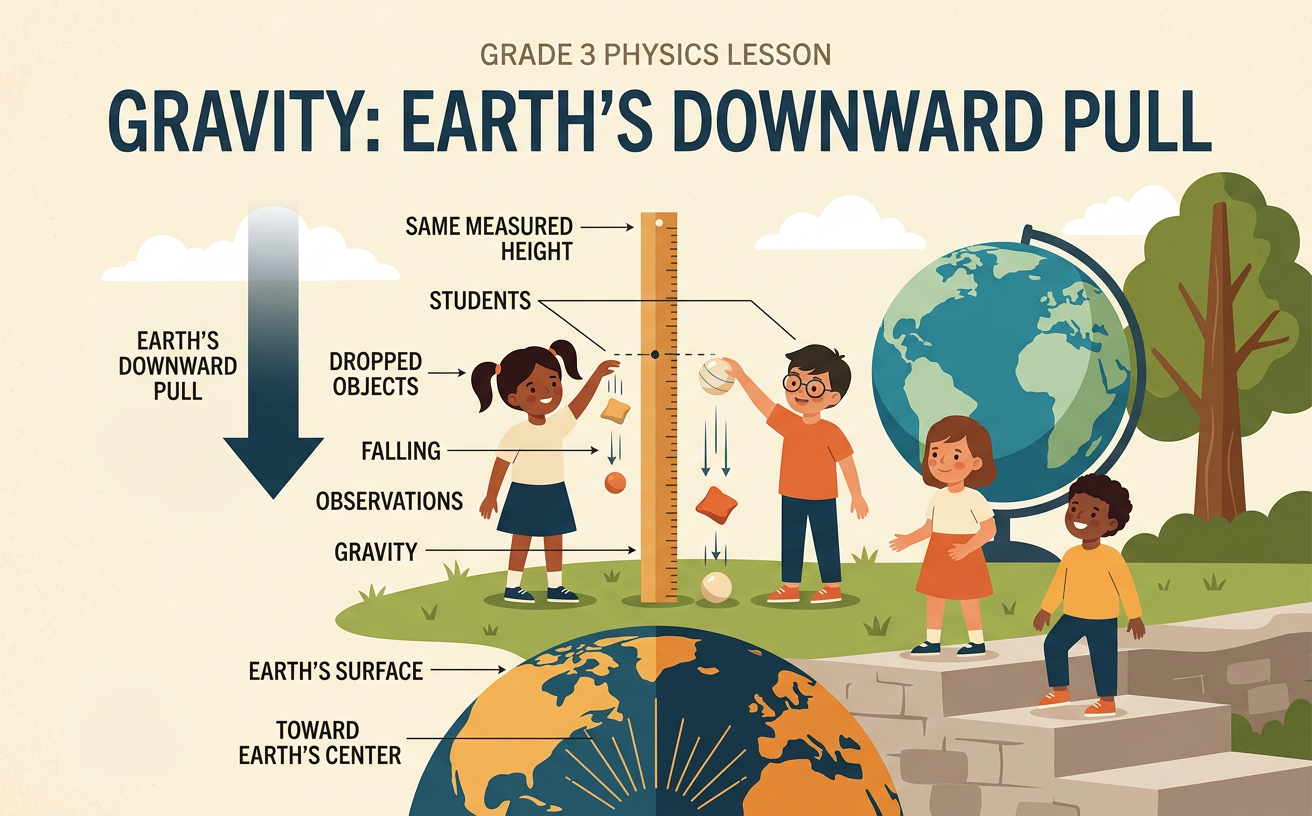
Students drop safe objects from the same measured height and use observations to explain that gravity pulls objects downward toward Earth.
Illustrations are auto-generated and may be placeholders. They can be refreshed to match the narration.
What Makes Objects Fall?
Gravity is a force that pulls objects toward Earth. A force is a push or a pull that can change how an object moves. When you hold a rubber ball, your hand keeps it from falling. When you open your hand, the support from your hand is gone, and gravity makes the ball move downward. The ball continues toward the floor until the floor pushes back and stops it. Gravity acts on every object near Earth, including balls, pencils, leaves, and people. However, air can affect how quickly some objects fall. For example, a flat sheet of paper may drift while a small block drops more directly. In this investigation, you will use safe, unbreakable objects and observe the direction they move after they are released.

Measure an Equal Drop Height
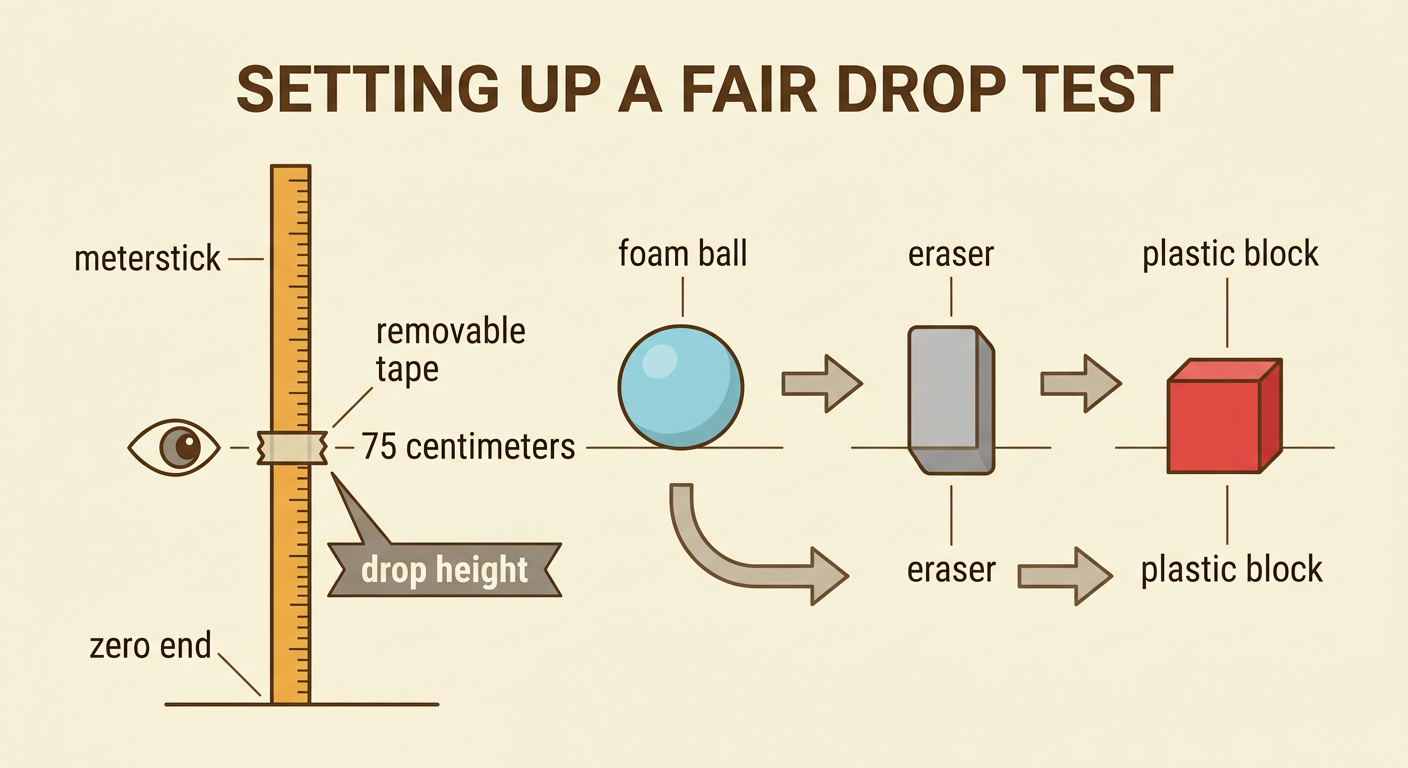
A fair drop test begins with every object at the same measured height. Place a meterstick upright with its zero end touching the floor. Choose a height, such as 75 centimeters, and mark that level with removable tape. Hold the bottom of each object even with the tape before releasing it. Measure carefully by looking straight at the mark instead of looking from above or below. Record the drop height in centimeters in a data table. For example, a foam ball, an eraser, and a plastic block can each be released from 75 centimeters. Keeping the height equal helps you compare the tests because the starting position does not change. Ask an adult or classmate to check the measurement, and use only a low height in a clear area.
Predict and Conduct Drop Tests
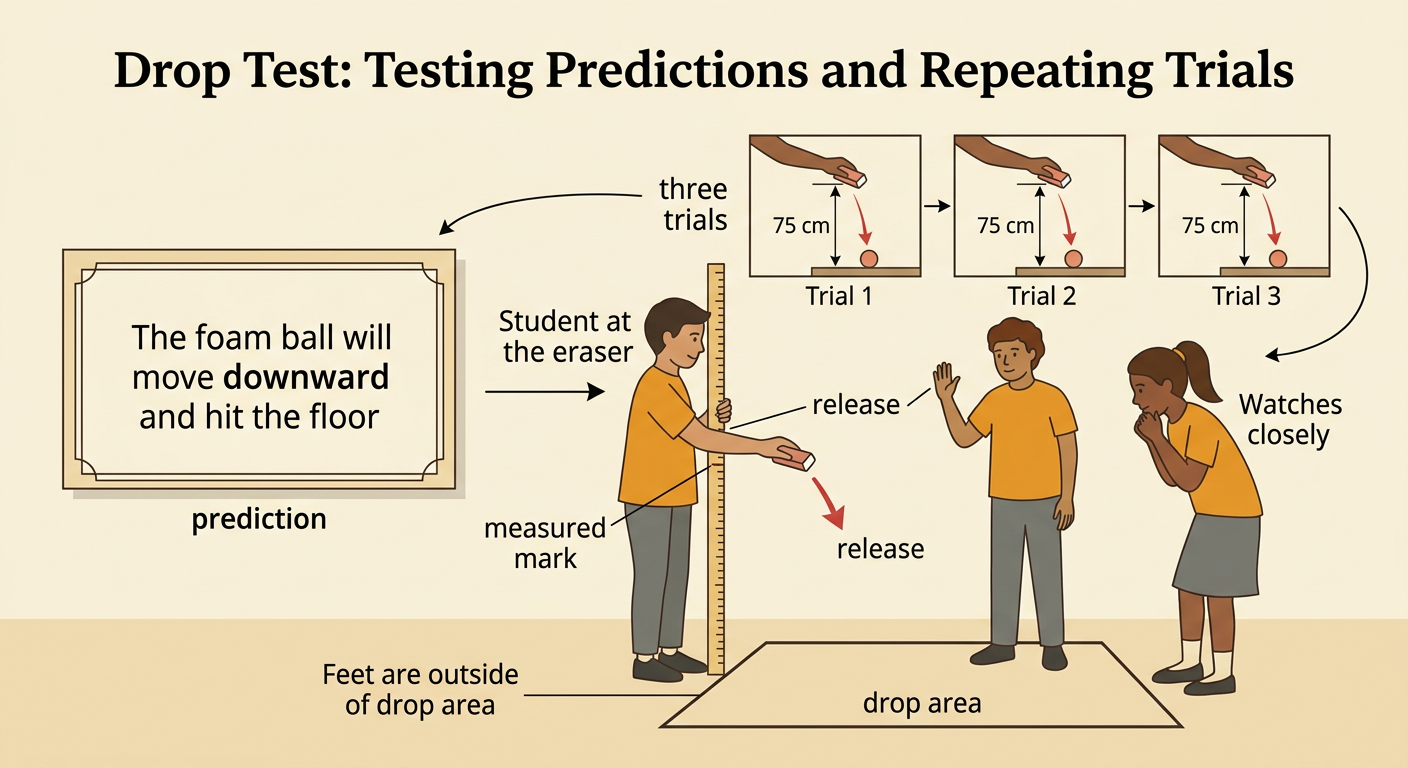
Before each test, make a prediction about what the object will do after it is released. A prediction is a statement about what you think will happen based on what you know. You might predict, “When I release the foam ball, it will move downward and hit the floor.” Then test the prediction. One student holds the object at the measured mark, one student gives the signal, and one student observes. Release the object without pushing, throwing, or spinning it. Repeat the test three times so one unusual release does not control your conclusion. Test each safe object in the same way. For example, release an eraser three times from 75 centimeters and count how many times it moves toward the floor. Keep feet away from the drop area and never use sharp, heavy, or breakable objects.
Record the Direction of Motion
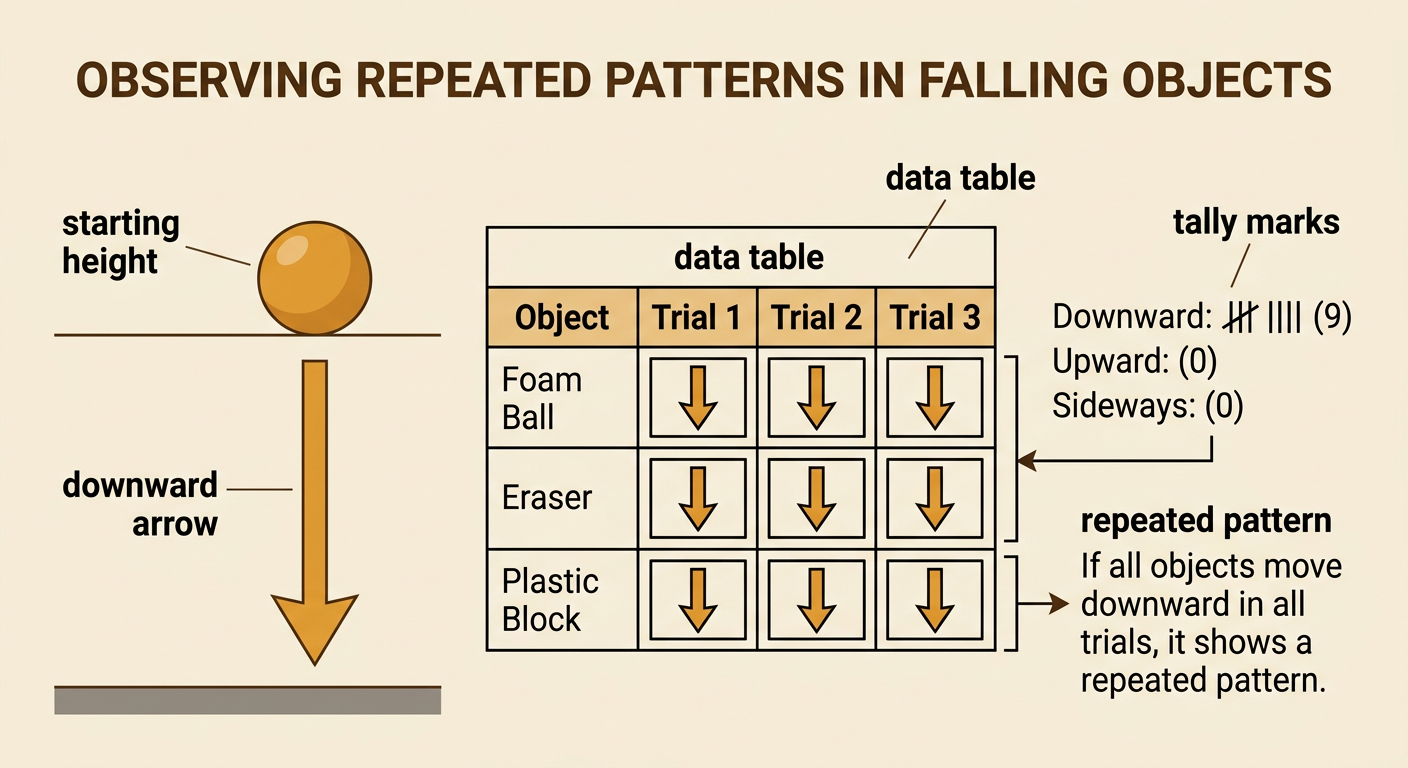
Watch the object from the moment it is released until it reaches the floor. Record its main direction of motion as downward, upward, or sideways. You can draw an arrow in your data table to show the direction. A downward arrow points from the starting height toward the floor. Also record what you directly observe, such as “The plastic block moved straight down” or “The paper cup tipped as it moved down.” Do not write that an object moved faster unless you measured time. For example, if a foam ball moves toward the floor in all three trials, record “downward” three times. You can make a picture graph or line of tally marks to compare the results. If 9 out of 9 drops moved downward, that repeated pattern is useful measurement and observation data.
Explain Gravity with Evidence
Use your observations and measurements to write an explanation. Begin with a clear idea: gravity pulls objects downward toward Earth. Next, include relevant evidence from the investigation. For example, “We released three objects from a height of 75 centimeters. In all nine trials, the objects moved downward toward the floor.” Then explain your reasoning: the objects were not pushed, but their motion changed after the supporting hand let go, so a pull acted on them. That pull was gravity. You may also mention differences you observed. A light paper object might flutter because air pushes against it, but its overall motion is still toward Earth. End with a conclusion that connects the evidence to the idea. Share your explanation with classmates, compare results, and revise any statement that is not supported by recorded data.
