Identifying Materials by Their Properties
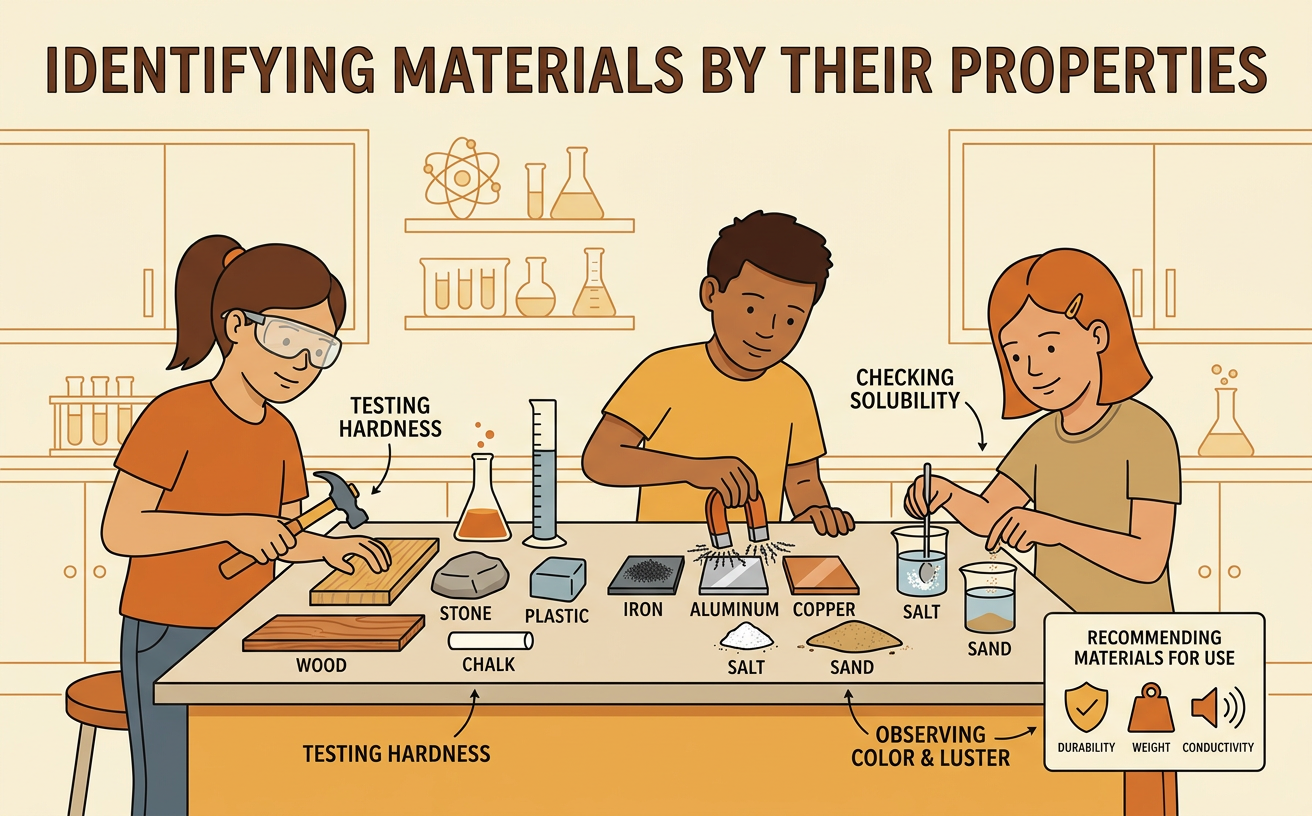
Students observe and measure properties such as color, hardness, solubility, and magnetism to identify materials and recommend one for a specific use.
Illustrations are auto-generated and may be placeholders. They can be refreshed to match the narration.
Properties of Matter
Materials can be described by properties that can be observed or measured. Color and texture can be observed with the senses. Hardness describes how well a material resists being scratched. Solubility tells whether a substance dissolves in a liquid such as water. Magnetism describes whether a material is attracted to a magnet. Some properties, such as mass and length, are measured with tools and units. Scientists use several properties together because one property may not be enough to identify a material. For example, both aluminum and steel can look gray and shiny, but steel is usually attracted to a magnet while aluminum is not. Careful observations and measurements provide evidence that helps scientists tell similar-looking materials apart.

Observe and Measure Samples
Begin by labeling each sample so that they do not get mixed up. Observe color, shine, and texture without tasting or directly smelling any substance. Use the same procedure for every sample to make the test fair. Measure mass with a balance and length with a ruler. If needed, convert units before comparing results: 1 centimeter equals 10 millimeters, and 1 gram equals 1,000 milligrams. Test magnetism by bringing a magnet close to each sample. Test solubility by adding equal amounts of each safe substance to equal amounts of water and stirring for the same length of time. For example, if Sample A has a mass of 5 grams, record it as 5,000 milligrams when the data table uses milligrams.

Record Property Data
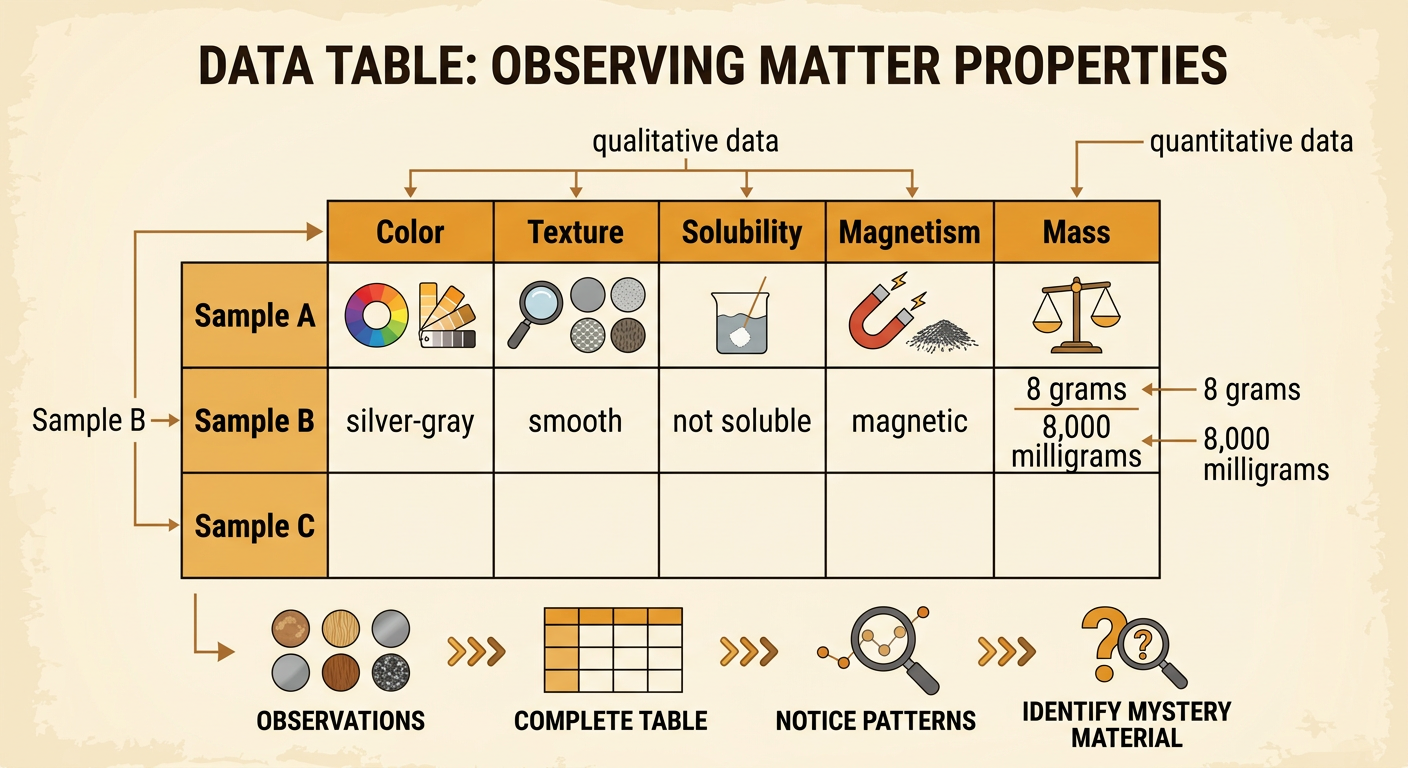
Record each observation and measurement in a data table as soon as it is collected. Put material names or sample letters in rows and properties in columns. Qualitative data use descriptive words, such as white, rough, shiny, soluble, or magnetic. Quantitative data use numbers and units, such as 4 grams or 25 millimeters. Avoid unclear descriptions such as nice or normal. For example, a student might record that Sample B is silver-gray, smooth, not soluble in water, attracted to a magnet, and has a mass of 8 grams. If all masses must be compared in milligrams, convert 8 grams to 8,000 milligrams. A complete, organized table helps reveal patterns and prevents students from relying on memory.
Identify the Mystery Material
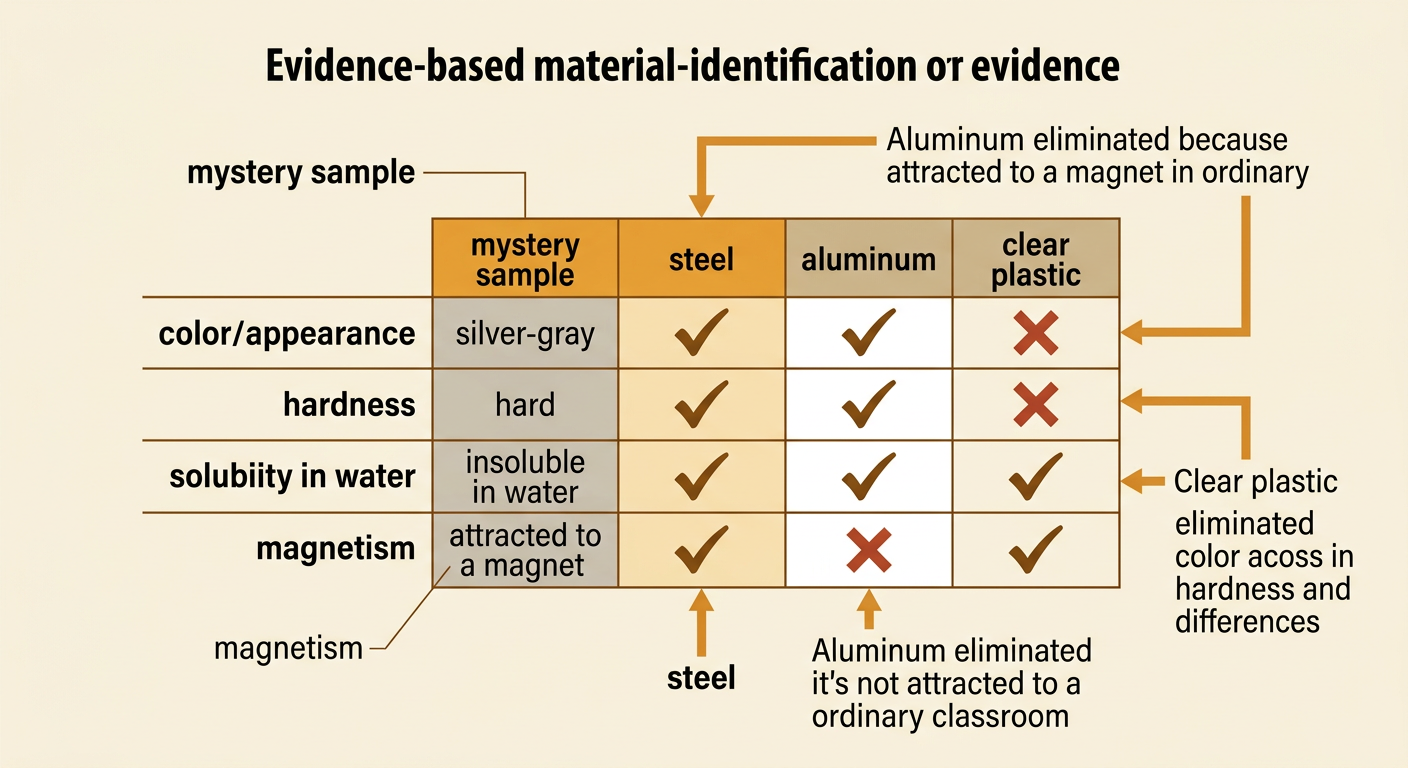
To identify a mystery material, compare its property data with reliable data from known materials. Look for a match across several properties rather than choosing based on appearance alone. Eliminate any known material that does not match an important test result. Suppose a mystery sample is silver-gray, hard, insoluble in water, and attracted to a magnet. Aluminum can be eliminated because it is not attracted to a magnet under an ordinary classroom test. Clear plastic can be eliminated because its color and hardness do not match. If the known steel sample matches all the recorded properties, steel is the best identification. The conclusion should still be described as evidence-based because classroom tests have limits. Additional properties, such as density, could provide stronger evidence if two materials have very similar results.
Choose a Material for a Purpose
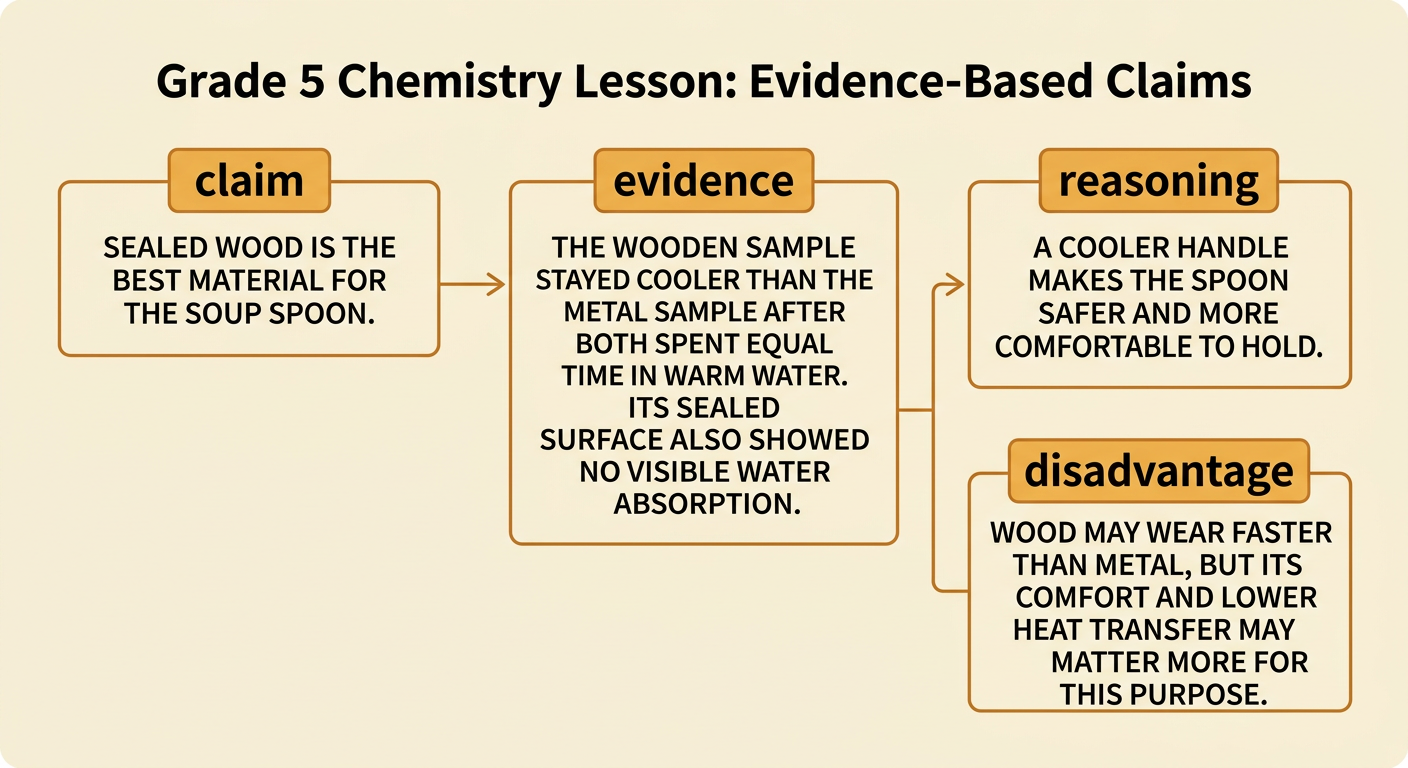
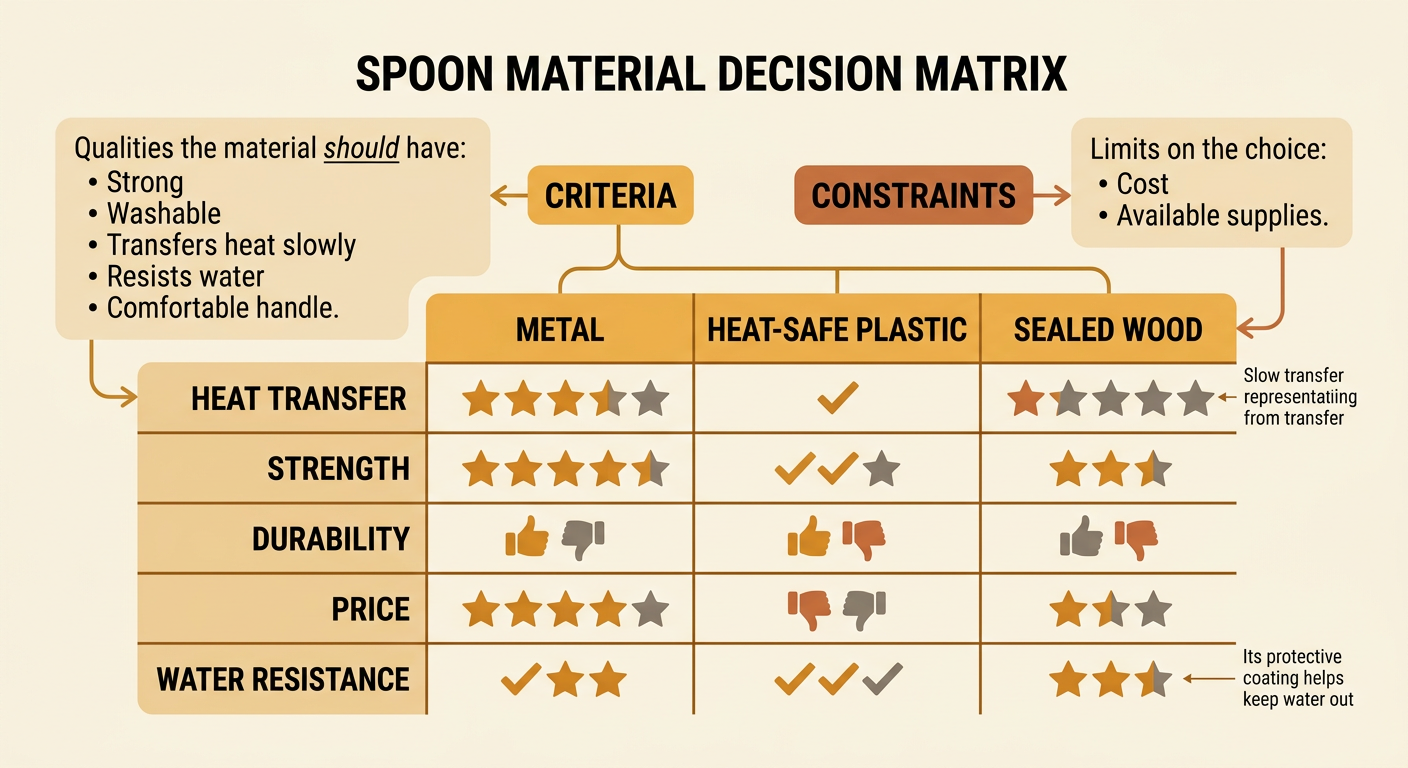
Choosing a material requires criteria, which are the qualities the material should have, and constraints, which are limits such as cost or available resources. Benefits and costs can include strength, safety, durability, price, weight, and environmental effects. Imagine choosing a material for a spoon used to stir hot soup. Metal is strong and washable, but it can conduct heat to the handle. Plastic may be inexpensive and light, but some plastics can soften when heated. Wood does not transfer heat as quickly as metal and is comfortable to hold, but it may absorb water and wear out sooner. A good recommendation depends on which qualities matter most. If staying cool and being comfortable are the main criteria, a sealed wooden spoon may offer the best balance of benefits and costs.
Make an Evidence-Based Claim
An evidence-based claim states a clear choice and supports it with relevant data. Begin with the claim, such as, “Sealed wood is the best material for the soup spoon.” Next, present evidence from observations, measurements, or a comparison table. Explain how each piece of evidence supports the choice. For example, the wooden sample stayed cooler to the touch than the metal sample after equal time in warm water, and its sealed surface did not absorb visible water. Then connect the evidence to the purpose: a cooler handle makes the spoon safer and more comfortable to hold. Include linking words such as because, therefore, and for example. You may also recognize a disadvantage, such as wood wearing faster than metal, and explain why the benefits still outweigh that cost for the intended use.