Identifying Mystery Materials by Their Properties
Students observe and measure properties such as color, hardness, magnetism, solubility, and mass to identify mystery materials and recommend one for a practical use.
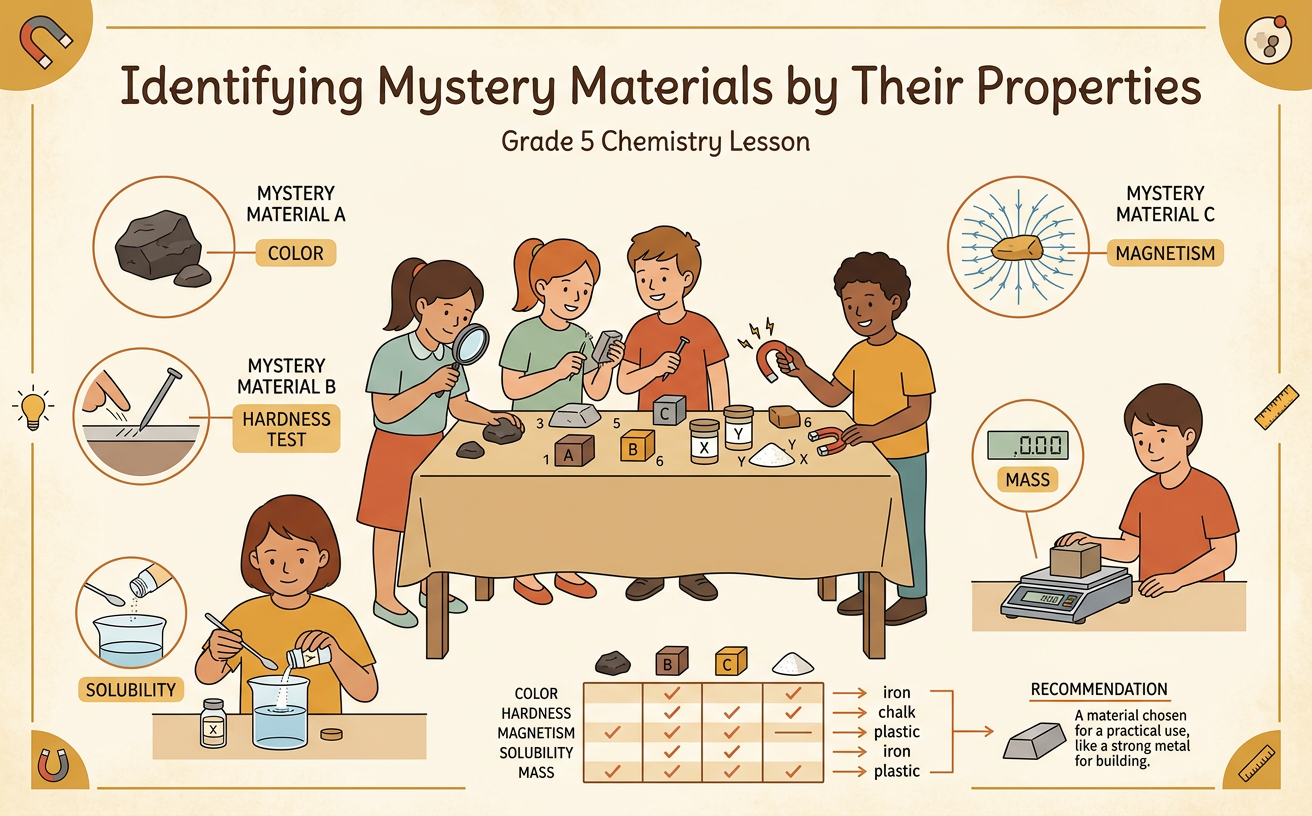
Illustrations are auto-generated and may be placeholders. They can be refreshed to match the narration.
What Are Physical Properties?
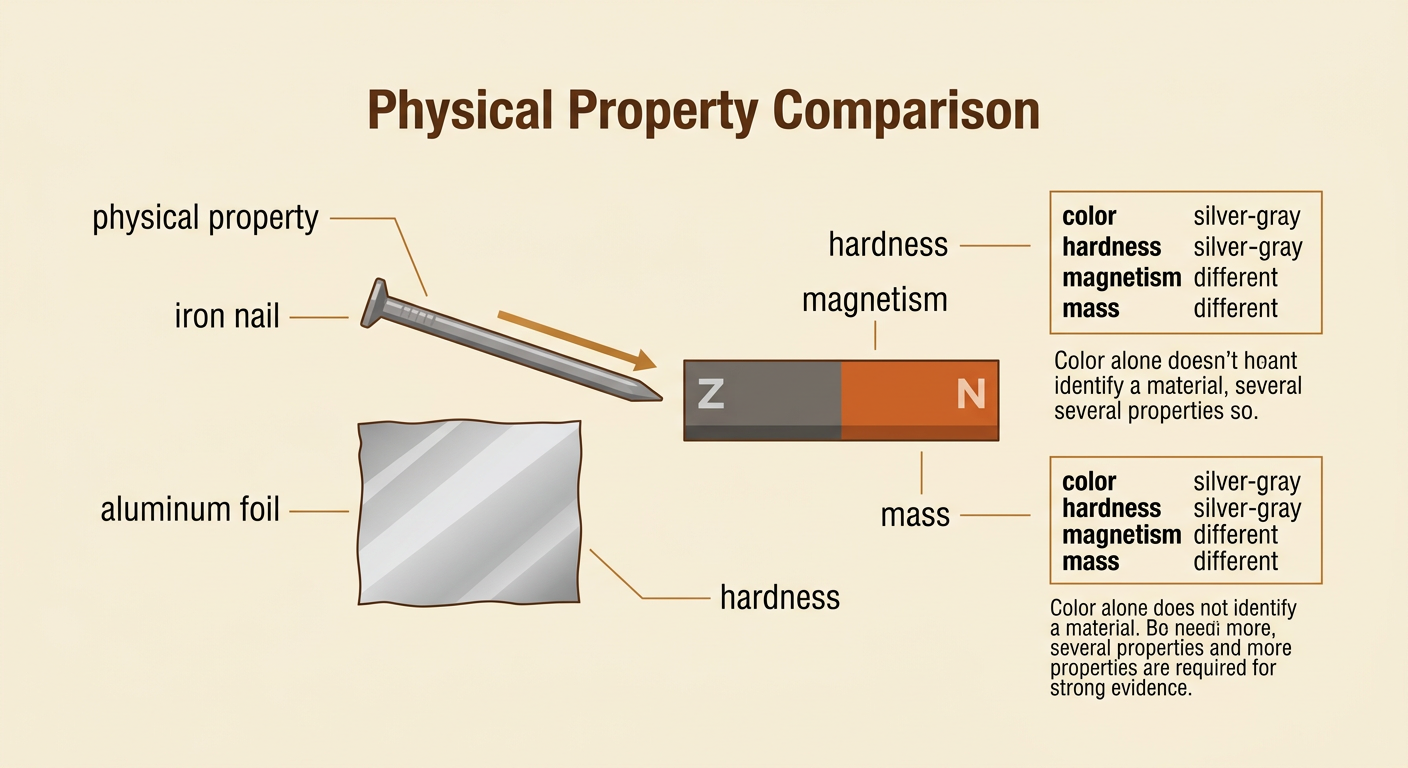
Physical properties are features of a material that can be observed or measured without changing the material into a different substance. Color, texture, hardness, magnetism, solubility, and mass are physical properties. Solubility describes whether and how well a substance dissolves in a liquid. Hardness describes how difficult a material is to scratch. Scientists use several properties because one property alone may not identify a material. For example, both an iron nail and aluminum foil may look silver-gray, but only the iron nail is attracted strongly to a magnet. The nail is also harder and usually has more mass than an equal-sized piece of foil. A careful list of properties provides evidence that can distinguish materials that look similar.
Observe the Mystery Materials
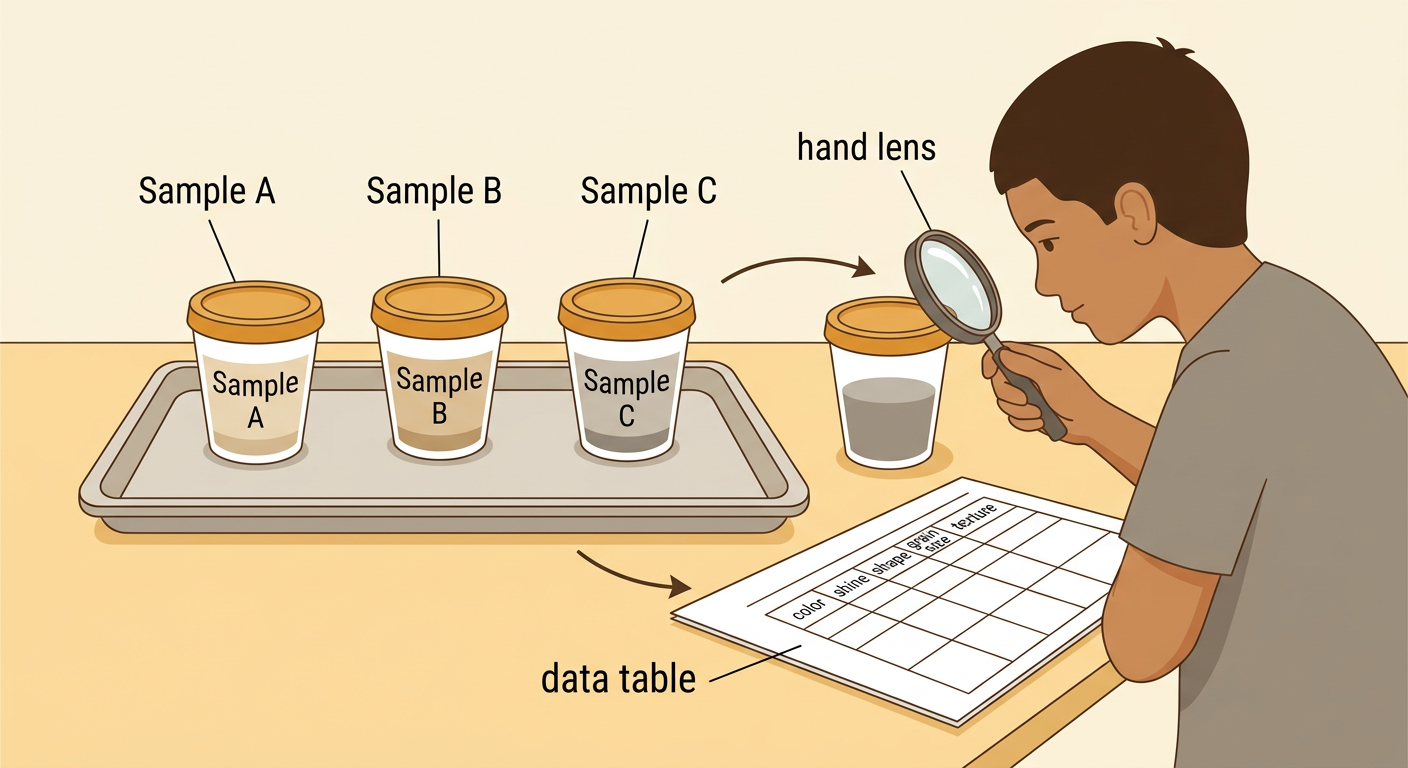
Begin by observing each mystery material without tasting it or touching it with bare hands. Give every sample a letter, such as Sample A, Sample B, or Sample C, so observations are not influenced by guesses. Look closely at color, shine, shape, grain size, and texture. Use a hand lens when details are difficult to see. Record facts rather than opinions. “Sample A has small, white crystals” is useful evidence, while “Sample A looks nice” is not. For example, salt and sugar are both white solids, but their crystal shapes may look different under a hand lens. Keep samples separate and use a clean tool for each one. A labeled data table helps the investigation remain organized, fair, and safe.
Measure and Test Properties
Use the same procedure for every sample so the results can be compared fairly. Find mass with a balance and record it in grams. Remember that 1,000 milligrams equals 1 gram, so 2,500 milligrams equals 2.5 grams. Test magnetism by bringing a magnet near the sample without mixing them. Test hardness by checking whether the material can be scratched by the same object, such as a fingernail or copper penny. To test solubility, place equal masses of the samples in separate cups containing equal volumes of water. Stir each cup for the same amount of time. For example, if 2 grams of Sample B disappear completely in 20 milliliters of water, record it as soluble under those conditions. Wear safety goggles and follow the teacher’s directions during every test.
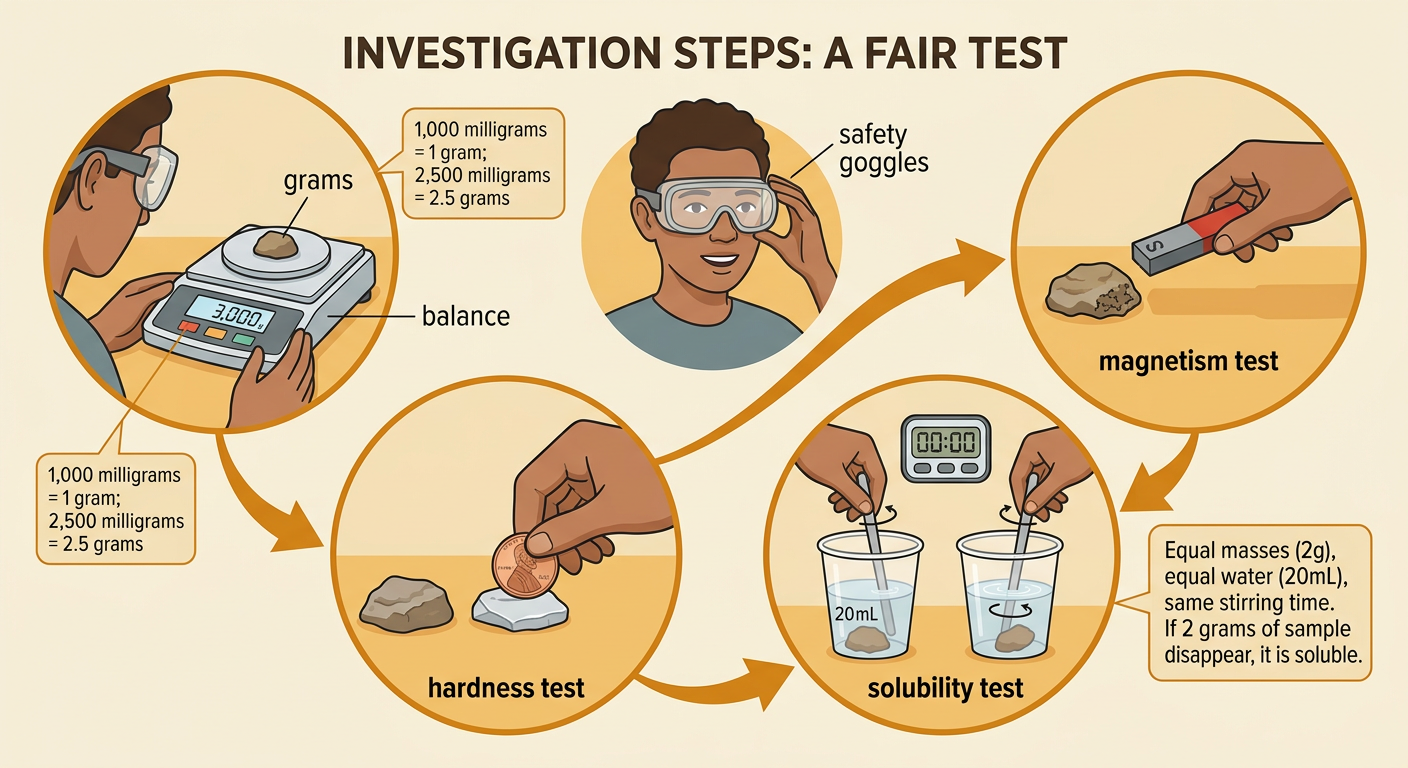
Compare Results with a Property Chart
After testing, compare the data with a reliable property chart for known materials. Look for a material whose full set of properties matches the mystery sample. Do not choose a match based only on color. Suppose Sample A is silver-gray, magnetic, difficult to scratch with a copper penny, and has a mass of 24 grams for the tested piece. A chart may show that iron has the same color, is magnetic, and is relatively hard, while aluminum is silver-gray but not magnetic. The combined evidence supports identifying Sample A as iron. If one result does not match, repeat the test and check the procedure. Differences in sample size can affect mass, so compare equal-sized samples or use mass only as one clue. Record both matching and nonmatching evidence.
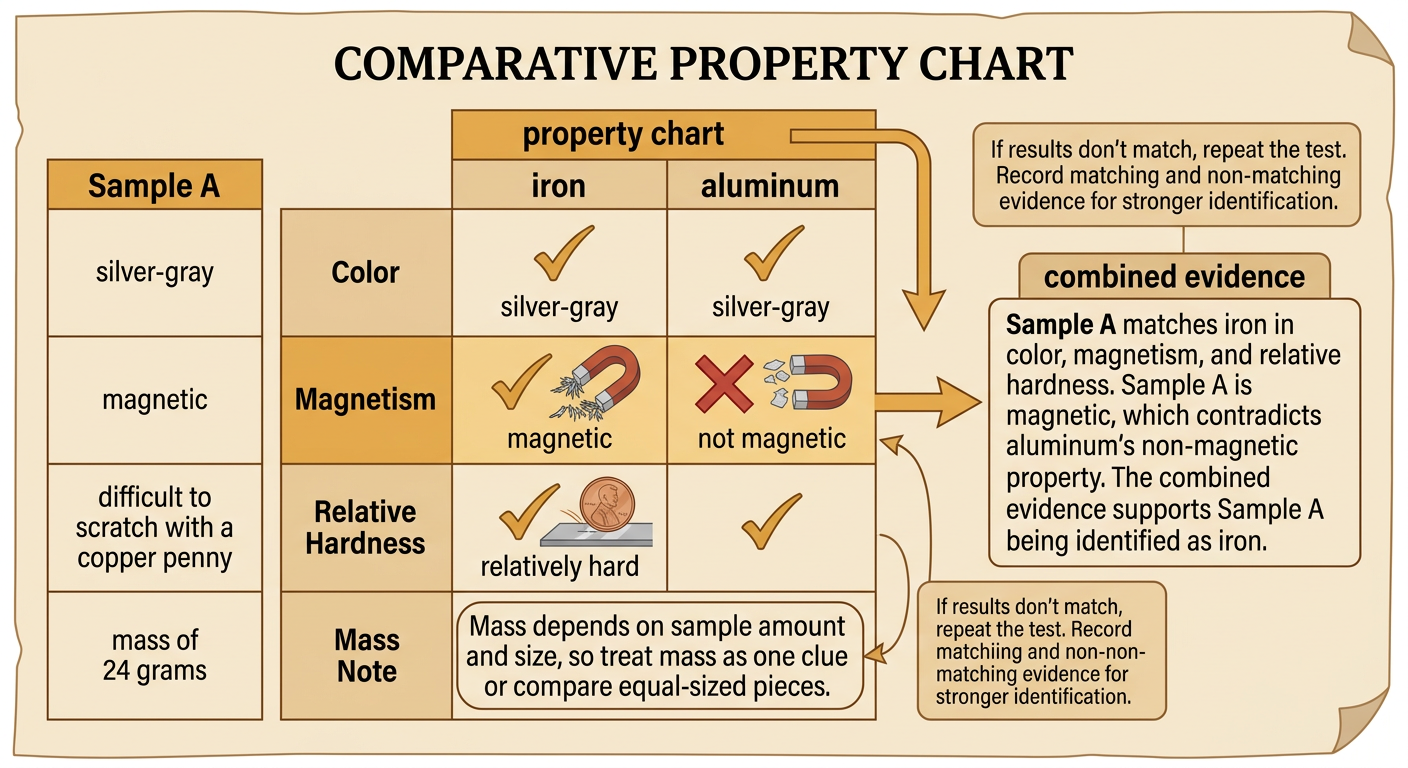
Identify and Select the Best Material
Identifying a material and selecting it for a job are related but different tasks. First, use property evidence to name each mystery material. Next, decide which properties matter for the intended use. Imagine choosing a material for a reusable outdoor sign. A plastic sheet may be lightweight, waterproof, and inexpensive, but it can bend or crack. A steel sheet may be strong and durable, but it is heavier, may rust without protection, and may cost more to move. Aluminum is lightweight and resists corrosion, although it may cost more than some plastics. Compare benefits and costs before recommending a choice. The best material is not always the strongest or cheapest; it is the one that meets the most important needs while keeping disadvantages acceptable.
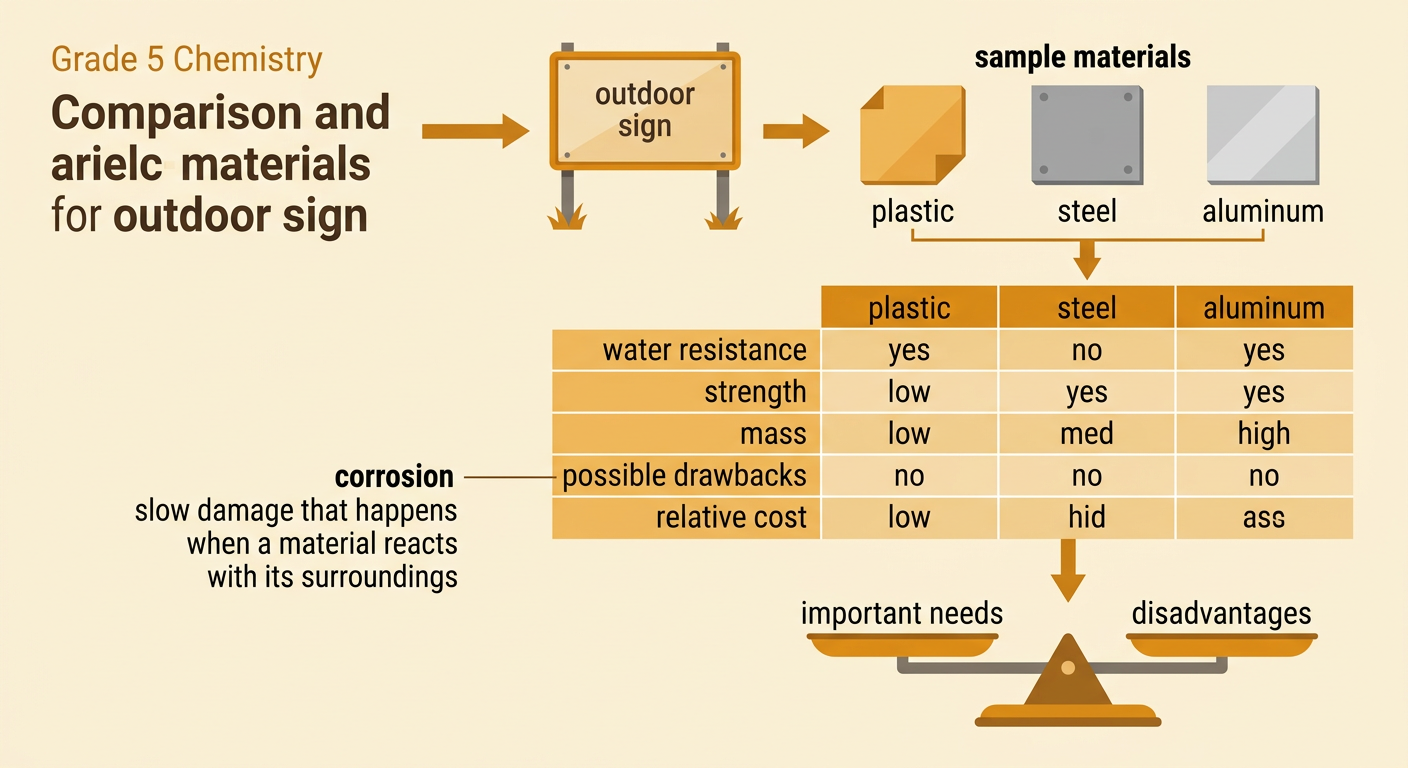
Explain the Choice with Evidence
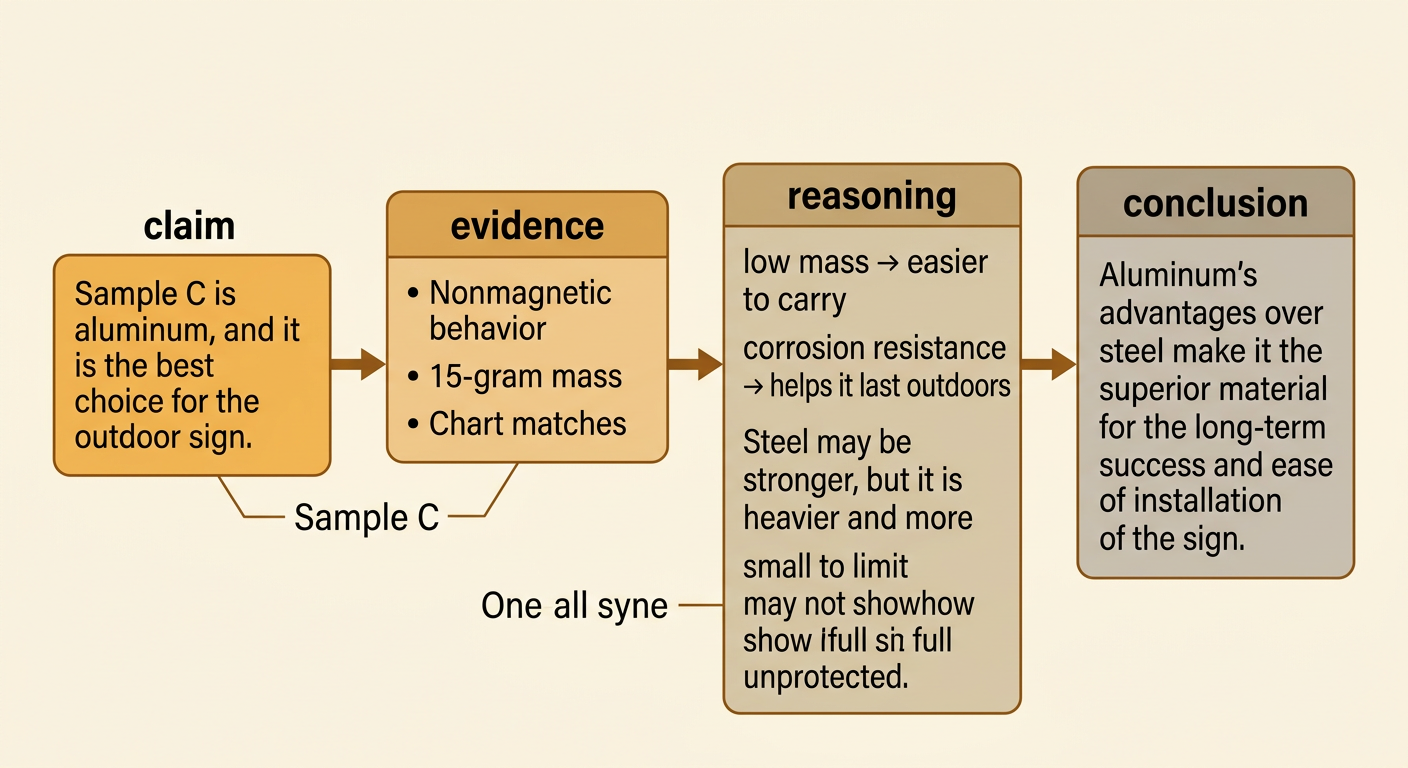
Write an informative explanation that states the identification, presents evidence, and connects the evidence to the recommended use. Begin with a clear claim, such as, “Sample C is aluminum, and it is the best choice for the outdoor sign.” Then include measured facts: “It was not attracted to a magnet, had a mass of 15 grams, and matched aluminum on the property chart.” Explain why those facts matter: low mass makes the sign easier to carry, and aluminum’s corrosion resistance helps it last outdoors. Include a comparison to another option, such as steel being stronger but heavier and more likely to rust if unprotected. Use measurement units correctly and mention any limits in the evidence. Finish with a conclusion that restates why the benefits outweigh the costs for this particular use.