
Keeping Ice Cold: Heat Transfer and Materials
Students test different wrapping materials to observe heat transfer, compare ice melting, and recommend an effective material for keeping an object cold.

Illustrations are auto-generated and may be placeholders. They can be refreshed to match the narration.
What Makes Ice Melt?
Ice melts when it gains heat energy from warmer surroundings. Heat energy moves from warmer air, hands, tables, and sunlight toward the colder ice. As the ice absorbs this energy, solid water changes into liquid water. Cold does not move out of the ice; heat moves into it. For example, an ice cube on a warm plate melts faster than an ice cube in a cool room because the warm plate transfers more heat to the ice. Wrapping materials can slow this transfer by creating a barrier between the ice and its surroundings. Materials that slow heat transfer are called insulators. No wrapping can stop heat transfer forever, but an effective insulator can help the ice stay frozen longer.

Choose Wrapping Materials
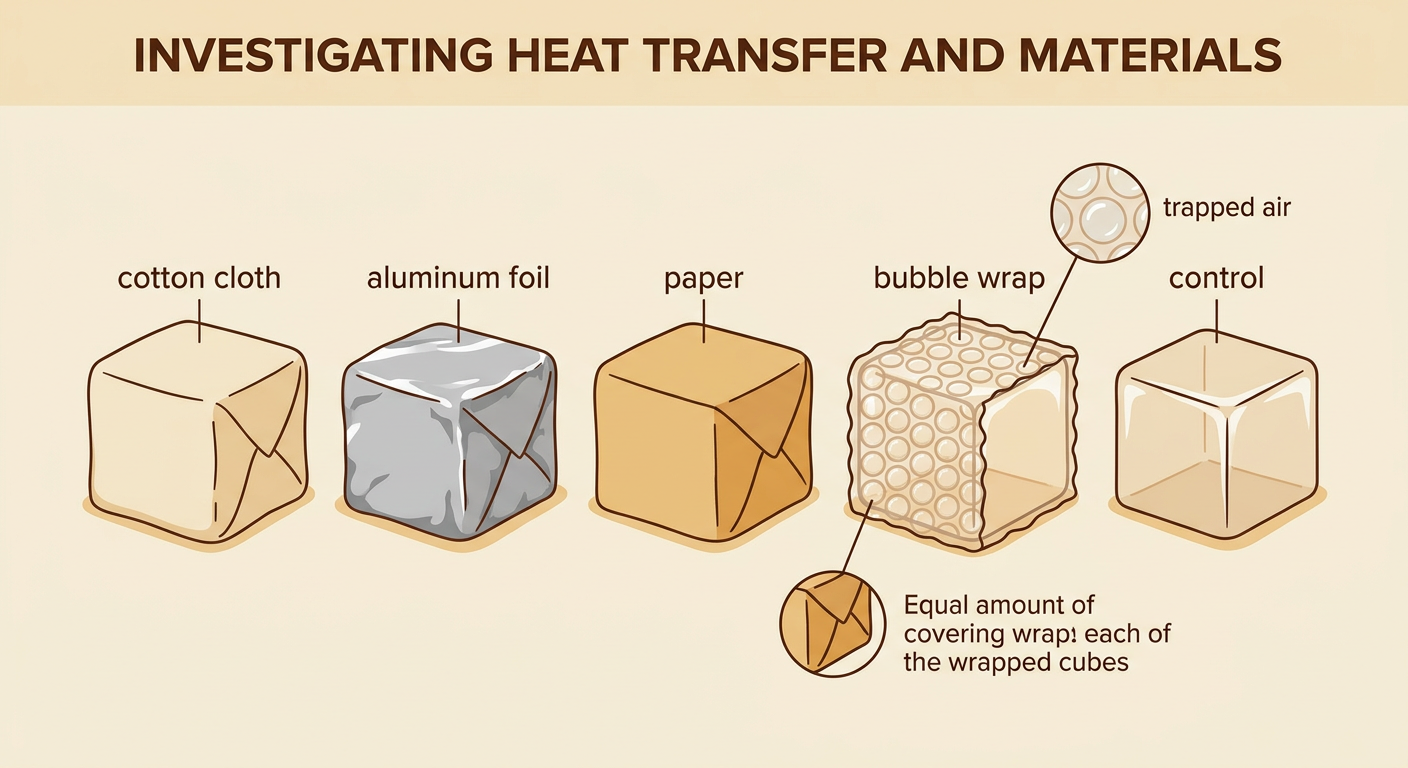
Choose several materials that might slow heat transfer, such as cotton cloth, aluminum foil, paper, or bubble wrap. Also test an unwrapped ice cube as a control for comparison. Use ice cubes of about the same size and equal amounts of each wrapping material. This makes the test fair because the main difference is the material being tested. Before testing, examine each choice and predict what will happen. For example, bubble wrap contains pockets of trapped air, which may slow heat transfer. Think about practical benefits and drawbacks too. Cotton can be reused, but it may absorb water. Aluminum foil is light and easy to shape, but it can tear. Bubble wrap may insulate well, but it creates plastic waste unless it is reused.
Conduct the Ice Test
Place one equal-sized ice cube in each wrapping material and leave one cube unwrapped. Put all samples on identical plates in the same indoor location. Start a timer as soon as the test begins. Observe the cubes at regular intervals, such as every five minutes, without squeezing or frequently opening the wrappings. Record whether each cube is solid, partly melted, or completely melted. If possible, measure the amount of liquid water on each plate. Students can work in teams with roles such as timer, observer, recorder, and materials manager. For example, the timer announces each five-minute check while the recorder writes the team’s observations. Handle meltwater carefully, wipe spills promptly, and keep water away from electrical devices.

Record and Compare Results
Organize observations in a table so the materials can be compared. Include columns for the wrapping material, observations at each time, and the total time until the ice completely melts. Numbers help show patterns clearly. In one example test, an unwrapped cube melted in 14 minutes, foil-wrapped ice in 18 minutes, cotton-wrapped ice in 28 minutes, and bubble-wrapped ice in 34 minutes. These are example results; classroom results may differ. Compare times by subtracting. Bubble wrap kept the ice frozen 20 minutes longer than no wrapping because 34 minus 14 equals 20. A bar graph can also display the results. The tallest bar represents the longest melting time and, under the tested conditions, the material that slowed heat transfer the most.

Recommend the Best Material
Use the test evidence to recommend a material for keeping an object cold. State your choice, support it with measured results, and explain its benefits and drawbacks. For example, a team might recommend bubble wrap because its ice cube took 34 minutes to melt, which was longer than the times for cotton, foil, and no wrapping. The team should also consider other needs. Bubble wrap is lightweight and can be reused, but it is made of plastic and may cost more than scrap paper. Cotton may be washable and reusable, but it can become wet and heavy. Different users may make different choices based on performance, cost, availability, waste, and ease of use. A strong recommendation explains why one material best fits the situation while recognizing its disadvantages.
