
Know Your Lab Gear: Names, Functions, and Setup
Students identify common Grade 6 laboratory equipment and explain how items are used to hold, transfer, mix, observe, and support materials during investigations.

Illustrations are auto-generated and may be placeholders. They can be refreshed to match the narration.
Equipment or Instrument?
Laboratory equipment is the general name for tools used during an investigation. Some equipment holds, transfers, mixes, or supports materials. An instrument is a tool designed to make an observation or measurement. For example, a beaker is equipment because it holds and mixes liquids. A thermometer is an instrument because it measures temperature. A balance measures mass, and a graduated cylinder measures liquid volume more accurately than a beaker. Before beginning an investigation, identify what each tool must do and select the correct item. Check that equipment is clean, undamaged, and suitable for the material. If a class needs to compare the temperatures of two water samples, students need containers to hold the water and a thermometer to collect measurements. Always follow the teacher’s directions for safe setup and use.

Containers: Beakers, Flasks, and Test Tubes
Laboratory containers have shapes suited to different tasks. A beaker is a wide, straight-sided container with a pouring spout. It is useful for holding, mixing, and heating liquids, but its markings provide only approximate volumes. An Erlenmeyer flask has a wide base and narrow neck. The shape reduces splashing when a liquid is gently swirled. A test tube holds a small amount of material for a reaction or observation. Test tubes should be placed upright in a test tube rack when they are not being held. For example, students comparing how quickly three solids dissolve could place equal liquid samples in three labeled test tubes. They would add one solid to each tube and observe the results. Glass containers must be checked for cracks, and heated glass must be handled only as directed.

Transfer and Mixing Tools
Transfer tools move materials from one container to another. A dropper or transfer pipette moves small amounts of liquid one drop at a time. It should not be used to measure an exact volume unless it has measurement markings designed for that purpose. A scoopula or lab spatula transfers small amounts of solid material. A funnel guides liquids or fine solids into containers with narrow openings. Mixing tools include a glass stirring rod and a rubber stopper used only when a procedure calls for sealing a container. For example, to prepare a saltwater mixture, use a scoopula to place salt in a beaker, add water, and stir with a stirring rod. Never taste chemicals or use fingers to transfer them. Use a clean tool for each substance so that materials are not accidentally mixed or contaminated.

Observation and Handling Instruments
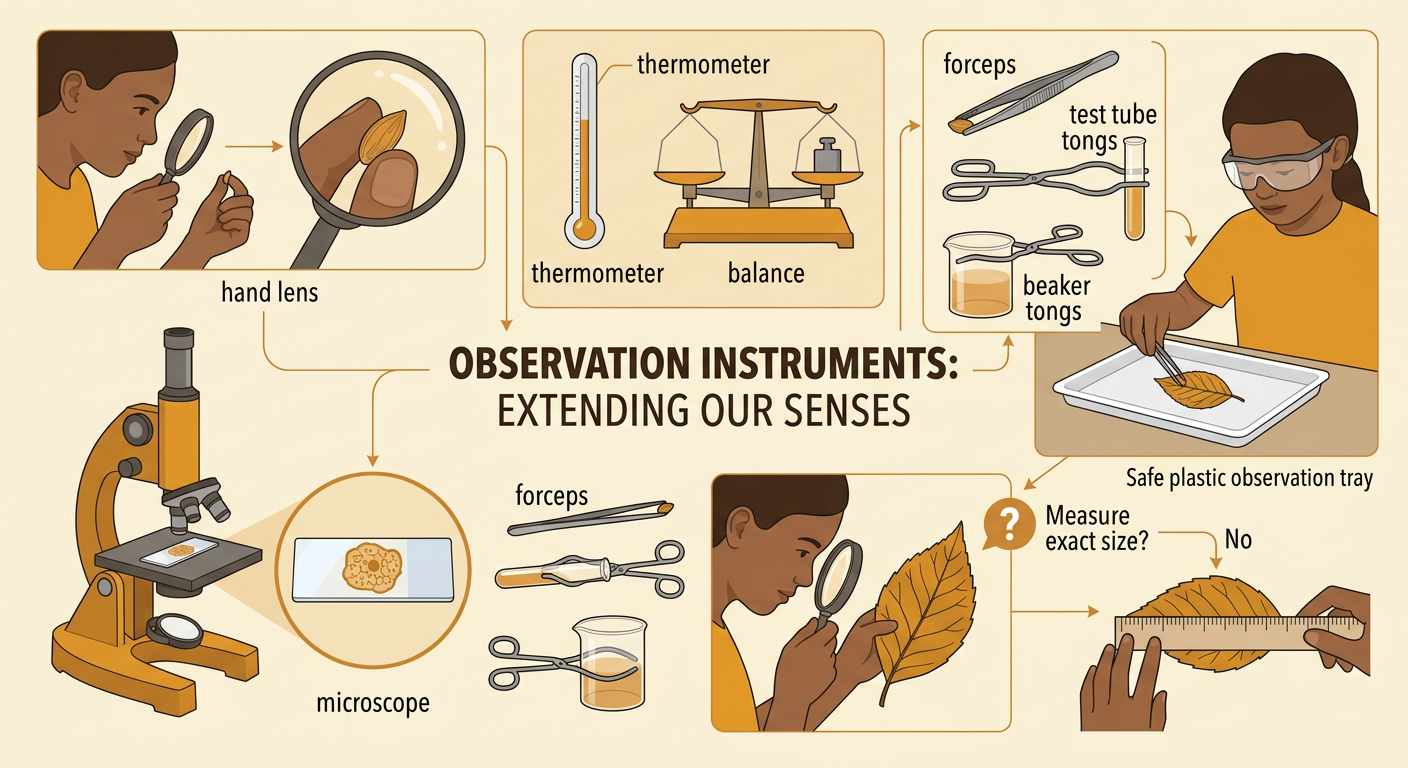
Scientists use observation instruments to gather information that their senses alone cannot provide. A hand lens makes a small object appear larger. A microscope provides greater magnification for viewing very small specimens. A thermometer measures temperature, while a balance measures mass. Handling tools protect samples and help keep hands away from materials. Forceps grasp small objects, test tube tongs hold a test tube, and beaker tongs move certain hot beakers when the teacher directs their use. For example, students examining a leaf could use forceps to place it on a tray and a hand lens to observe its veins. They might record the vein pattern but should not claim that the hand lens measures size unless they also use a ruler. Select an instrument according to the observation or measurement needed, and use it only as instructed.
Match Each Item to Its Function
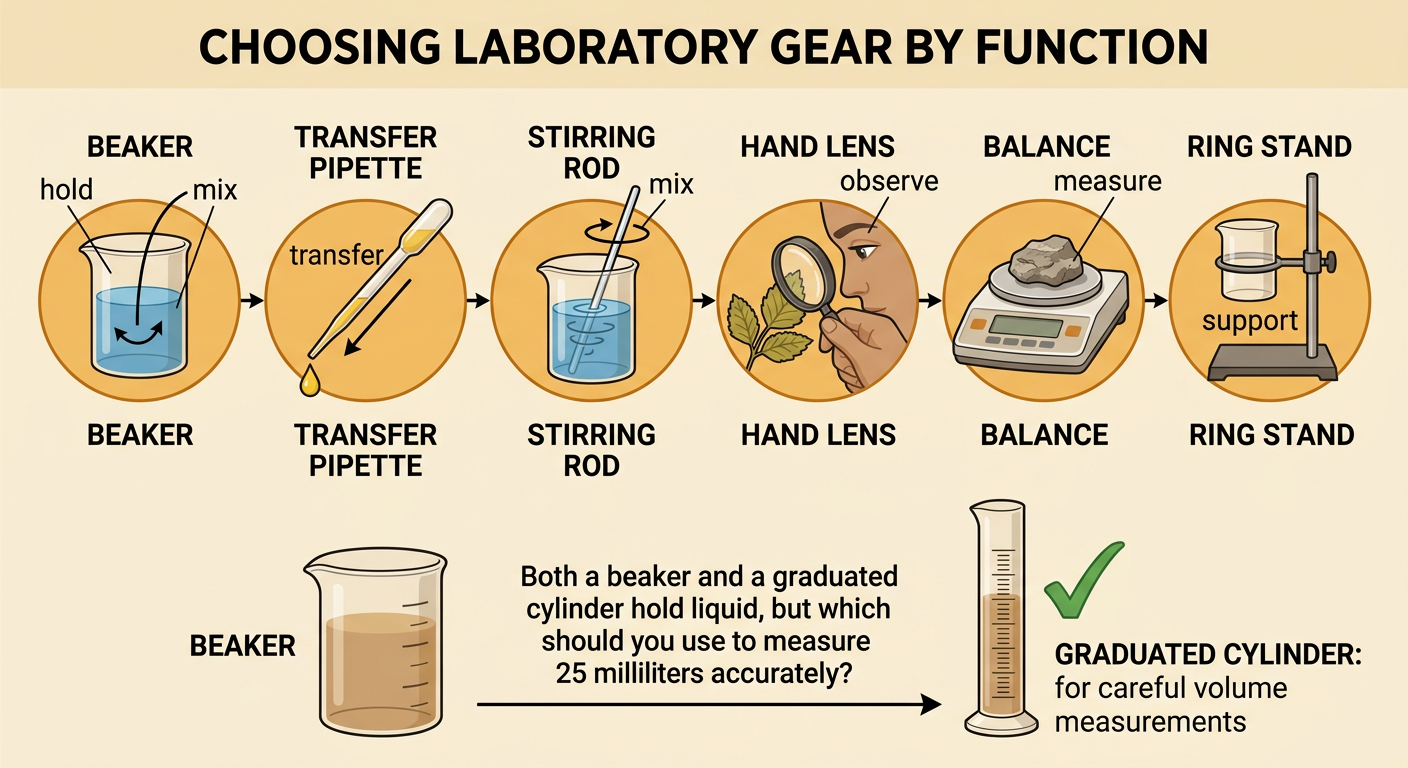
Choosing laboratory gear begins with the task, not with the tool’s appearance. Ask whether you need to hold, transfer, mix, observe, measure, or support something. A beaker holds and mixes liquid. A transfer pipette moves a small amount of liquid. A stirring rod mixes materials. A hand lens improves visual observation. A balance measures mass, and a ring stand supports equipment with the correct clamp. Some items can perform more than one function, but they are not equally accurate for every task. For example, both a beaker and graduated cylinder can hold liquid, but the graduated cylinder is better for measuring volume. If a procedure says to measure 25 milliliters of water, choose a graduated cylinder rather than estimating with a beaker. Matching each item to its intended function makes an investigation safer and produces more reliable results.
Build an Equipment Setup
A good equipment setup is stable, organized, and matched to the procedure. To separate sand from water, first place a ring stand on a level surface. Attach a ring clamp securely to the stand. Set a funnel in the clamp, then fold and place filter paper inside the funnel. Position an Erlenmeyer flask directly below the funnel stem. Pour the sand-and-water mixture slowly from a beaker, guiding the flow with a stirring rod if the teacher instructs you to do so. The liquid that passes through the paper is the filtrate, while the sand remaining on the paper is the residue. Before pouring, check that the clamp is tight, the flask is centered, and the setup will not tip. Wear required safety equipment and follow each step in order rather than changing the setup during the procedure.
