
Making and Changing Shadows
Students investigate how an object blocks light to make a shadow and how moving the object changes the shadow’s size and position.
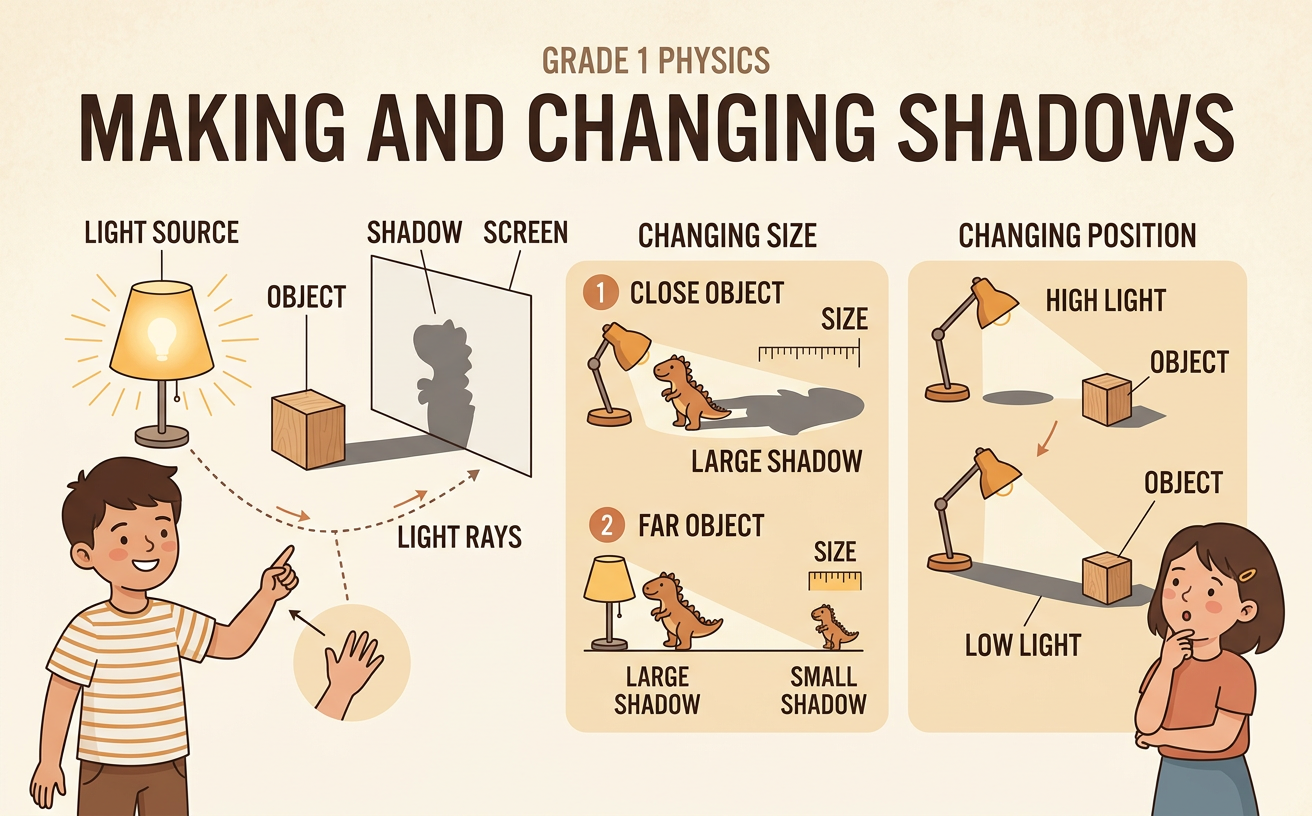
Illustrations are auto-generated and may be placeholders. They can be refreshed to match the narration.
Notice a Shadow
Look around for a shadow. You might see your shadow on the playground when sunlight shines on you. A shadow is a dark area made when an object blocks light. To explore one indoors, place a toy between a flashlight and a wall. Ask an adult or partner to help, and never shine the flashlight into anyone’s eyes. Notice the bright wall and the darker shape behind the toy. The toy is in the path of the light, so some light cannot reach the wall. Talk with a partner about what you notice. Where is the shadow? What shape does it have? You may notice that the shadow looks a little like the outline of the toy.

Block the Light
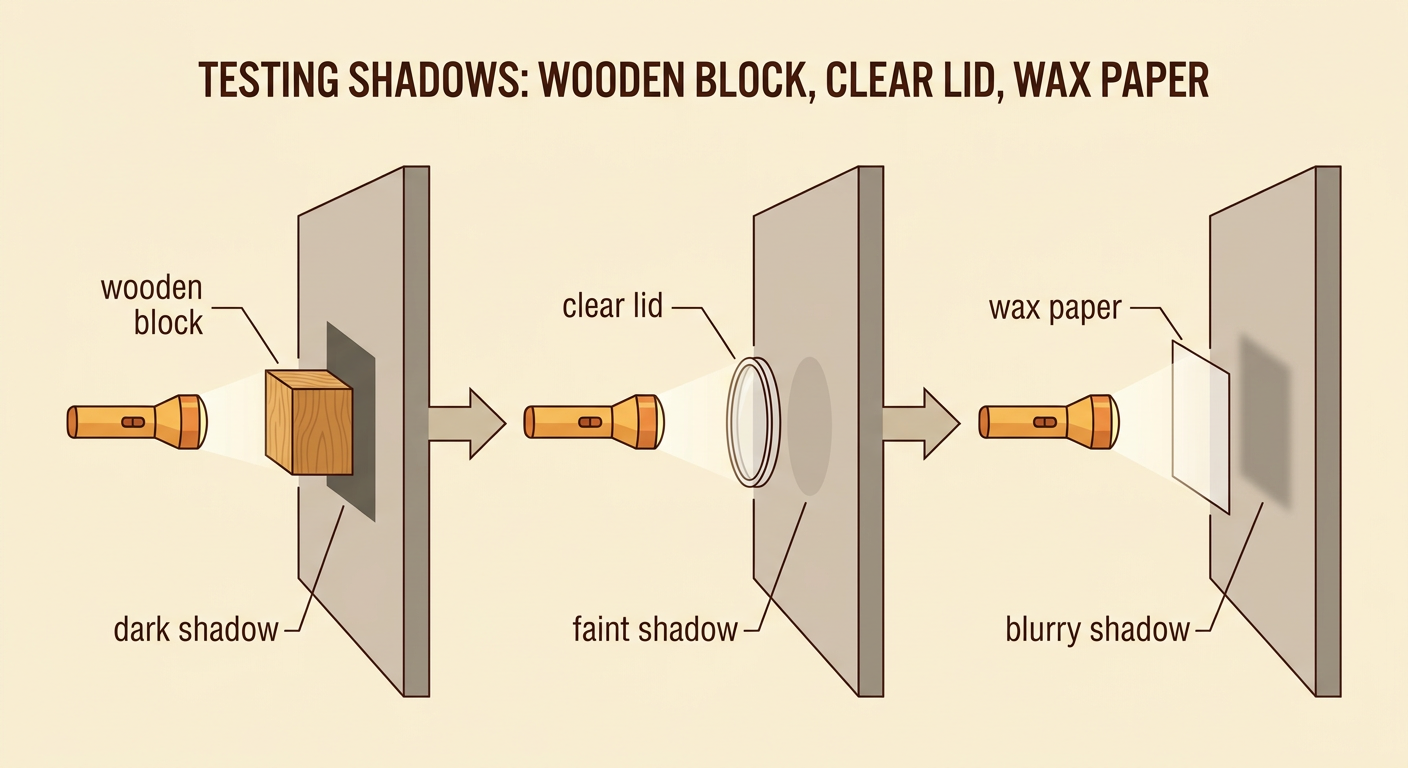
Plan a test with a flashlight, a wall, and several objects. Try a wooden block, a clear plastic lid, and a sheet of wax paper. Place each material in the same spot between the flashlight and the wall. Observe what happens on the wall. The wooden block blocks most of the light and makes a dark shadow. The clear lid lets most light pass through, so its shadow may be very faint. Wax paper lets some light through but scatters it, so it can make a lighter, blurry shadow. Keep the flashlight still to make the test fair. Before each test, tell your partner what you think will happen. Then compare your idea with what you observe.
Move the Object
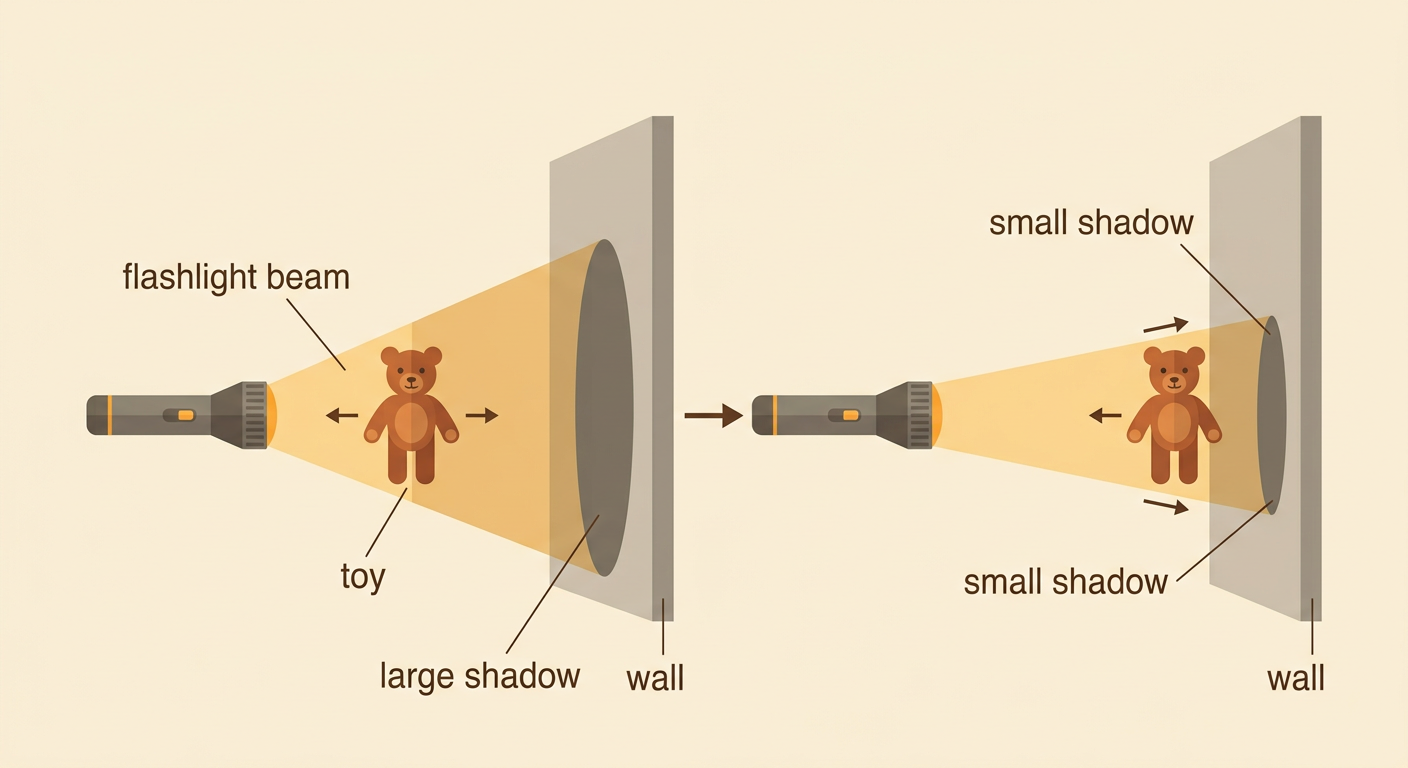
Now investigate what happens when you move an object. Shine a flashlight at a wall and hold a toy in the beam. First, move the toy close to the flashlight. Its shadow on the wall becomes larger because the toy blocks a wider part of the spreading beam. Next, move the toy closer to the wall. Its shadow becomes smaller and usually looks sharper. Keep the flashlight and wall in the same places while you move only the toy. You can also slide the toy up, down, left, or right. Watch the shadow move on the wall. Ask your partner, “What changed, and why?” Use what you observed to explain that moving the object changes where its blocked light reaches the wall.
Compare Shadow Changes
Scientists compare observations to find patterns. Work with a partner to make two shadow tests. In Test 1, place the toy close to the flashlight. In Test 2, place it close to the wall. Keep the same flashlight, toy, and wall. Describe each shadow with words such as large, small, high, low, dark, or blurry. You can trace each shadow on paper with an adult’s help, then place the tracings side by side. Explain a possible reason for every change. For example, “The first shadow was larger because the toy was closer to the flashlight.” Listen to your partner’s reason too. If your observations differ, repeat the test and check that only the toy’s position changes.

Share What We Discovered
Gather with your group and share what you discovered. Take turns speaking, listening, and asking questions. Show a shadow tracing or point to the setup as you explain. You might say, “The toy made a shadow because it blocked the flashlight’s light. When we moved the toy closer to the flashlight, the shadow became larger.” Give evidence from your test, such as two tracings with different sizes. Then explain your reason for the change. Classmates may ask, “What stayed the same?” or “What did you move?” Build on one another’s ideas by adding another observation. Together, make a class statement: An object in a beam of light can make a shadow, and moving the object can change the shadow’s size and position.
