
Mapping Our Community
Students identify common map features and create a simple map showing important places, landforms, and bodies of water in a community.

Illustrations are auto-generated and may be placeholders. They can be refreshed to match the narration.
What Is a Map?
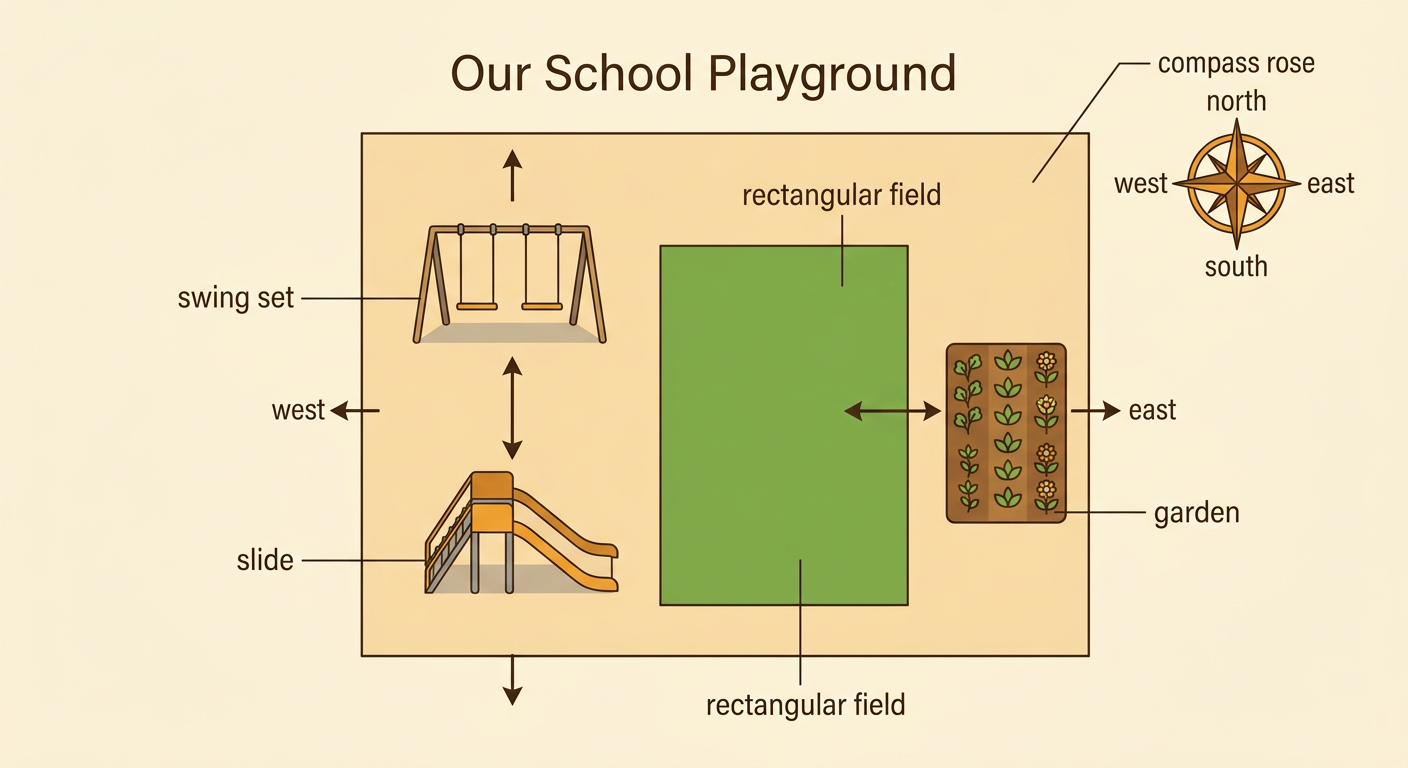
A map is a picture that shows where places and features are located. Most maps show an area as if you were looking down from above. A map can show a large place, such as a country, or a small place, such as a classroom. The title tells what area the map shows. A compass rose shows directions. North is usually near the top, south is near the bottom, east is to the right, and west is to the left. For example, a map titled Our School Playground might show the swings north of the slide and the garden east of the field. These map images help readers understand where each feature is located without visiting the playground.
Map Symbols and Keys
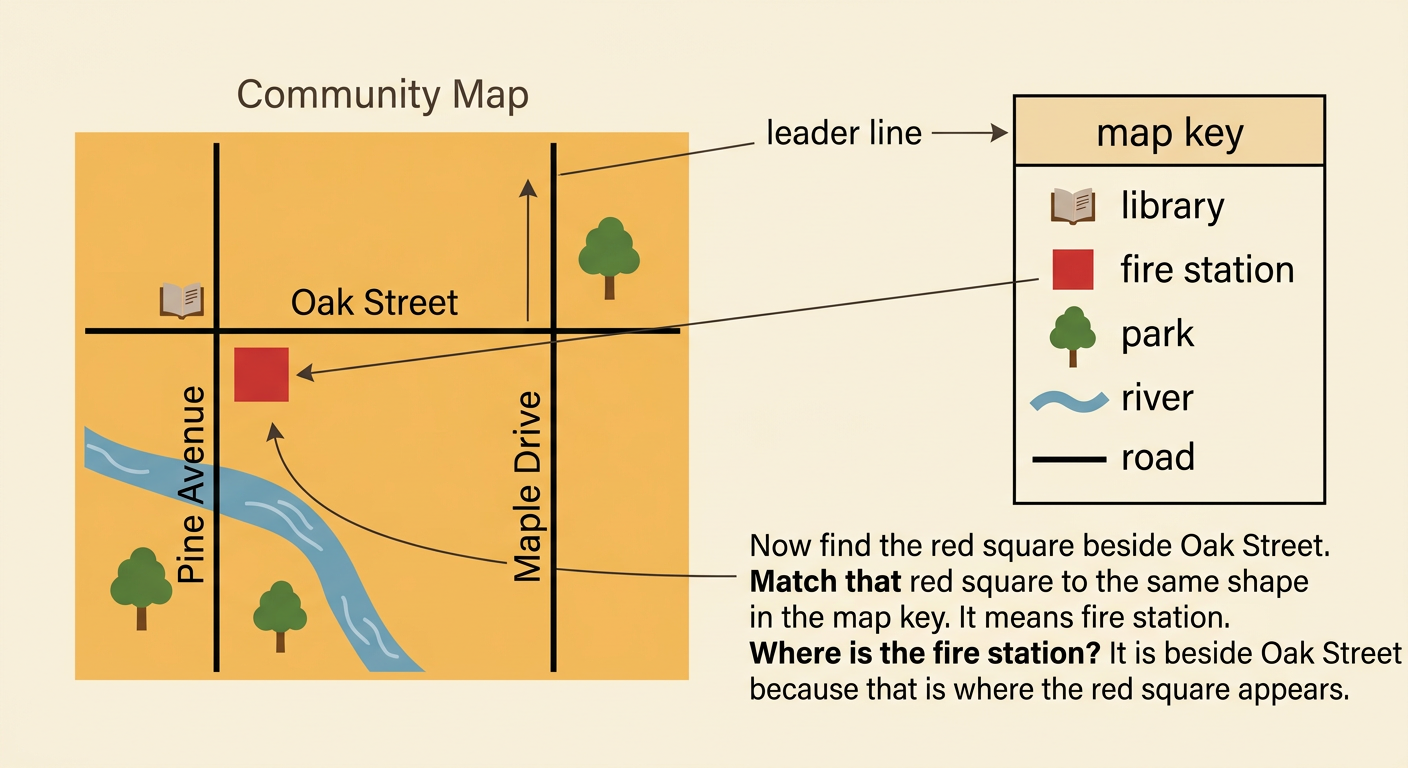
Mapmakers use symbols to show real places and features in a small amount of space. A symbol is a simple picture, shape, or color that stands for something. For example, a small book symbol might represent a library, and a blue line might represent a river. A map key explains what each symbol means. To read a map, find a symbol and then match it to the same symbol in the key. Maps may also use lines for roads and dots for locations. Imagine a map with a red square beside Oak Street. If the key says that a red square means fire station, you know the fire station is on Oak Street. Symbols and keys make maps easier to read and understand.
Community Places
A community is a place where people live, work, learn, and help one another. Community maps often show important places such as homes, schools, libraries, parks, stores, hospitals, police stations, and fire stations. Roads, sidewalks, and paths connect these places. Their positions on a map help people plan how to travel. For example, a map might show that the library is across the street from the park and that the fire station is south of the school. A person could use the map to walk from the school to the park by following Pine Street. When describing locations, use words such as near, far, beside, across from, north of, and south of. These words explain how community places are arranged.

Land and Water Features
Maps can show natural features as well as buildings and roads. Landforms are natural shapes of land, including mountains, hills, valleys, plains, and islands. Bodies of water include rivers, lakes, ponds, and oceans. Mapmakers often use brown or green for land and blue for water, but the map key gives the exact meaning. The shapes on a map can help us understand an area. For example, a winding blue line may show a river flowing between two hills. A blue shape surrounded by land may show a lake, while an island is land surrounded by water. When creating a community map, include the land and water features that belong in that area. Show their general shapes and where they are located compared with nearby places.

Create a Community Map
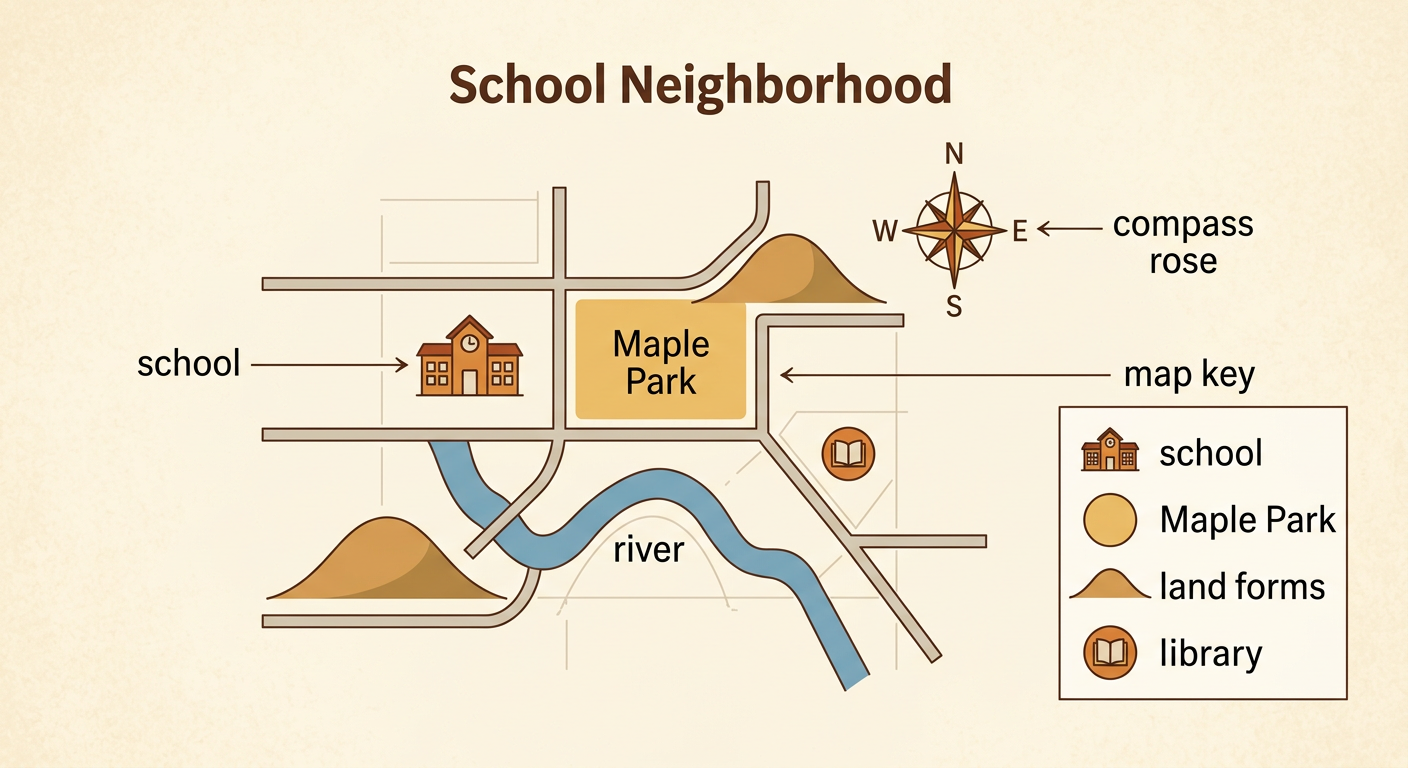
To create a community map, first choose a familiar area, such as the neighborhood around your school. Think about the important places, roads, landforms, and bodies of water there. Next, sketch the area as if you were looking down from above. Place features where they belong in relation to one another. Add simple symbols for places such as the school, library, and park. Draw roads as lines and water as blue shapes or lines. Then add a clear title, a compass rose, and a map key. For example, you might draw the school west of Maple Park, with a river south of both places. Check that every symbol appears in the key and that the map is neat enough for another person to read.
Share and Review
Share your finished map with a partner and explain what it shows. Point to the title, compass rose, symbols, key, community places, landforms, and bodies of water. Use location words to describe at least two features. For example, you might say, “The library is east of the school, and the river is south of the park.” Ask your partner to use the map to find a place or follow a route. If the partner is confused, check whether a symbol is missing from the key or whether a road is unclear. Helpful feedback might be, “Please label the lake,” or, “Add the park symbol to the key.” Revise the map so its images clearly match your explanation and help other people understand the community.
