
Mapping Our Community’s Land and Water
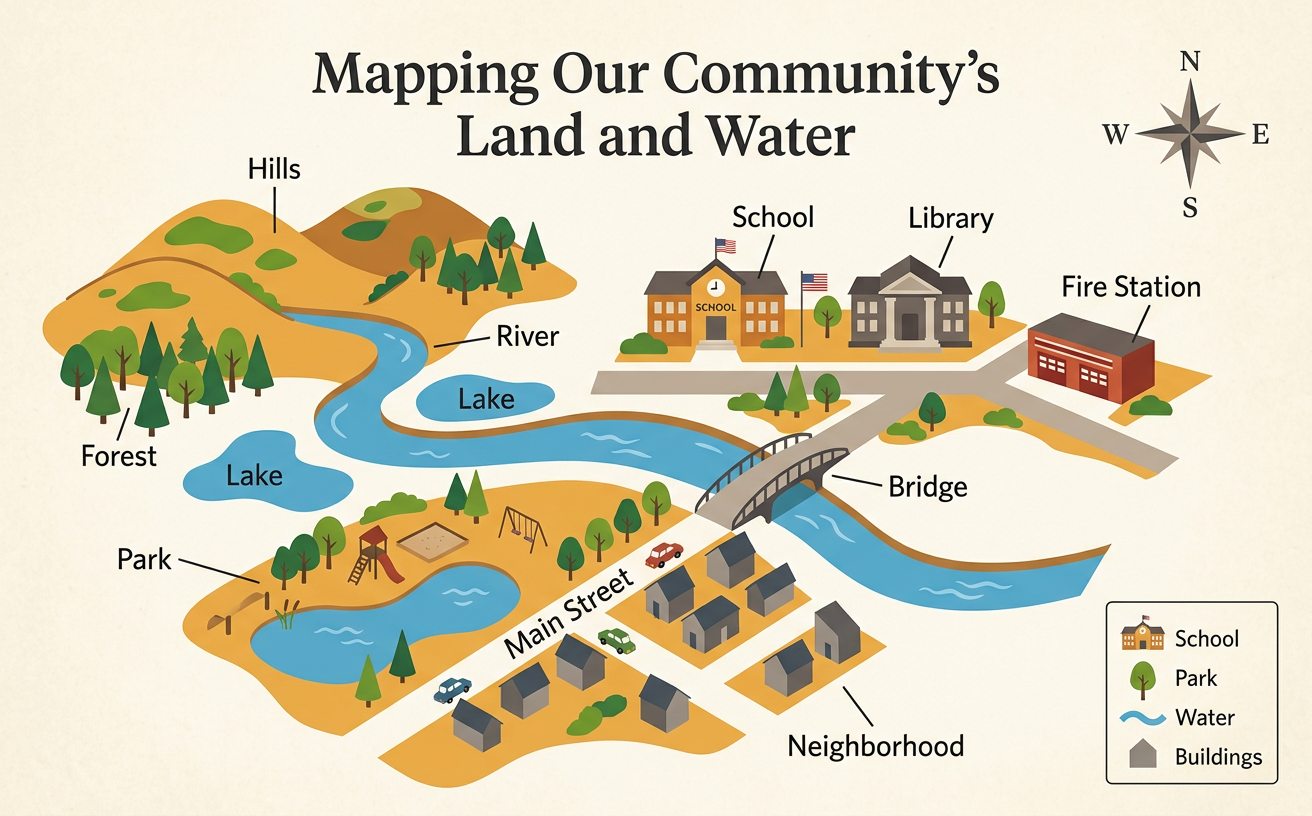
Students examine and create simple community maps showing important human features, landforms, and bodies of water.
Illustrations are auto-generated and may be placeholders. They can be refreshed to match the narration.
What Is a Community Map?
A community map is a drawing that shows a place where people live, work, learn, and play. It shows where features are located and how they are arranged. A map may show a school beside a park, a road crossing a river, or homes near a lake. Most maps look down on a place as if you were looking from high above. Maps are smaller than the real places they represent, so mapmakers use simple shapes, colors, and symbols. For example, a community map might use a small black square for the library and a blue shape for a pond. People use community maps to find places, plan routes, and learn about the land and water around them.

Natural and Human-Made Features
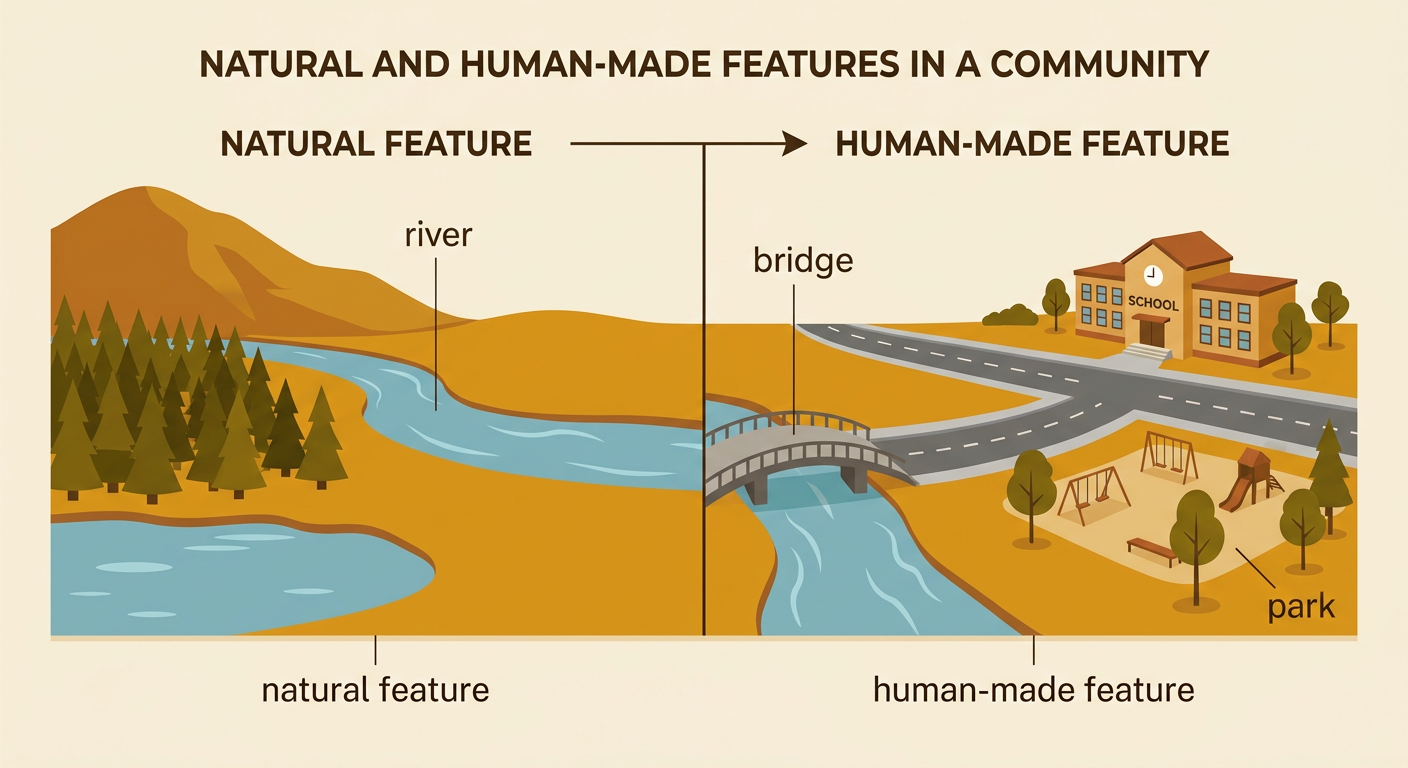
Community maps can show natural features and human-made features. Natural features are parts of Earth that were not built by people. Hills, valleys, rivers, lakes, forests, and beaches are natural features. Human-made features are built or changed by people. Houses, schools, roads, bridges, farms, and playgrounds are human-made features. A feature can help us understand how people use a place. For example, a bridge may cross a river so people can travel from one side to the other. A park may be built on flat land near a neighborhood. On a map, look carefully at each feature and ask, “Was this formed by nature, or was it made by people?” Sorting features into these two groups helps you understand your community.
Reading Symbols and a Map Key
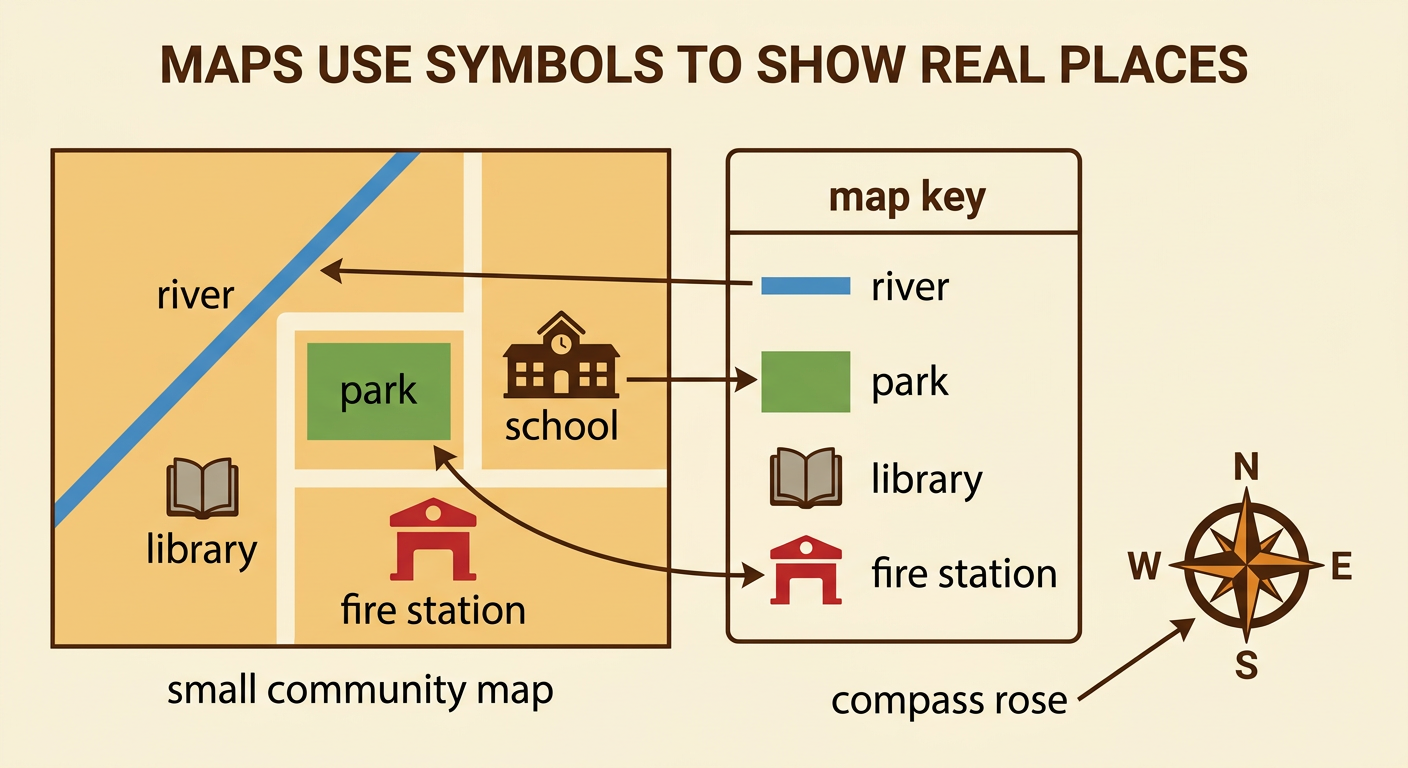
Maps use symbols to stand for real features. A symbol is a simple picture, shape, line, or color. A map key explains what each symbol means. For example, a blue line may represent a river, a green patch may represent a park, and a red cross may represent a fire station. Find the symbol in the key, and then look for the matching symbol on the map. Maps may also include a compass rose. It shows the directions north, south, east, and west. Suppose the school symbol is east of the park symbol. You can use the map key to identify both places and the compass rose to describe their locations. Symbols make maps clear without drawing every real-world detail.
Locate Land and Water
Maps help us locate different shapes and kinds of land and water. Landforms are natural shapes on Earth’s surface, such as hills, mountains, valleys, plains, and islands. Bodies of water include rivers, lakes, ponds, and oceans. A river is a long, flowing body of water. A lake is water surrounded by land. An island is land surrounded by water. Mapmakers often use brown or green for land and blue for water, but you should always check the map key. Notice where features are located in relation to one another. For example, a town might be on a plain south of a hill, with a river flowing beside it into a lake. These locations show how land and water shape a community.

Create a Community Map
To create a community map, first choose a familiar area, such as the blocks around your school or a neighborhood park. List the important natural and human-made features there. Next, imagine looking down from above and draw the main land and water shapes. Add roads, buildings, bridges, and other useful places in their correct general locations. Use simple symbols instead of detailed pictures. Include a title, a map key, and a compass rose. Use blue for bodies of water if that color appears in your key. For example, draw the school south of the park if the school is really in that direction. Add a blue pond west of the playground. Finally, compare your map with what you know about the area and correct any misplaced features.

Share and Explain the Map
Sharing your map helps others understand the community you represented. Begin by stating the map’s title and the place it shows. Point to the map key and explain what two or three symbols mean. Then describe where features are located by using words such as north, south, east, west, near, beside, between, and across. You might say, “The library is east of the park, and the bridge crosses the river.” Explain which features are natural and which are human-made. Also tell how the map image adds information. For example, a written sentence may name a lake, but the map shows the lake’s shape and its location near the school. Invite a classmate to ask a question, and use evidence from your map to answer.
