Maps and Symbols Help Us Find Places
Students explore map symbols and create a simple map showing a route between familiar places in their school.
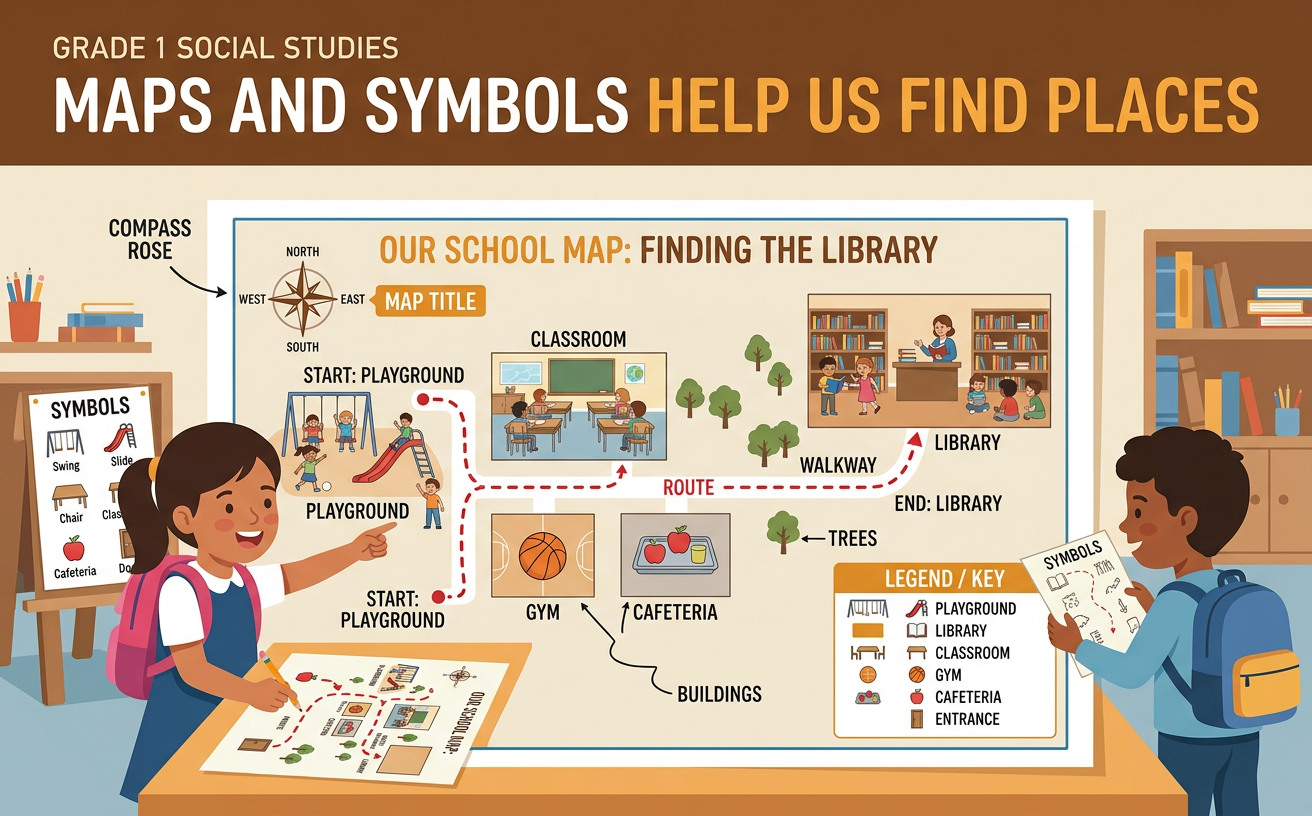
Illustrations are auto-generated and may be placeholders. They can be refreshed to match the narration.
What Is a Map?
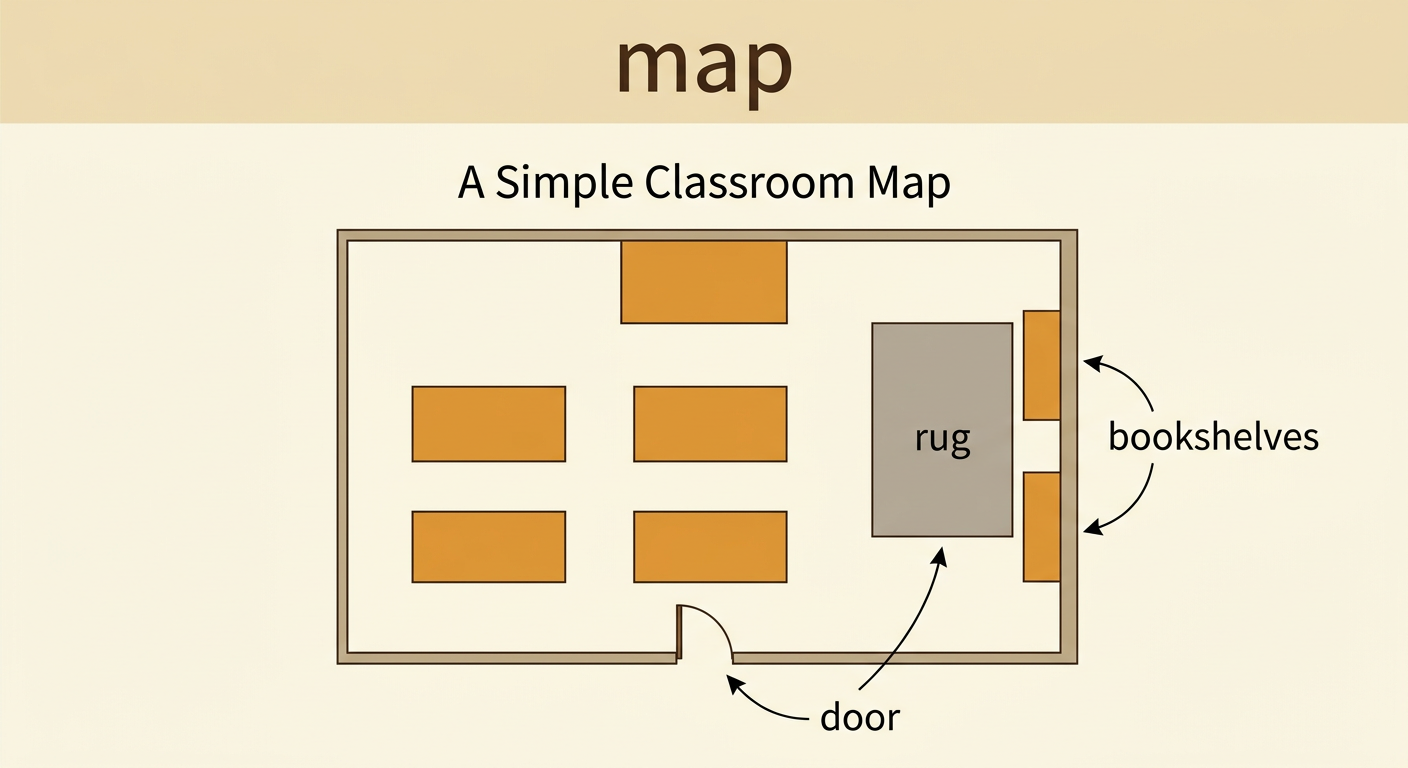
A map is a drawing that shows where places or objects are. Many maps show a place as if you were looking down from above. A map does not show every tiny detail. It includes the details people need to find places and move from one place to another. For example, a map of your classroom might show the door, tables, rug, bookshelves, and teacher’s desk. A rectangle can stand for a table, even though a real table is much larger. The spaces between the objects help you understand where they are. On the map, the rug may be beside the bookshelves and across from the door. By studying these locations, you can use the map to find your way around the classroom.
Map Symbols and Keys
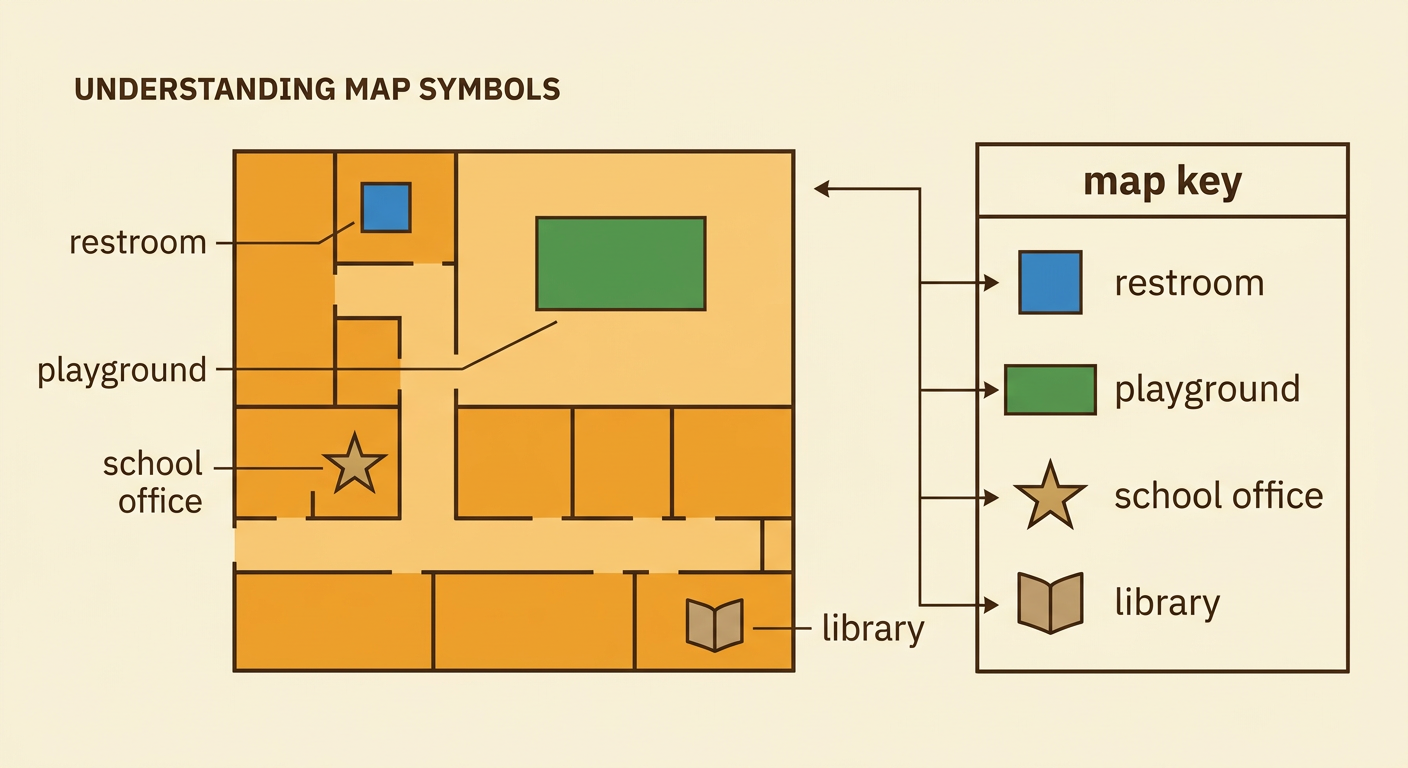
Mapmakers use symbols to show places and objects. A symbol is a simple picture, shape, color, or line that stands for something real. A blue square might stand for a restroom, a green rectangle might stand for the playground, and a star might stand for the school office. A map key explains what each symbol means. To use a key, find a symbol on the map and match it to the same symbol in the key. Symbols help keep maps neat and easy to read. Imagine that you see a book symbol at the end of a hallway. The key says that the book symbol means library, so you know where the library is. Everyone using the map should use the symbols in the same way.
Finding Places on a School Map
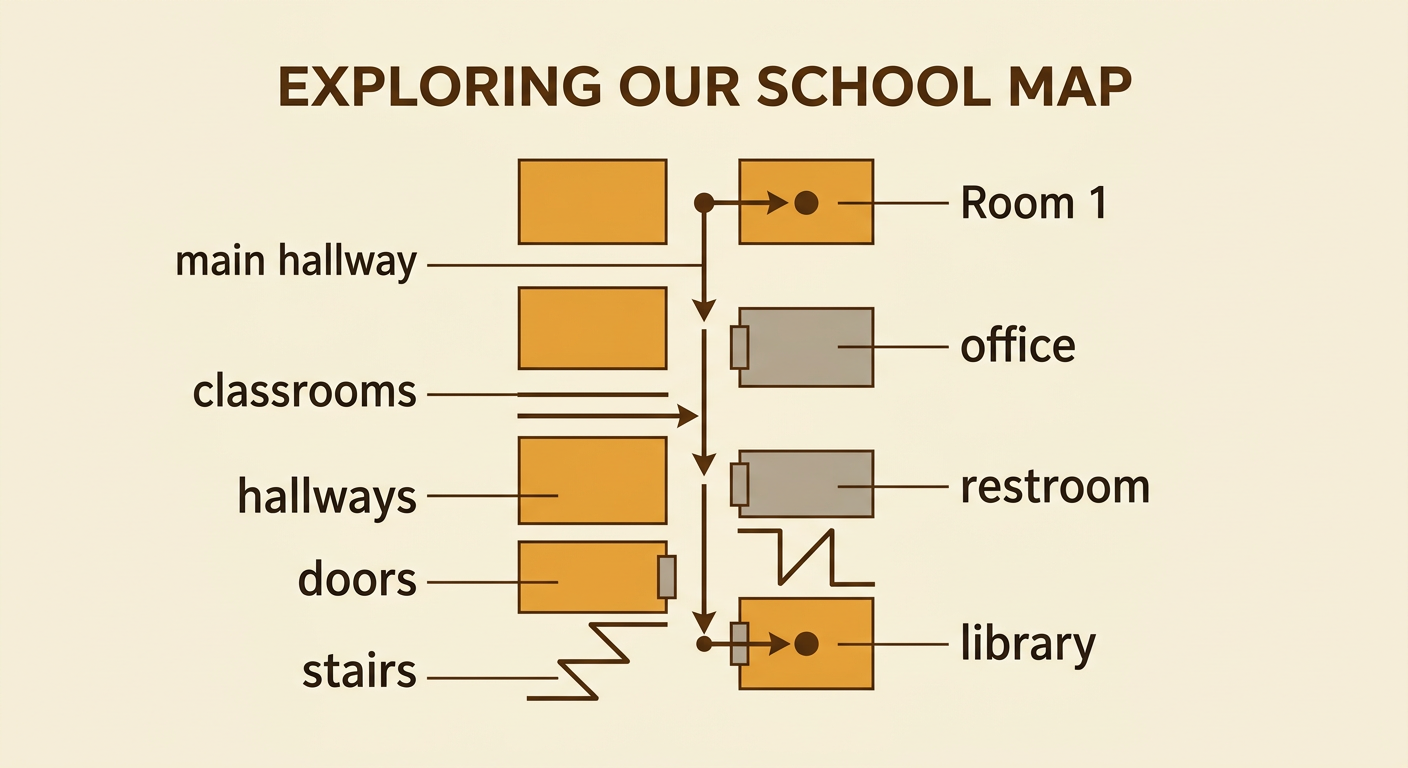
A school map can help you find classrooms, hallways, stairs, doors, and shared spaces. First, look at the map title and key. Then find the place where you are starting. Next, find the place you want to reach. Notice what is near, beside, across from, or between the two places. For example, suppose you are in Room 1 and want to go to the library. On the map, Room 1 opens into the main hallway. The library is past the office and across from the restroom. You can trace the hallway with your finger from Room 1 to the library. Lines can model hallways, and rectangles can model rooms. These simple shapes help you understand the real school building and the locations of its important places.
Plan a Helpful Route
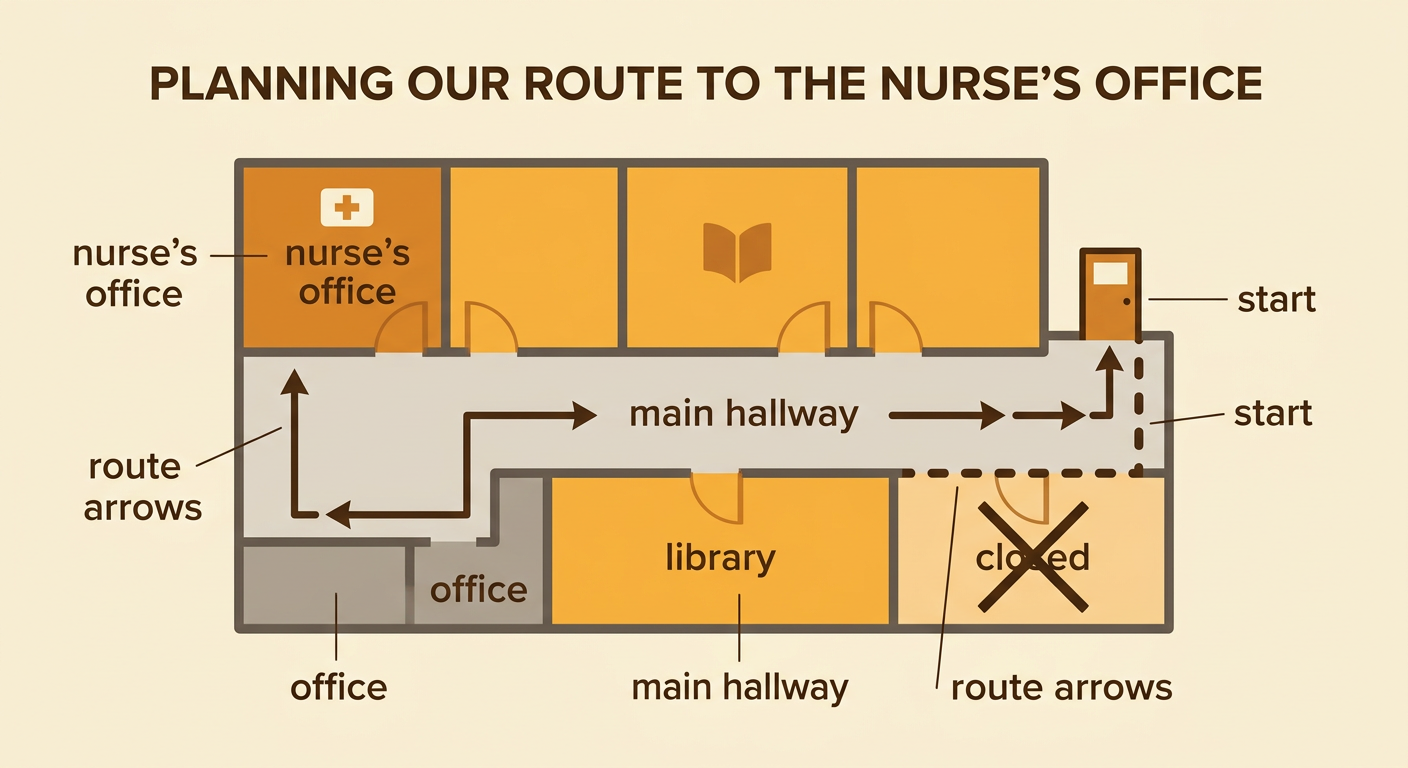
A route is the path you follow to travel from one place to another. Before drawing a route, ask questions and gather information. Where does the route start? Where does it end? Which hallways connect the places? Are any doors locked or areas blocked? Is there a safe path with enough space to walk? You can observe the school or ask a teacher for help. For example, plan a route from your classroom to the nurse’s office. Walk into the main hallway, pass the library, turn left at the office, and stop at the nurse’s door. Draw the route as one clear line with arrows. A helpful route should be easy to follow and should avoid unsafe or closed areas. Sometimes the best route is not the shortest route.
Draw and Share a Map
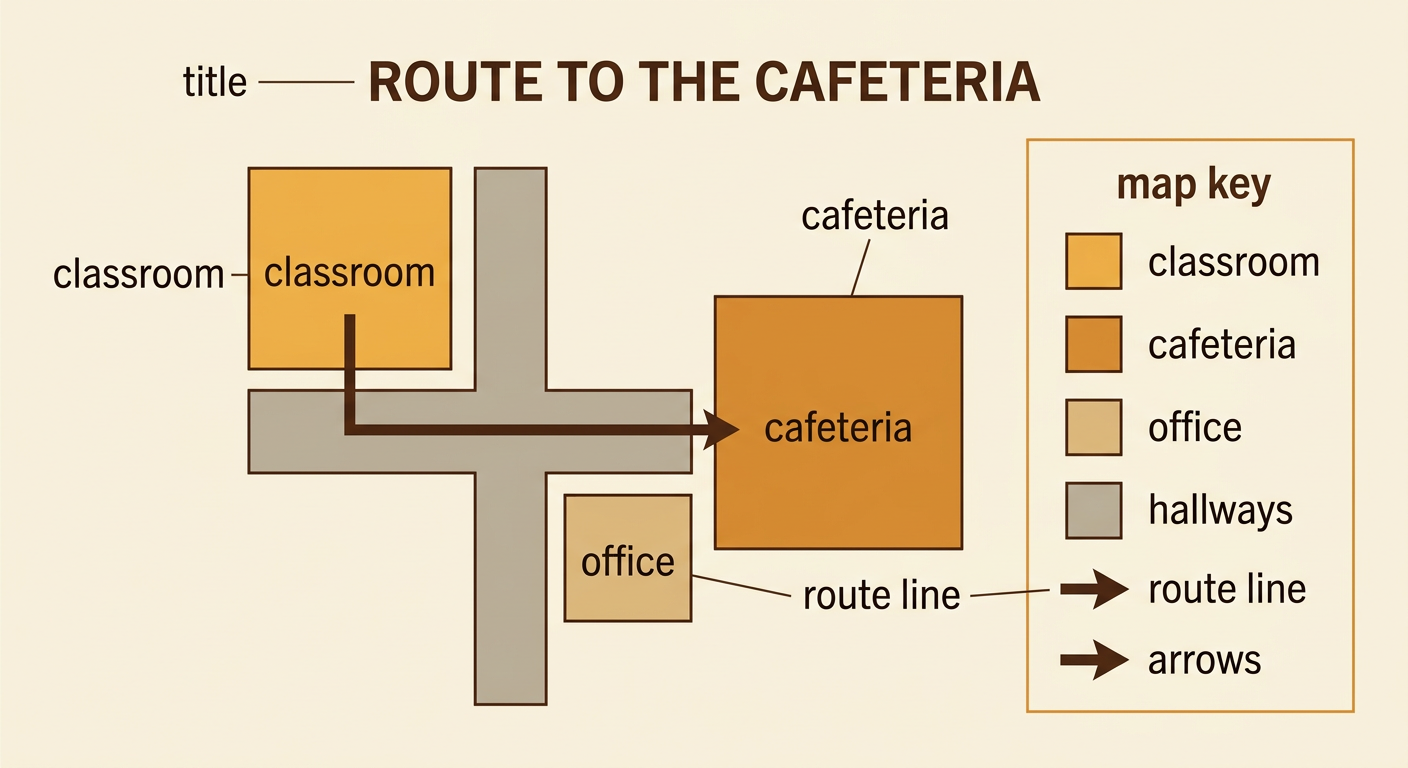
Now create a map of a familiar part of your school. Choose a starting place and a destination, such as your classroom and the cafeteria. Draw the rooms and hallways from a top-down view. Add simple symbols for important places. Make a key that explains every symbol you use. Then draw a route line with arrows from the start to the destination. Give your map a title and label the important places. Share the map with a partner. Ask your partner to trace the route and explain where to go. If the route is confusing or a symbol is missing from the key, revise your map. For example, you might add an arrow at a hallway turn. Testing and improving your map will make it a more useful tool for helping someone find a place.