Measure and Draw Angles with a Protractor
Students use a protractor to measure angles in whole-number degrees and draw angles with given measurements.
Illustrations are auto-generated and may be placeholders. They can be refreshed to match the narration.
Review Angles and Degrees
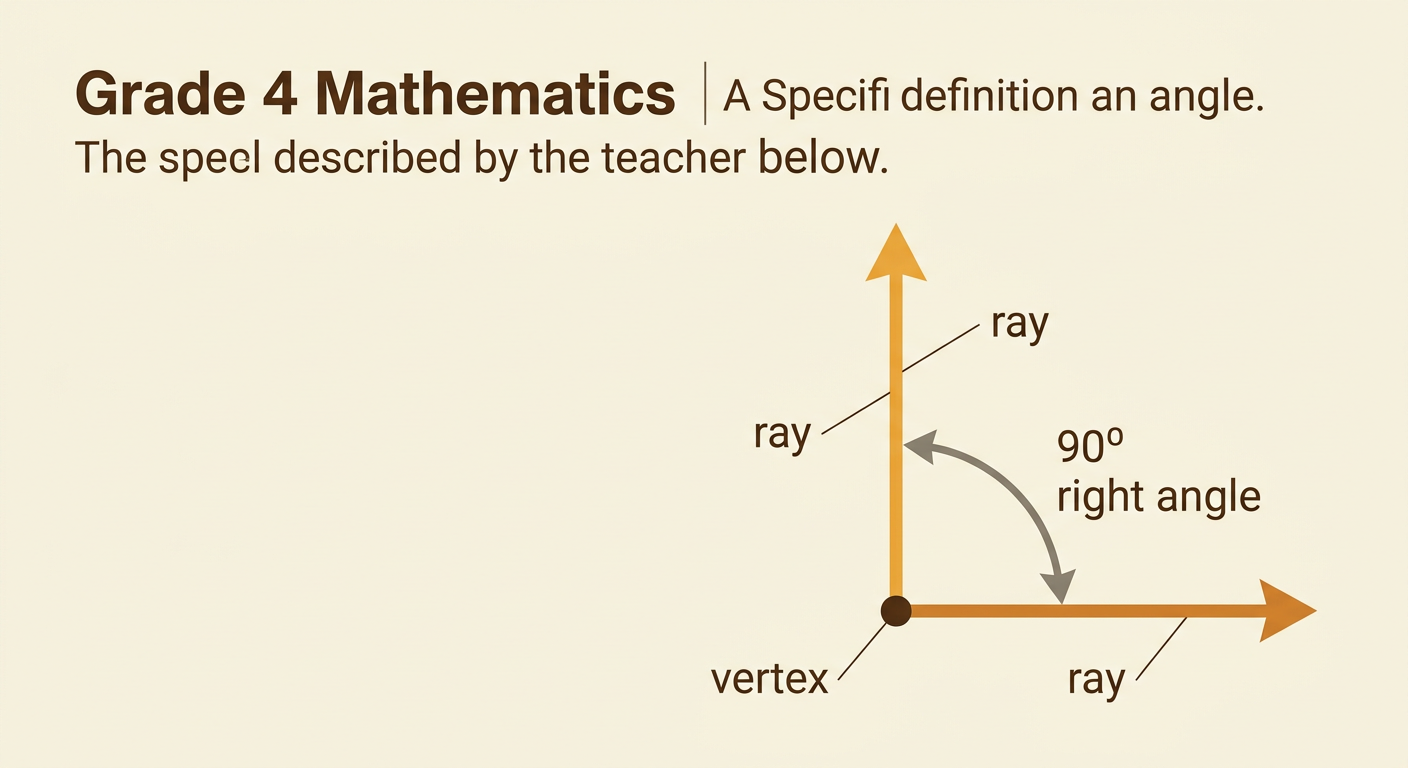
An angle is formed by two rays that share the same endpoint. The shared endpoint is called the vertex. The amount of turn from one ray to the other tells the angle’s measure. We measure this turn in degrees, written with the symbol °. A right angle measures exactly 90°. An acute angle measures less than 90°, and an obtuse angle measures more than 90° but less than 180°. A straight angle measures 180°. For example, imagine one ray pointing directly right and another ray pointing directly up. The turn between them is one-fourth of a full turn, so the angle measures 90°. The lengths of the rays do not affect the angle’s measure. Only the amount of turn matters.
Explore the Parts of a Protractor
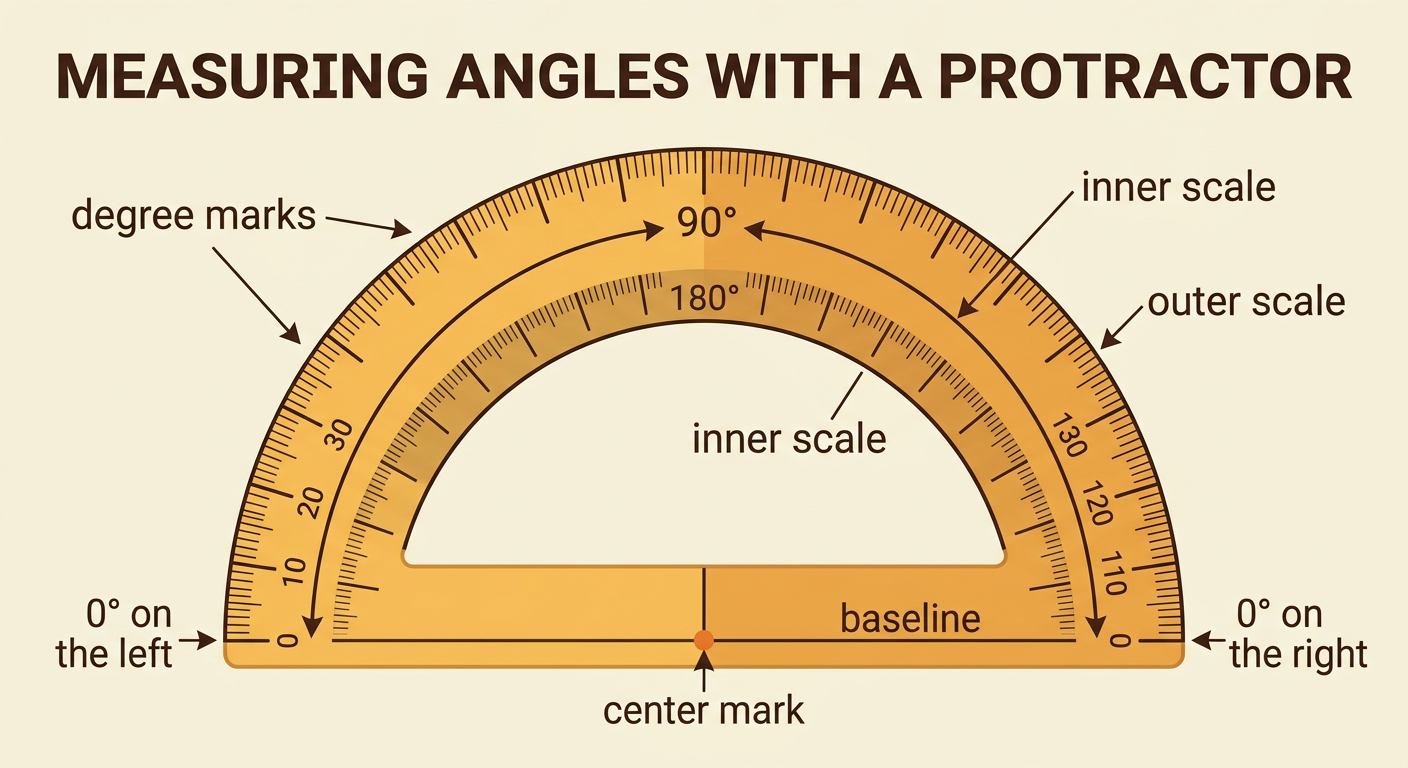
A protractor is a tool marked in degrees. A common protractor is shaped like a semicircle and measures angles from 0° to 180°. The small mark at the middle of the straight edge is the center mark. Place this mark exactly on the angle’s vertex. The straight edge is called the baseline, and one ray of the angle must line up with it. Most protractors have two number scales. One scale begins with 0° on the left, and the other begins with 0° on the right. Use the scale whose 0° is lined up with the starting ray. For example, if the starting ray points right, read the scale that begins with 0° on the right. The degree marks around the curved edge show the angle’s measure.
Measure Angles Accurately
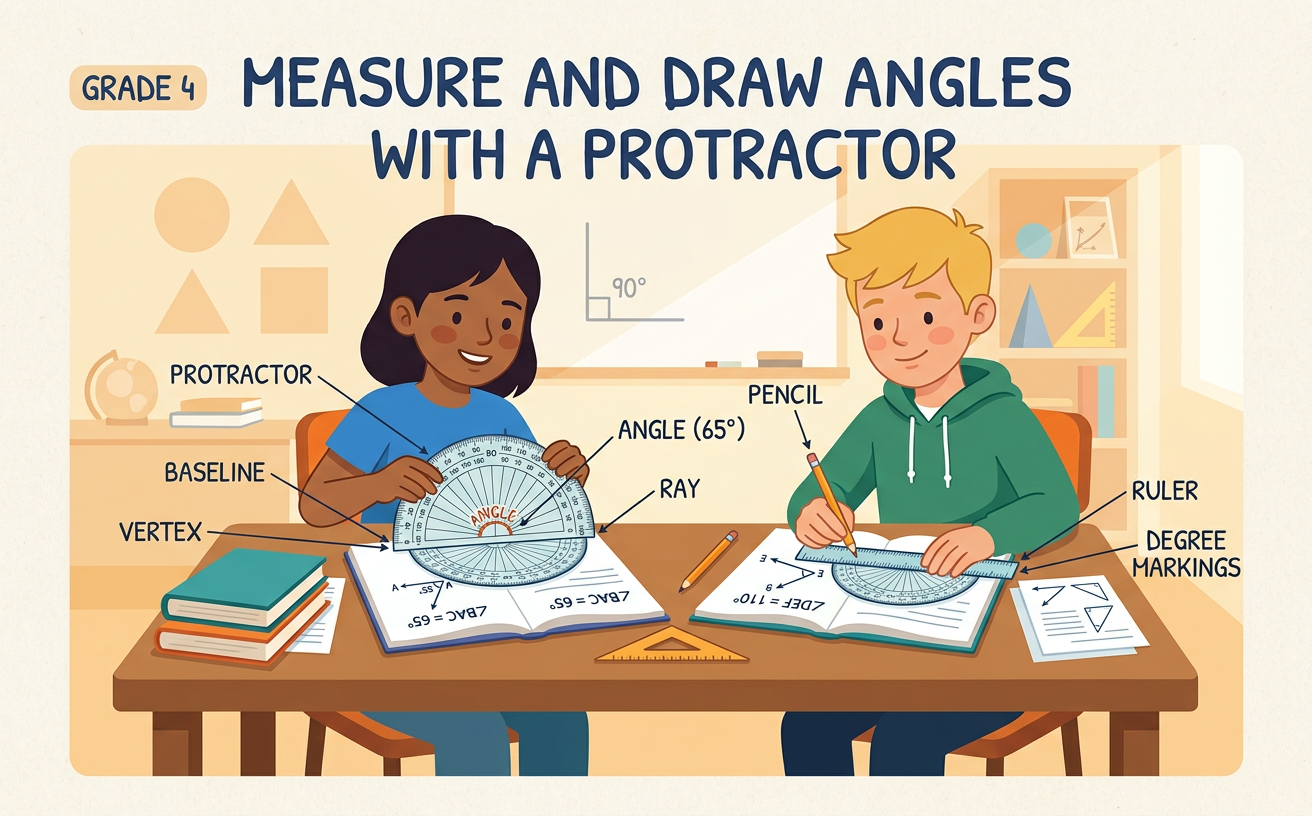
To measure an angle, first place the protractor’s center mark on the vertex. Next, line up one ray with the baseline and the correct 0° mark. Then look where the other ray crosses the curved scale. Read the number on the scale that started at 0°. Suppose the starting ray points to the right and the other ray crosses the scale at 65°. Because the right-hand scale begins at 0°, the angle measures 65°. This answer makes sense because the angle is acute, so its measure should be less than 90°. Keep the protractor flat, and do not place the center mark beside the vertex. Even a small shift can cause an incorrect measurement. If a ray is short, imagine extending it until it reaches the scale.

Draw Angles of Given Measures
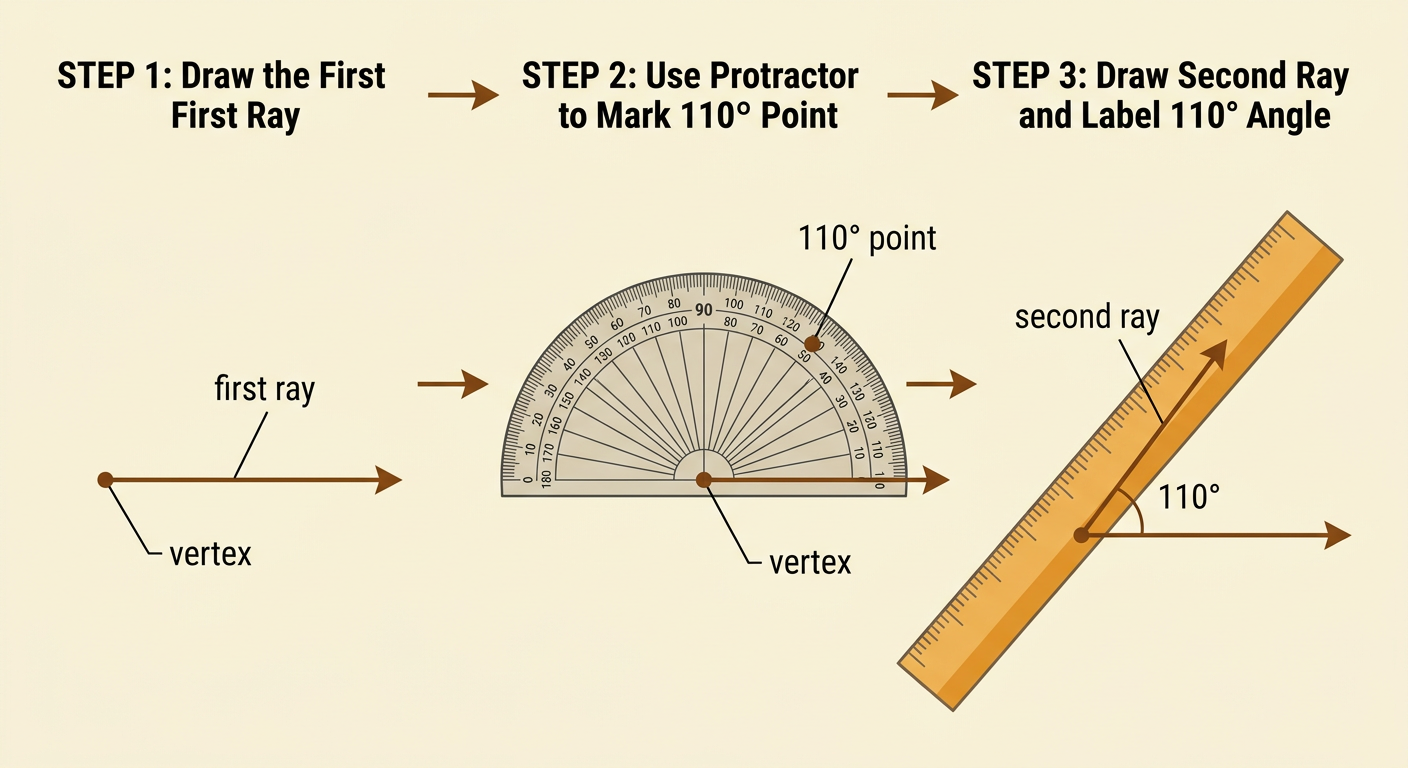
To draw an angle with a given measure, begin by drawing a ray with a ruler. Mark its endpoint as the vertex. Place the protractor’s center mark on the vertex and line up the ray with the baseline and 0°. Find the requested number on the scale that begins at that 0°, and make a small point beside the number. Remove the protractor. Use a ruler to draw a second ray from the vertex through the point. For example, to draw a 110° angle, mark 110° and connect the vertex to that mark. The result should be an obtuse angle because 110° is greater than 90° and less than 180°. Finally, draw a small arc between the rays and label the angle 110°.
Check and Explain Measurements
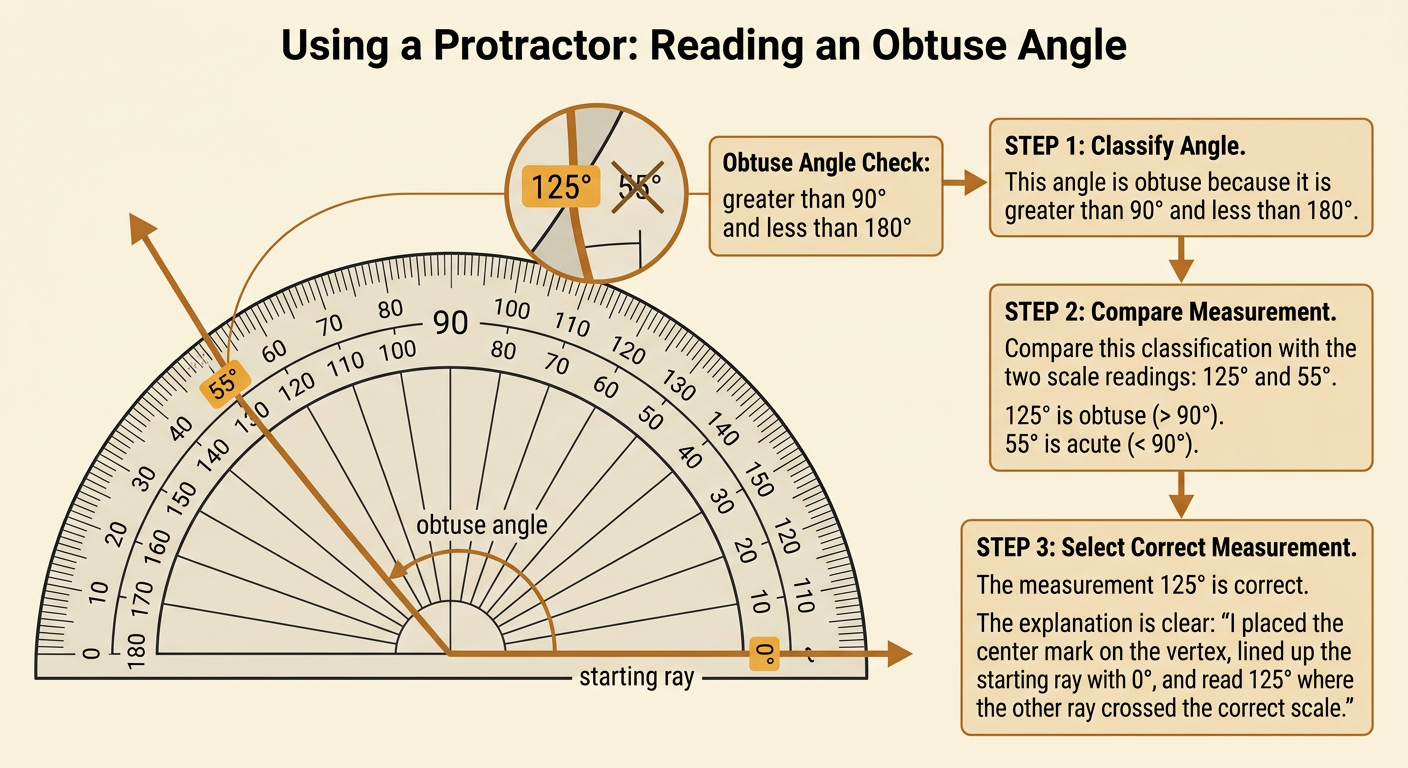
After measuring or drawing an angle, check whether the answer is reasonable. First classify the angle as acute, right, obtuse, or straight. Then compare that classification with the number of degrees. For example, suppose an angle looks obtuse and one protractor scale shows 125° while the other shows 55°. The correct measure is 125° because an obtuse angle must be greater than 90°. The 55° reading comes from using the scale that did not begin at the starting ray’s 0°. You can explain your work by saying, “I placed the center mark on the vertex, lined up the starting ray with 0°, and read 125° where the other ray crossed the correct scale.” Careful placement, correct scale choice, and a reasonableness check support an accurate answer.