
Program a Robot Route
Students create, test, and debug a sequence of directional commands that moves a paper robot to a destination on a classroom map grid.

Illustrations are auto-generated and may be placeholders. They can be refreshed to match the narration.
Explore Commands and Sequences
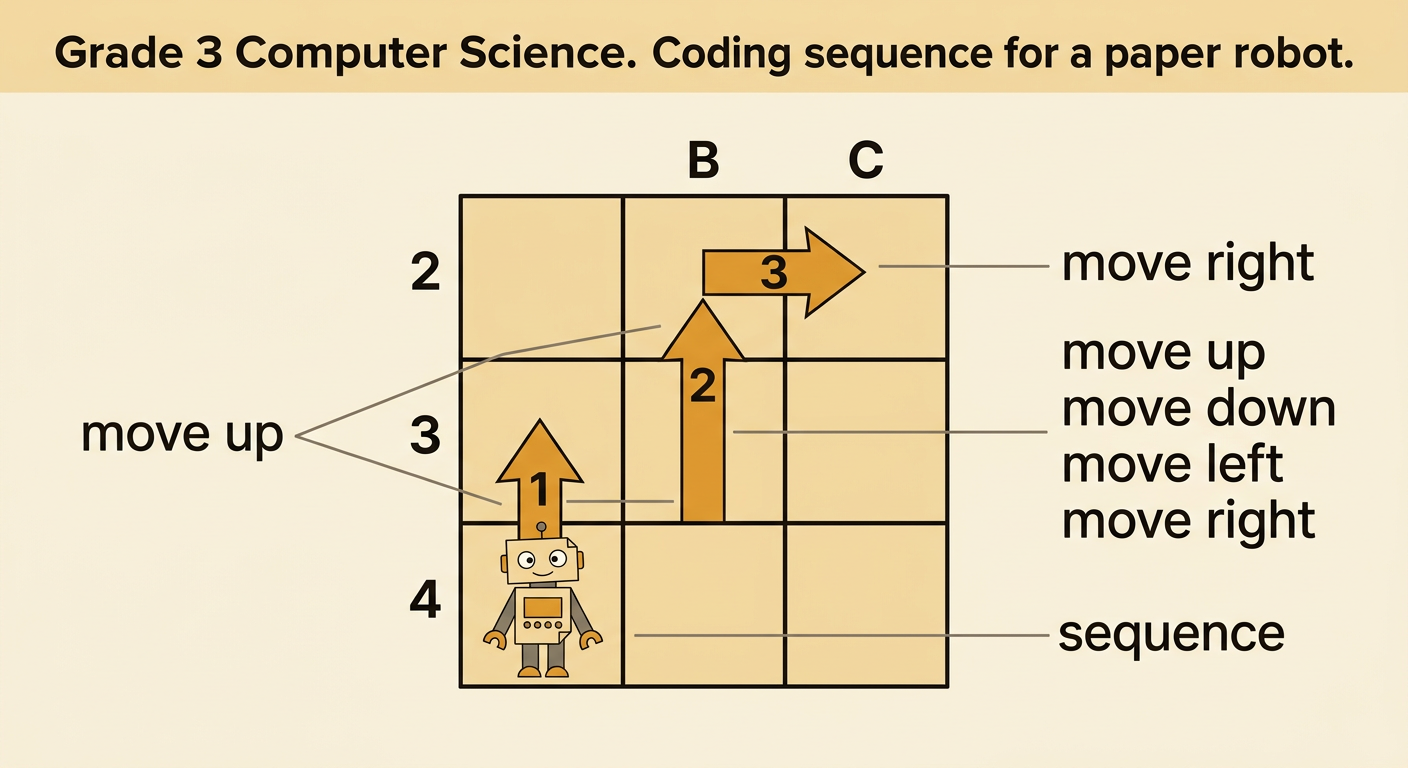
A command is an instruction that tells a robot what to do. For this activity, use four directional commands: move up, move down, move left, and move right. Each command moves the robot exactly one square on the grid. A sequence is a list of commands in the order the robot must follow them. Order matters because changing even one command can send the robot to a different location. For example, begin on square B4. The sequence “up, up, right” moves the robot to B3, then B2, and finally C2. Work with a partner to act out short sequences. One person can read the commands while the other moves a paper robot. Listen carefully, take turns, and check that each command causes only one move.
Read the Map Grid
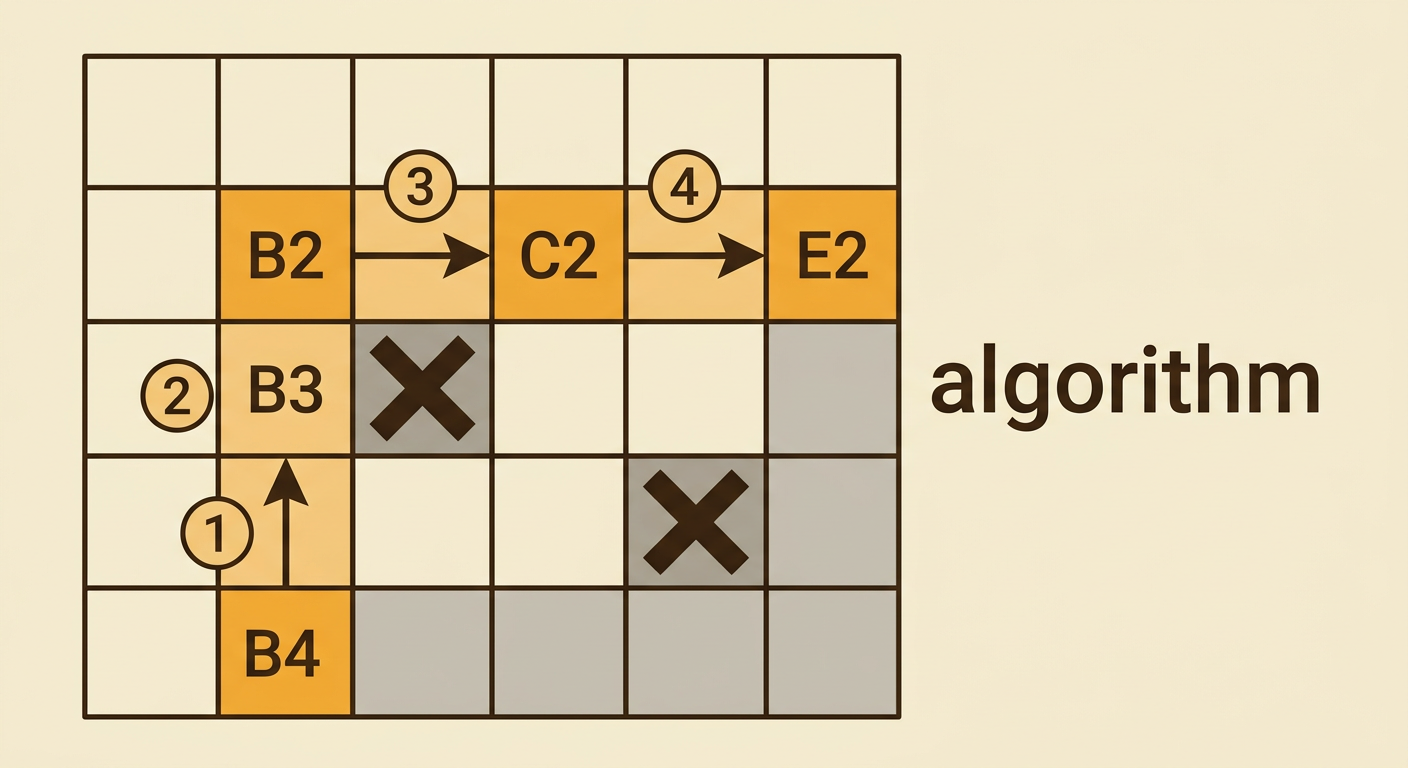
A map grid divides an area into equal squares so locations and movements are easy to describe. On this classroom map, columns are labeled A through E from left to right. Rows are labeled 1 through 5 from top to bottom. A square’s name combines its column letter and row number. For example, C3 is in column C and row 3. The robot starts at B4, and the destination is E2. Some squares, such as C3 and D4, contain obstacles that the robot cannot enter. Before planning a route, find the start, destination, and obstacles. Then look for connected open squares. Moving from B4 to B3 is allowed because the squares share an edge. Moving directly from B4 to C3 is not allowed because that would be a diagonal move.

Write a Robot Algorithm
An algorithm is a clear sequence of steps for completing a task. To write a robot algorithm, begin at the start square and plan one legal move at a time. Record each command in the exact order it should happen. On the example map, the robot can travel from B4 to E2 with this algorithm: up, up, right, right, right. The robot visits B3, B2, C2, D2, and E2. This route avoids the obstacles at C3 and D4. Check your work by tracing the route with a finger before moving the paper robot. Make sure every command moves one square, stays inside the grid, and avoids blocked squares. If you work with a partner, explain why you chose the route and invite your partner to check each step.
Test the Route
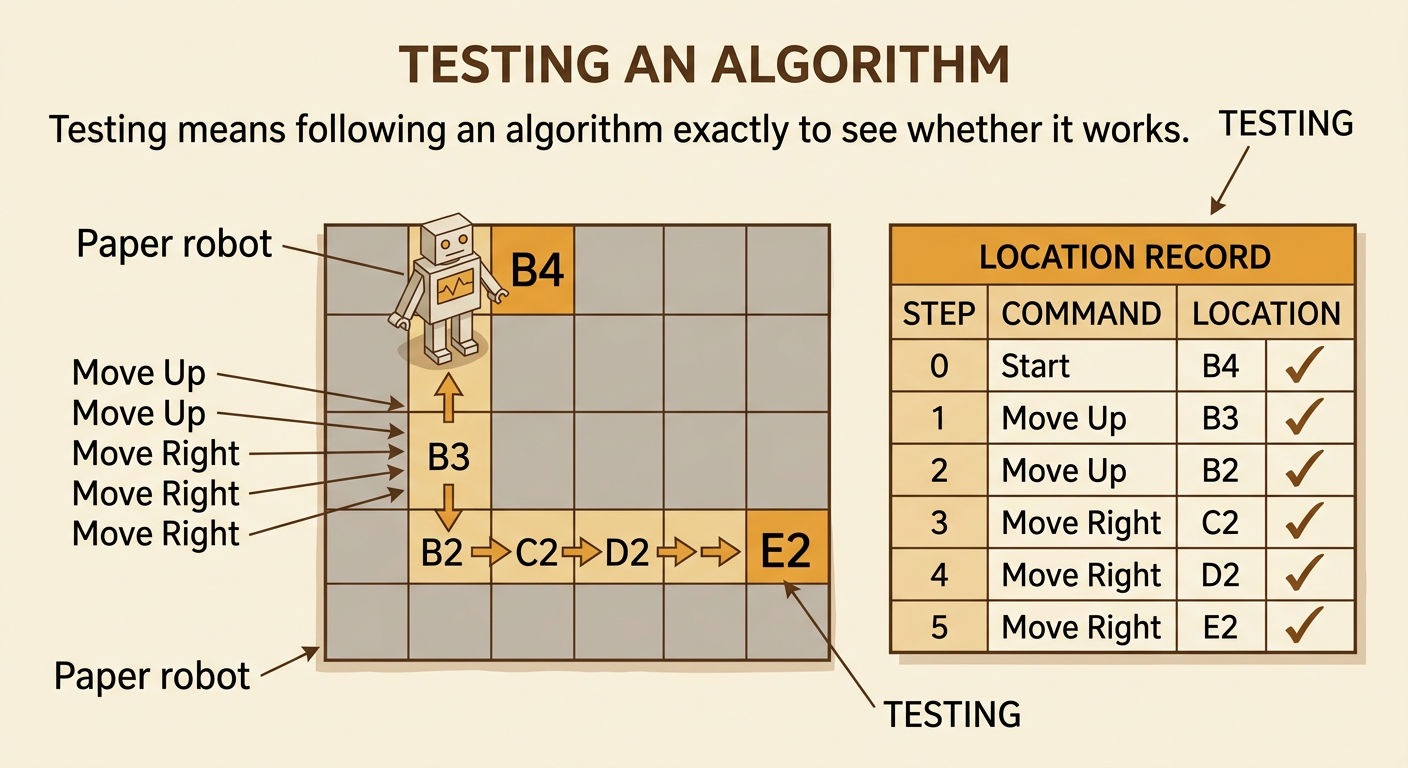
Testing means following an algorithm exactly to see whether it works. Place the paper robot on B4. One student should read the commands one at a time, and another student should move the robot. After each move, pause and record the robot’s location. For the algorithm “up, up, right, right, right,” the location record is B4, B3, B2, C2, D2, E2. The test is successful if the robot reaches E2 without leaving the grid or touching an obstacle. Do not silently fix a command while testing, because the goal is to learn what the written algorithm actually does. If the robot goes somewhere unexpected, stop and mark the command where the problem appeared. Try the test again to confirm what happened. Careful testing provides evidence that can help you improve the route.
Debug and Improve
Debugging means finding and fixing a problem in an algorithm. Suppose a student writes “up, right, right, up, right” for the robot starting at B4. The first command moves the robot to B3, but the second command tries to move it right into the obstacle at C3. That second command is the bug. Replace it with “up,” and test the revised sequence: up, up, right, right, right. Now the robot safely reaches E2. When debugging, begin at the start and check commands in order. Identify the first place where the actual movement differs from the planned route. Change only what is needed, and then test the entire algorithm again. Keep trying even if the first correction does not work. Mistakes are useful because they show where the instructions need to become clearer or more accurate.

Share Solutions
A route problem may have more than one correct solution. Share your algorithm with classmates and explain how you know it works. One route from B4 to E2 uses five commands: up, up, right, right, right. Another safe route uses seven commands: left, up, up, right, right, right, right. The second route travels through A4, A3, A2, B2, C2, D2, and E2. Both algorithms reach the destination and avoid obstacles, but the first route is shorter. Compare solutions by counting commands, checking safety, and noticing which squares each route uses. A longer route may still be useful if a new obstacle blocks the shorter one. During discussion, take turns, ask questions, and use map locations as evidence. You might say, “My route is shorter because it reaches E2 in five moves instead of seven.”
