
Reading Hazards and Responding to Lab Incidents
Students interpret chemical hazard labels and safety data information, locate emergency equipment, and sequence the correct responses to common laboratory incidents.
Illustrations are auto-generated and may be placeholders. They can be refreshed to match the narration.
Hazard Symbols and Signal Words
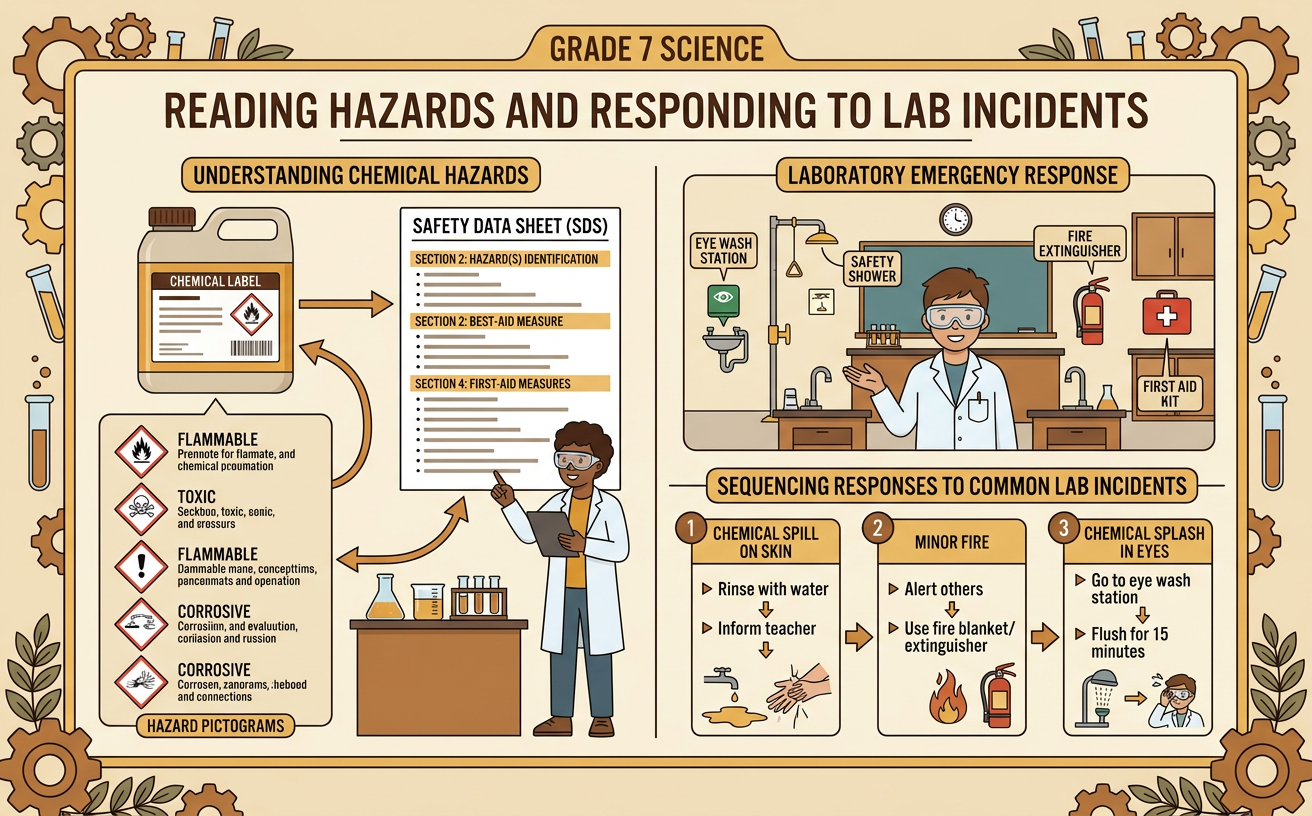
Chemical containers use standardized pictograms to warn about hazards. Each pictogram has a black symbol inside a red diamond. A flame can indicate a flammable chemical, while corrosion shows that a substance can burn skin or damage metals. The skull and crossbones warns of severe acute toxicity. Labels may also include the signal word “Danger” or “Warning.” “Danger” identifies more severe hazards within a hazard class; “Warning” identifies less severe hazards. A pictogram alone does not give every safety instruction, so read the entire label before using a chemical. For example, a bottle marked with a flame and the word “Danger” should be kept away from sparks, hot plates, and open flames. Never smell, touch, or open a chemical merely to determine what it is.
Reading a Chemical Label
Read a chemical label from top to bottom before handling the container. First, identify the product name so you know exactly which substance you have. Next, find the signal word, hazard statements, pictograms, and precautionary statements. Hazard statements describe what can go wrong, while precautionary statements explain how to prevent harm or respond to exposure. Also check the supplier information and any directions for storage or disposal. For example, a sodium hydroxide label may display the corrosion pictogram and state that the chemical causes severe skin burns and eye damage. Its precautions may require splash goggles, protective gloves, and immediate rinsing after contact. Do not use a container with a missing or unreadable label. Tell the teacher, leave the container closed, and wait for instructions.
Safety Data Sheet Essentials
A Safety Data Sheet, or SDS, gives detailed information about a chemical. SDS documents use the same 16-section format, making important facts easier to locate. Section 1 identifies the chemical. Section 2 lists hazards. Section 4 explains first-aid measures, and Section 6 covers accidental releases. Sections 7 and 8 describe safe handling, storage, exposure controls, and personal protective equipment. During an incident, locate the section that matches the problem instead of reading every page from the beginning. For example, if acetone splashes into an eye, Section 4 provides first-aid directions. Section 2 also warns that acetone is highly flammable, so flames and sparks must be avoided. Students should know where SDS documents are stored, but they should immediately alert the teacher rather than delaying emergency action to search for paperwork.
Emergency Equipment and Its Uses
Before beginning an investigation, locate emergency equipment and keep paths to it clear. An eyewash station flushes chemicals or particles from the eyes. A safety shower rinses a large chemical splash from the body or clothing. A fire extinguisher is for a trained adult to use on a suitable small fire; students should not attempt to fight a fire unless specifically trained and directed. A fire alarm and emergency exit help everyone leave during a serious emergency. A first-aid kit holds supplies for minor injuries, while a spill kit contains materials selected for certain spills. For example, if liquid soaks a student’s sleeve and reaches the skin, the student should alert the teacher and move immediately to the safety shower as directed. Never block emergency equipment with stools, backpacks, or boxes.
Spill, Splash, and Injury Procedures
Respond calmly and follow the procedure for the specific incident. For a spill, stop working, warn nearby people, move away, and notify the teacher. Do not touch, smell, or clean an unknown spill. The teacher will identify the substance and use the SDS and appropriate spill procedure. For a chemical splash in the eyes, go immediately to the eyewash, hold the eyelids open, remove contact lenses if easily possible, and flush continuously for at least 15 minutes while someone alerts the teacher. For a large splash on skin or clothing, use the safety shower and remove contaminated outer clothing while rinsing, following school procedures. For a cut, burn, or other injury, stop work and report it immediately, even if it seems minor. For example, broken glass causing a small cut requires teacher help and proper glass disposal, not cleanup by hand.
Incident-Response Sequence Check
A correct incident response follows an ordered sequence, but immediate life-saving action should never be delayed. First, stop the activity and recognize the hazard. Next, warn people who may be exposed and alert the teacher. Then move away from danger or begin emergency flushing, depending on the incident. Follow the teacher’s directions, the label, the SDS, and the school emergency plan. Finally, report what happened and do not restart work until the area and equipment are declared safe. Consider this example: a beaker tips over and an unknown liquid spreads across the table. The correct sequence is to stop work, warn nearby students, step away, notify the teacher, and keep others out of the area. It would be incorrect to wipe up the liquid first because its identity and hazards have not been confirmed.