Same Liquid, Different Container
Students pour the same amount of colored water into differently shaped containers to observe that a liquid changes shape and height while remaining the same material.
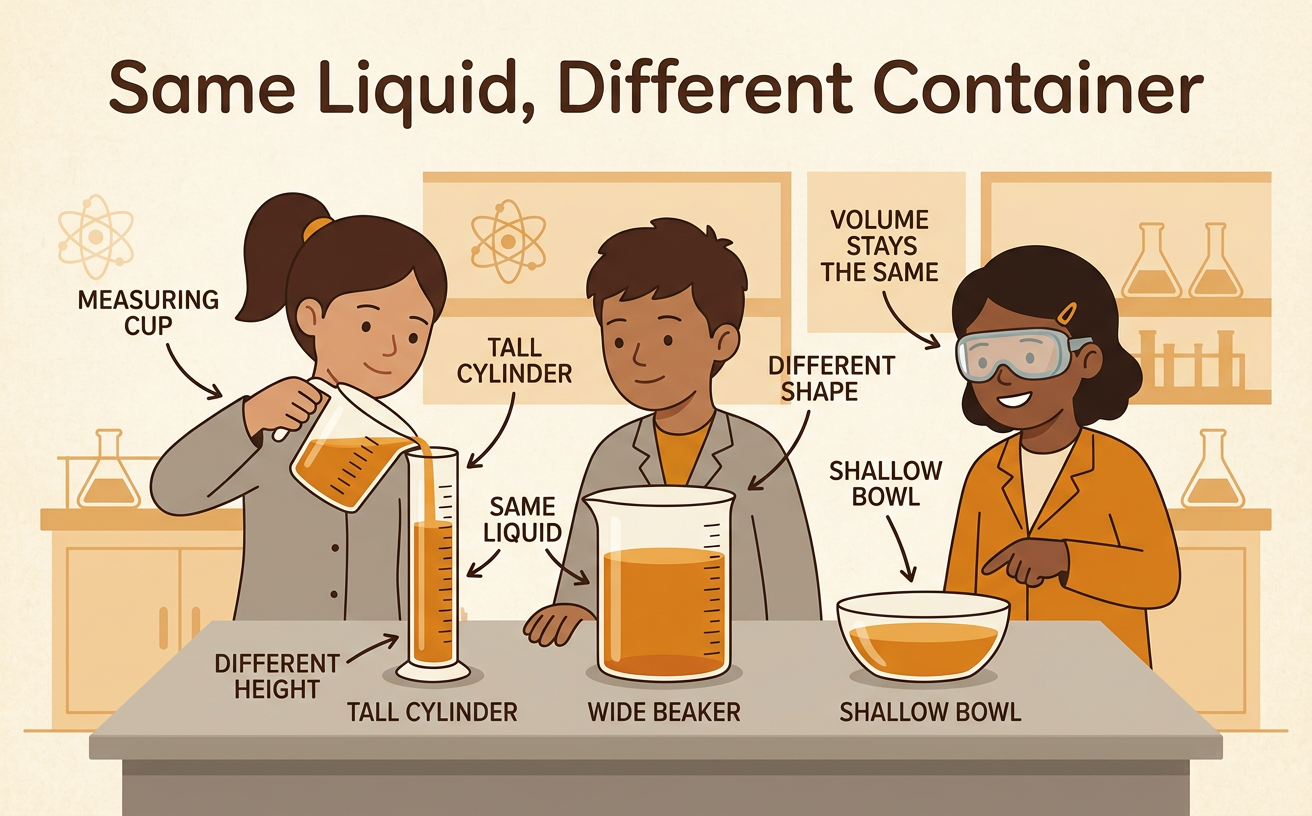
Illustrations are auto-generated and may be placeholders. They can be refreshed to match the narration.
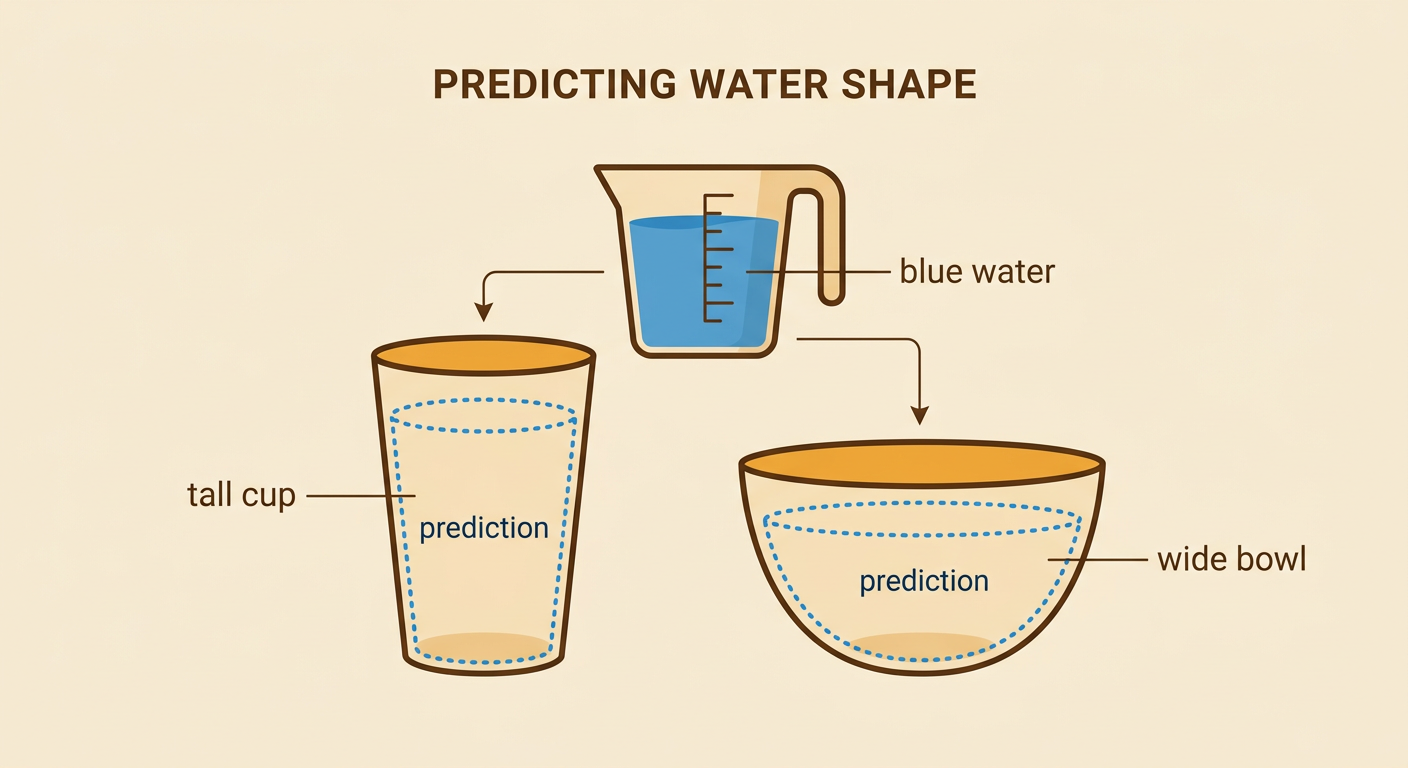
Predict the Liquid’s Shape
Look at a tall, narrow cup and a short, wide bowl. Imagine pouring one cup of blue water into each container. What shape will the water take? What will happen to its height? Make a prediction before testing. You might say, “The water will be tall in the narrow cup and low in the wide bowl.” A liquid does not keep one shape like a solid block does. It can flow and take the shape of the part of its container that it fills. Draw or write your prediction with a partner. Your prediction does not need to be correct. It is an idea that you will check by making careful observations during the investigation.
Pour the Same Amount
Use a measuring cup to prepare the same amount of colored water for each test. For example, fill the measuring cup to the 1-cup line. Pour the water slowly into the tall cup and observe it. Then pour all of that water back into the measuring cup before moving it into the wide bowl. You may also use two equal 1-cup portions. Keep the amount of water the same so the comparison is fair. Pour over a tray, and wipe up spills with help from an adult. If water spills or stays behind, the amount is no longer exactly the same. Record which containers you used and how you kept the amount equal.

Observe Shape and Surface
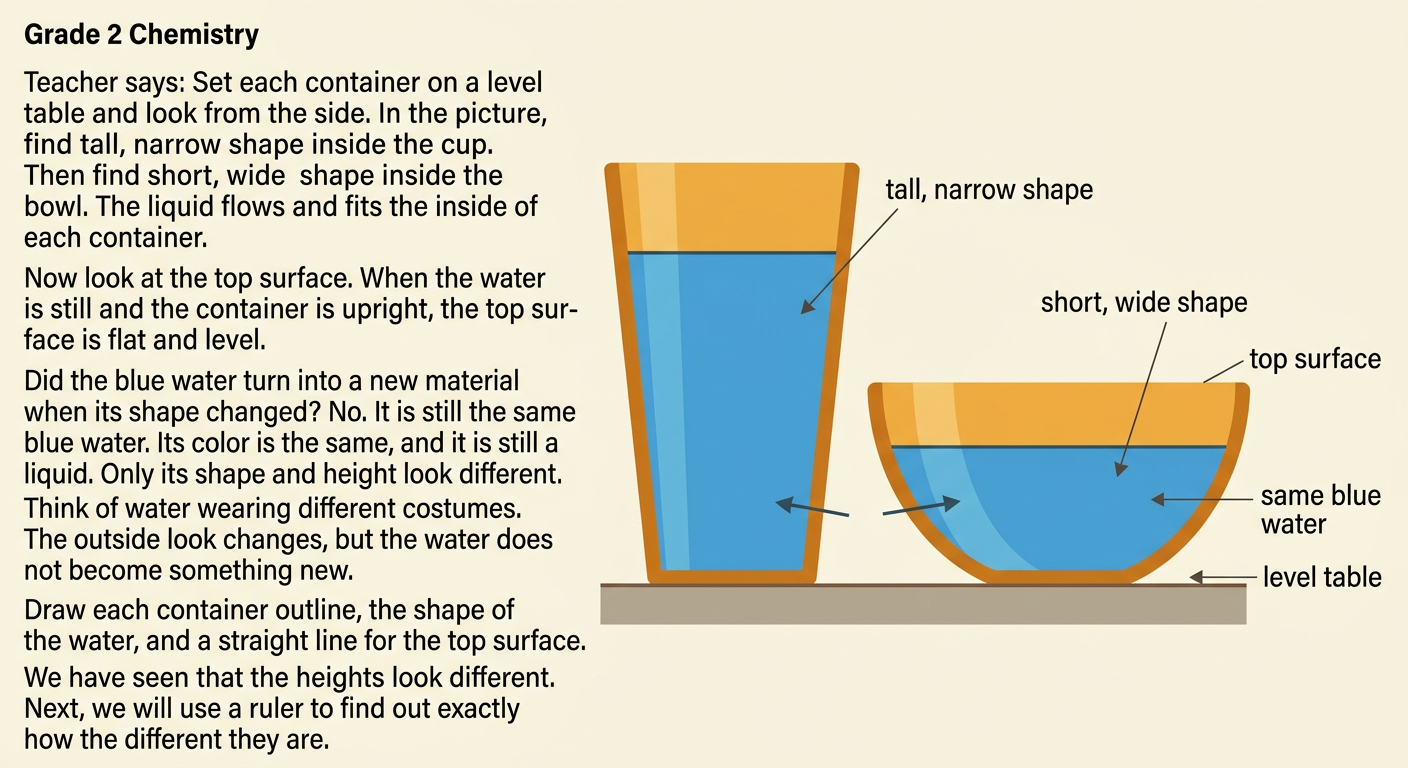
Look at the water from the side after each container is resting on a level table. In the tall cup, the water forms a tall, narrow shape. In the wide bowl, it forms a short, wide shape. The water changes shape because it flows and fits the inside of its container. Its top surface stays flat and level when the water is still and the container is upright. The blue water is still the same material in both containers. Its color and liquid state have not changed. Only its shape and height look different. Draw both observations. Include the container outline, the water shape, and a straight line for the top surface.
Measure and Compare Heights
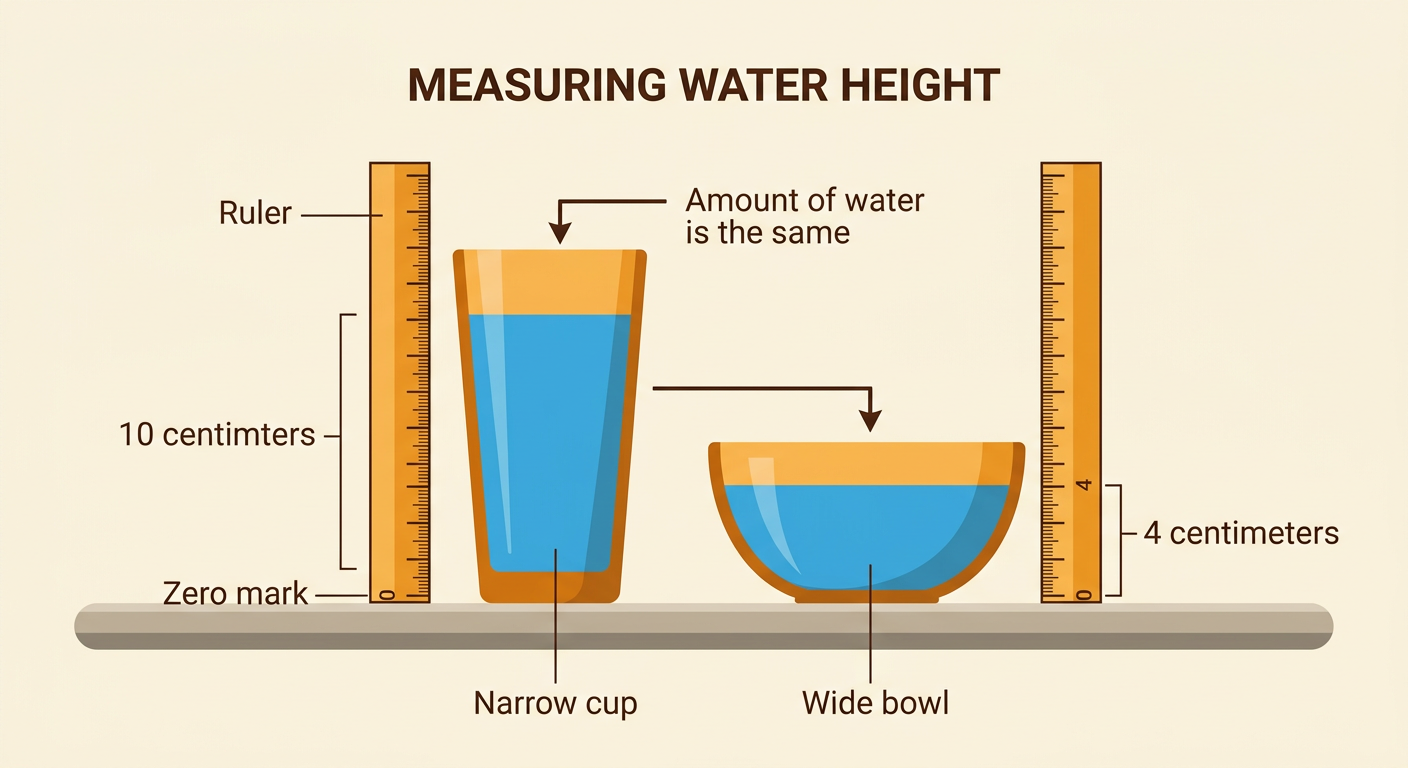
Place each container on the same level table. Stand a ruler beside the container with the zero mark even with the inside bottom. Read the number where the top of the water meets the ruler. Measure in centimeters and record the height. For example, the water might be 10 centimeters high in a narrow cup but only 4 centimeters high in a wide bowl. Compare the numbers using words such as taller, shorter, greater, and less. The different heights do not mean that one test used more water. If no water spilled and the same amount was poured, the amount stayed the same. The narrow container makes the water rise higher because there is less space across each level.
Explain Why Liquids Need Containers
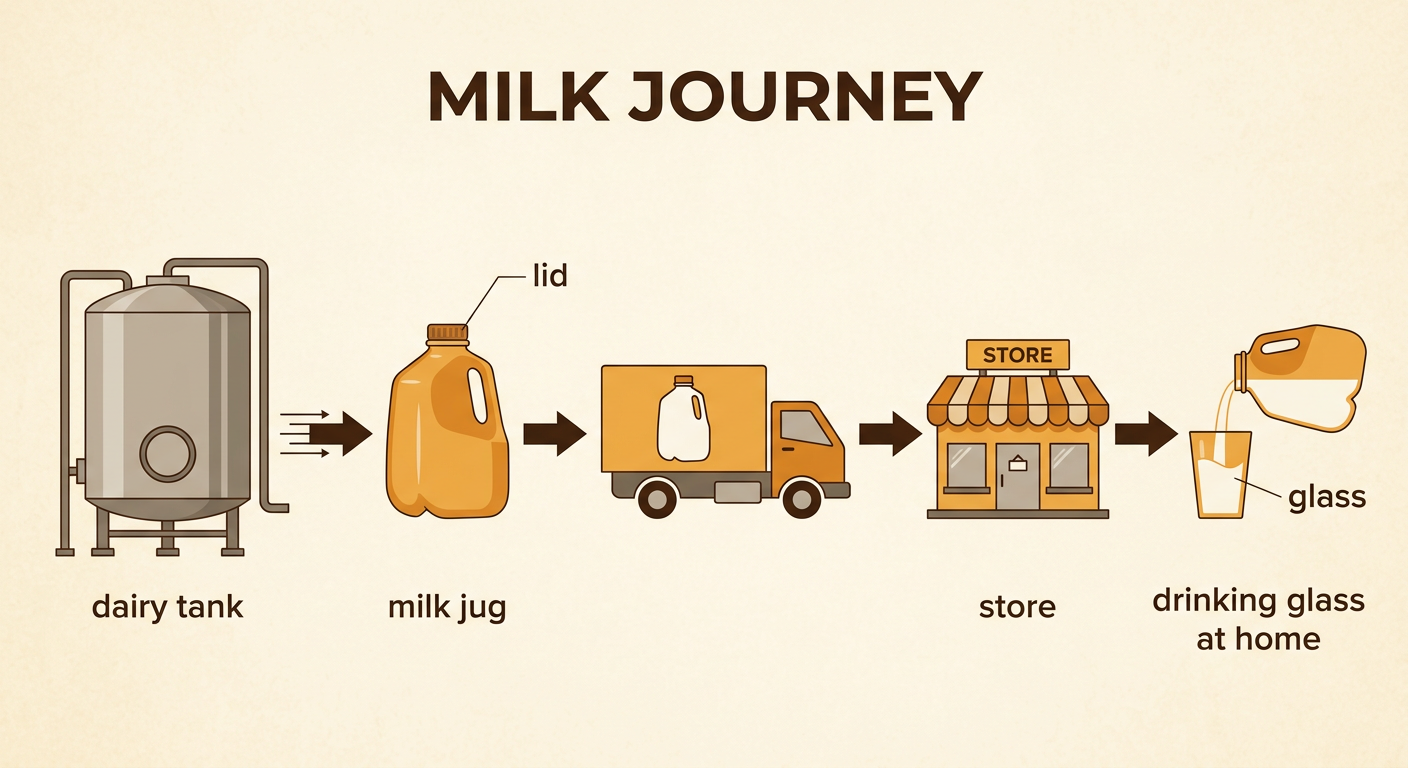
Liquids can flow, so they need containers to hold them and help people move them safely. A dairy fills milk into cartons or jugs so trucks can carry it to stores. A family may pour the milk into a glass at home. The milk changes shape in each container, but it remains milk. Lids help keep liquids from spilling while they travel. Containers can also be chosen for a purpose: a large tank holds a lot, a bottle is easy to carry, and a cup is easy to drink from. Explain the journey of one liquid good using words or pictures. Tell where it starts, which containers hold it, and how it moves from one place to another.