
Selecting and Reading Scientific Measuring Tools
Students select and correctly read rulers, balances, graduated cylinders, and thermometers while recording SI units, estimated digits, and measurement uncertainty appropriate to each tool's resolution.

Illustrations are auto-generated and may be placeholders. They can be refreshed to match the narration.
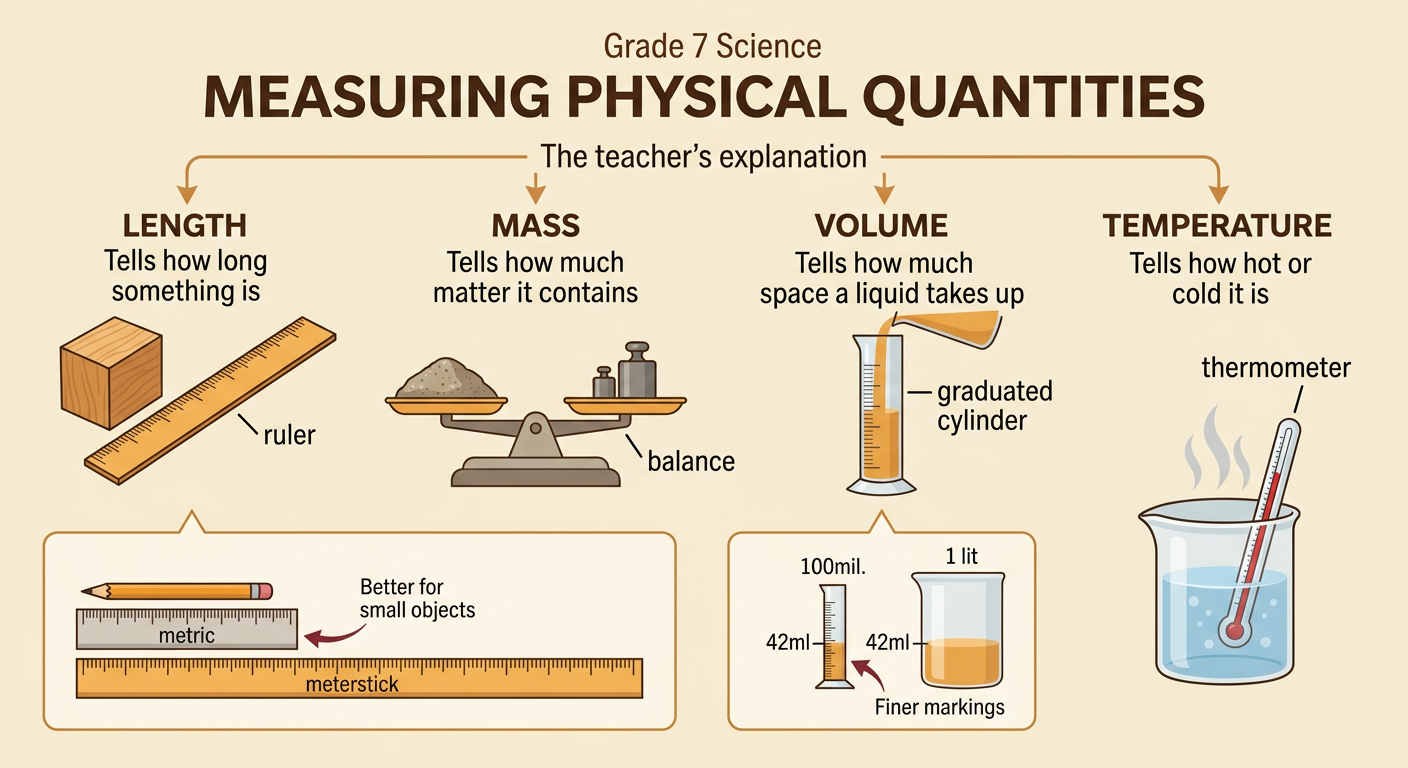
Match the Tool to the Quantity
Begin by identifying the quantity you need to measure. Use a ruler or meterstick for length, a balance for mass, a graduated cylinder for liquid volume, and a thermometer for temperature. Choose a tool whose range includes the expected measurement and whose markings provide enough detail. For example, use a 100 mL graduated cylinder rather than a 1 L container to measure about 42 mL of water. The smaller cylinder usually has finer graduations, so it provides a more precise reading. Similarly, a metric ruler is suitable for measuring a 12.6 cm pencil, while a meterstick is better for measuring the length of a lab table. Choosing the correct tool and range helps produce useful, reliable data.
Identify Scale and Resolution
A measuring tool’s scale is the ordered set of values shown by its marks or display. Resolution is the smallest change the tool can show. To find the resolution of an analog tool, subtract the values of two numbered marks and divide by the number of equal spaces between them. Suppose a graduated cylinder has numbered marks at 30 mL and 40 mL with ten equal spaces between them. Each space represents 1 mL, so the cylinder’s resolution is 1 mL. A metric ruler with millimeter marks also has a resolution of 1 mm. For a digital tool, the resolution is the value of its last displayed place. A balance that displays 24.6 g has a resolution of 0.1 g. Always inspect the scale before measuring.
Read Menisci and Digital Displays
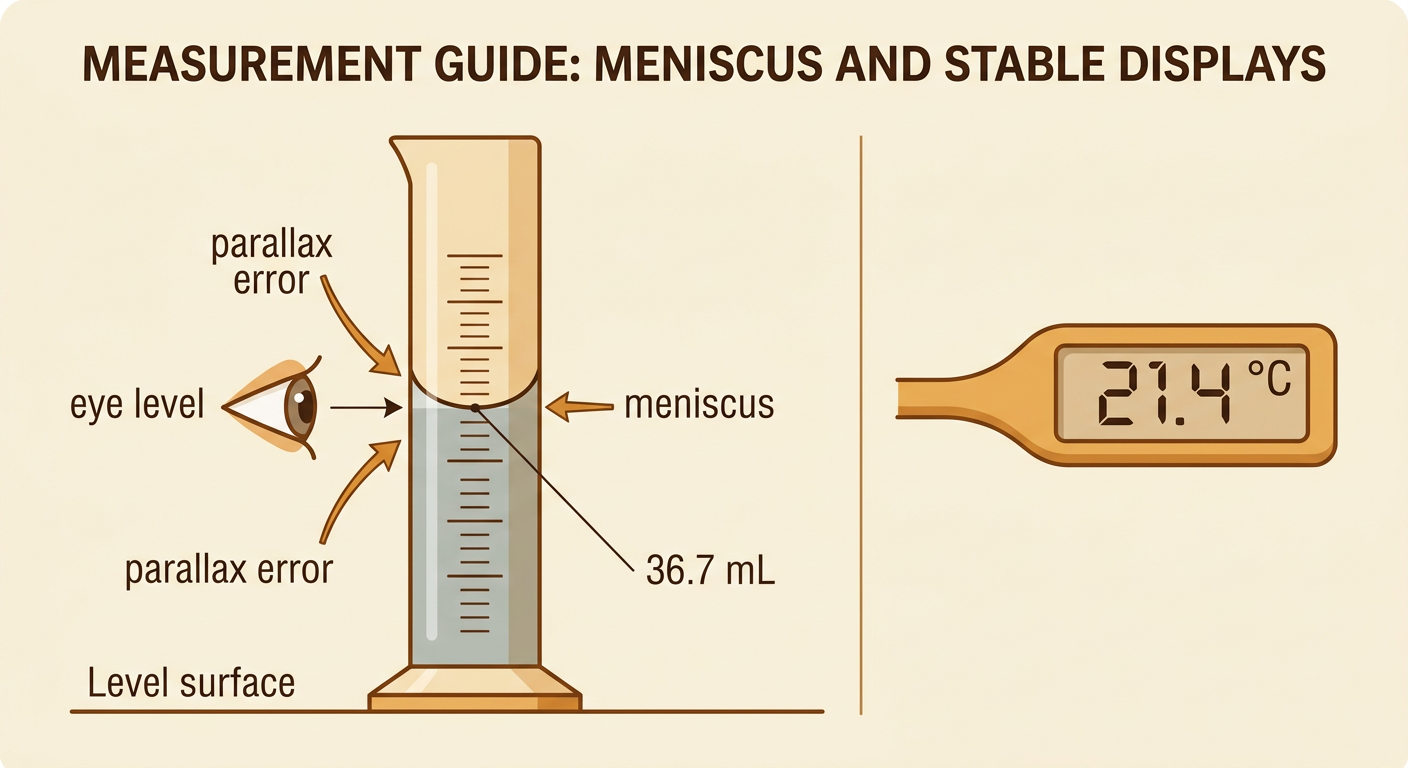
Liquid in a narrow graduated cylinder often forms a curved surface called a meniscus. Water and most water-based liquids form a concave meniscus, with the center lower than the edges. Place the cylinder on a level surface, bring your eye to the same height as the liquid, and read the scale at the bottom of the curve. Looking from above or below causes parallax error. For example, if the bottom of a water meniscus lies between 36 mL and 37 mL, it might be recorded as 36.7 mL. Read a digital display only after the value becomes stable. Copy every displayed digit, the decimal point, and the unit. If a thermometer displays 21.4 degrees Celsius, record 21.4 degrees Celsius rather than rounding it to 21 degrees Celsius.
Zero, Tare, and Measure Correctly
Check that a tool starts at zero before taking a measurement. If an empty balance does not read zero, use its zero control. When measuring material in a container, place the empty container on the balance and press tare. The display returns to 0.0 g, so the next reading gives only the material’s mass. For example, after taring a cup, adding sand might produce a reading of 18.7 g. With a ruler, align one end of the object with the zero mark, not automatically with the ruler’s edge. If the zero mark is damaged, record both endpoint readings and subtract. Keep a graduated cylinder upright on a level surface, and wait for a thermometer reading to stop changing. Correct setup prevents avoidable measurement errors.

Record SI Units and Estimated Digits
A measurement must include a number and a unit. In science class, common metric units include meters, centimeters, and millimeters for length; kilograms and grams for mass; liters and milliliters for volume; and degrees Celsius for temperature. Write the unit after every recorded value, including values in a data table. For an analog scale, record all certain digits and one reasonable estimated digit beyond the smallest marked division. If a cylinder has 1 mL graduations and the meniscus is about seven tenths of the way from 36 mL to 37 mL, record 36.7 mL. Do not write 36.700 mL because the tool cannot support that precision. For a digital tool, record every displayed digit but do not invent an extra digit. A display of 8.42 g should be recorded as 8.42 g.
Compare Precision and Measurement Uncertainty
Precision describes how finely a tool measures and how closely repeated measurements agree. A tool with smaller scale intervals generally has less measurement uncertainty. For many classroom analog tools, uncertainty is estimated as plus or minus half the smallest marked division. A graduated cylinder with 1 mL divisions may be reported as 36.7 mL with an uncertainty of about plus or minus 0.5 mL. A cylinder with 0.2 mL divisions has an uncertainty of about plus or minus 0.1 mL and is more precise. For a digital tool, a common classroom estimate is plus or minus one unit in the last displayed place unless the manufacturer provides a different value. Precision does not guarantee accuracy: repeated readings can be close together but incorrect if the tool was not zeroed or calibrated properly.