Using a Map to Find a Safe Route
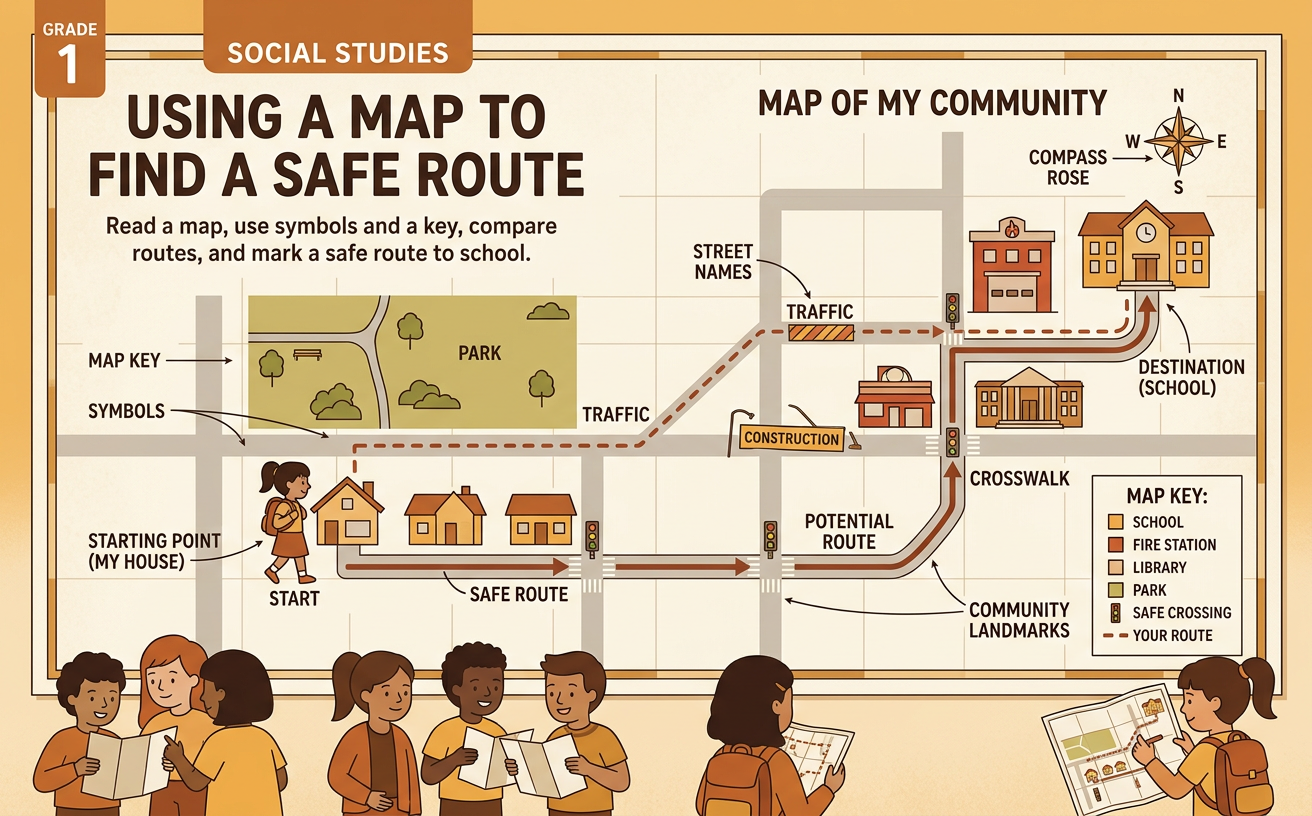
Students read a simple community map, use its symbols and key, compare possible routes, and mark a safe route to a familiar destination.
Illustrations are auto-generated and may be placeholders. They can be refreshed to match the narration.
What Is a Map?
A map is a drawing that shows where places are. It is like looking down at an area from high above. A map can show roads, buildings, parks, and other important features. It helps us understand where places are and how to travel from one place to another. The top, bottom, left, and right sides of a map help us describe locations. For example, imagine a community map with a home near the bottom and a library near the top. Streets connect the two places. By following the streets with a finger, a student can plan how to get from home to the library. A map is smaller and simpler than the real community, but it keeps the important locations in their correct positions.

Symbols and the Map Key
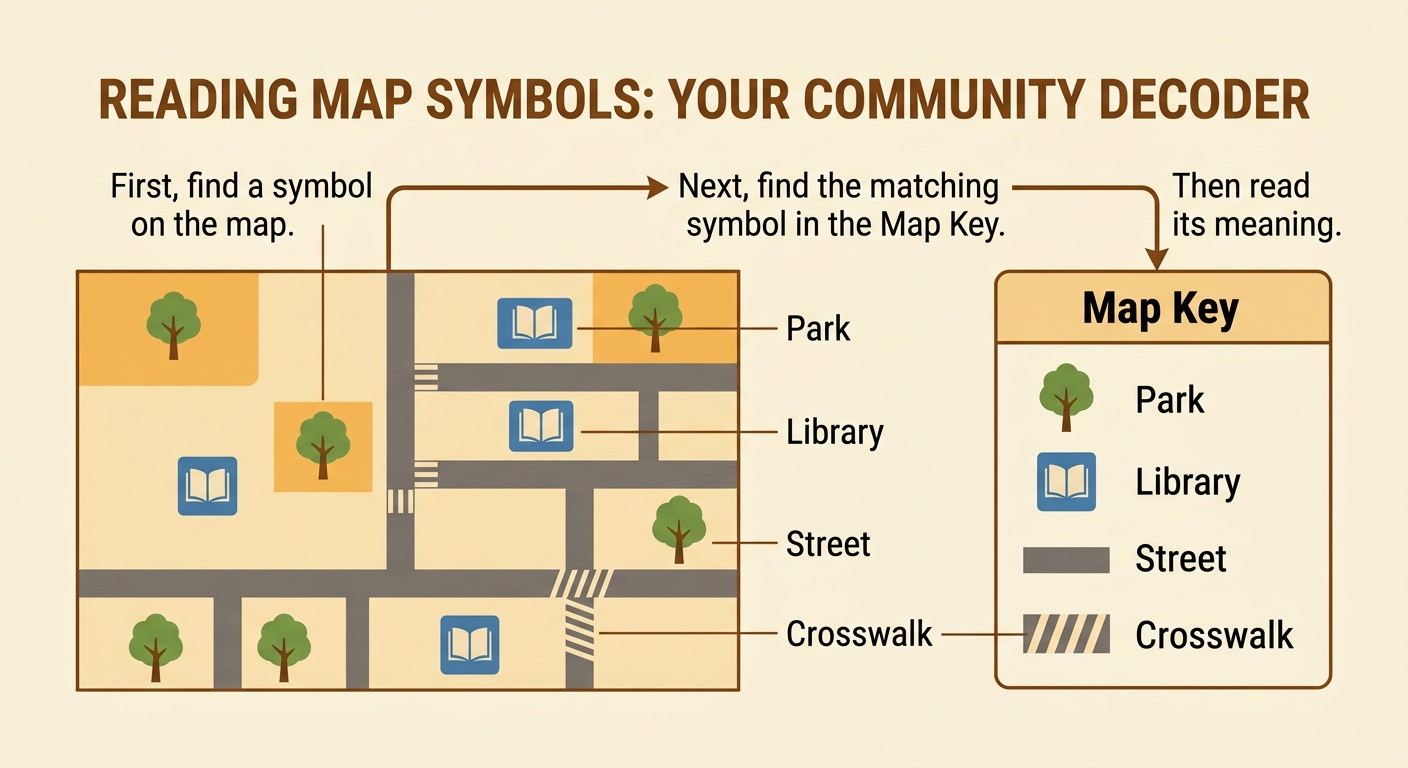
Maps use symbols, which are small pictures, shapes, or colors that stand for real things. A map key explains what each symbol means. Reading the key helps us understand the map correctly. For example, a small green tree can mean a park. A blue square with a book can mean a library. Thick gray lines can show streets, and white stripes across a street can show a crosswalk. First, find a symbol on the map. Next, match it to the same symbol in the key. Then read what the symbol means. If you see white stripes near the library and the key says they mean crosswalk, you know there is a marked place to cross the street. Symbols make a map clear without drawing every real detail.
Finding Community Locations
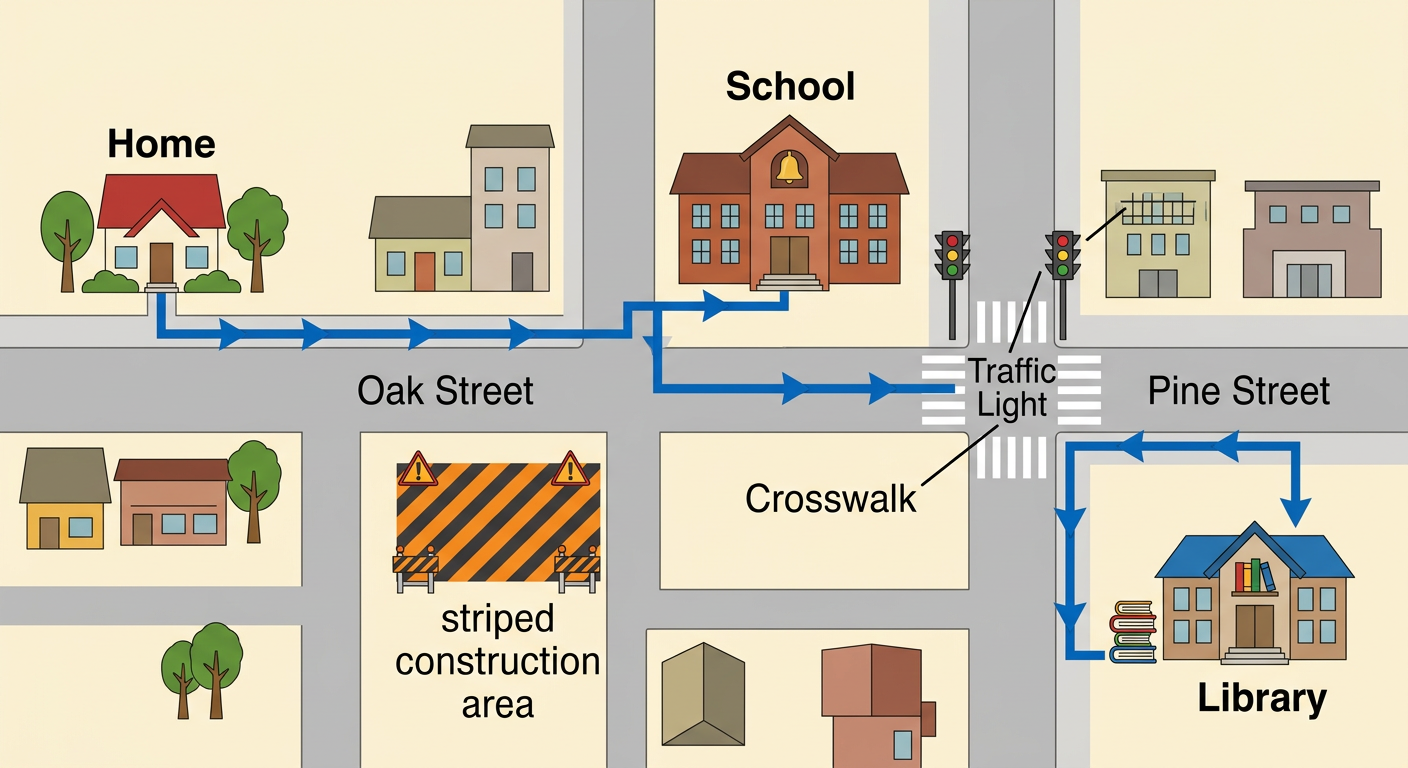
To find a community location, begin with a place you already know. This is your starting point. Then use map symbols, street names, and nearby landmarks to find the destination. A landmark is an easy-to-notice place, such as a school, park, or fire station. Suppose Mia starts at Home on Oak Street and wants to find the Library. She locates the house symbol first. Then she finds the blue book symbol for the library. The library is across Pine Street from the park and next to a marked crosswalk. Mia can point to Home, trace along Oak Street, turn onto Pine Street, and stop at the Library. As she traces, she checks the labels and symbols. These map details help her know where to begin, where to turn, and where to stop.

Comparing Possible Routes
A route is the path used to travel from one place to another. A map may show more than one possible route. We can compare routes by looking at their lengths and safety features. Trace each route with a finger or use equal-size blocks to measure it. Count the blocks from start to finish. A route using six blocks is shorter than a route using eight blocks. However, the shortest route is not always the safest. One short route might cross a busy street where there is no crosswalk. A slightly longer route might use a sidewalk, a crosswalk, and a traffic light. For example, Route A to the library is six blocks long but crosses between parked cars. Route B is eight blocks long and reaches a marked crosswalk. Route B is longer, but it is the safer choice because it provides a safer place to cross.

Marking and Explaining a Safe Route
After comparing the choices, mark the safe route on the map. Start at the correct location and draw a clear line along sidewalks and streets toward the destination. Add arrows to show the direction of travel. Keep the line away from construction areas, parking lots, and places without safe crossings. Stop the line at the destination. For example, draw a blue line from Home along Oak Street, turn right at the School, and continue to the traffic light. Cross Pine Street at the marked crosswalk, then walk to the Library. Explain why the route is safe by using map details. You might say, “I chose this route because it follows the sidewalk and crosses at a crosswalk with a traffic light.” A good explanation names the starting point, destination, important turns, and safety features. A trusted adult should always help choose and practice a real walking route.