We Need Light to See
Students observe that objects become visible when light from the Sun, a lamp, or another source illuminates them.

Illustrations are auto-generated and may be placeholders. They can be refreshed to match the narration.
What Can We See?
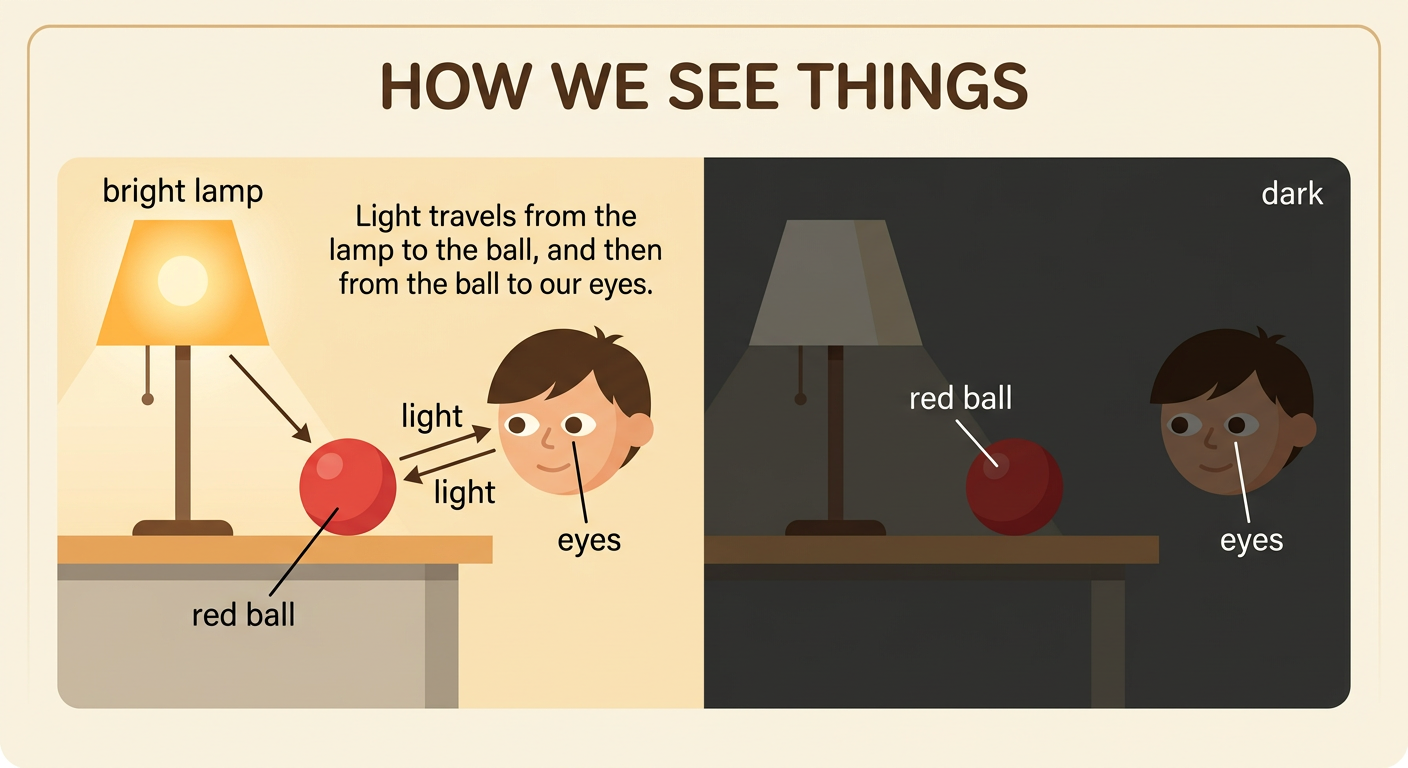
We use our eyes to see, but our eyes need light. Light can come from the Sun, a lamp, or another light source. When light shines on a toy, some of the light travels from the toy to our eyes. Then we can see the toy’s color, shape, and size. Imagine a red ball under a bright lamp. You can see that it is round and red. If the room becomes completely dark, no light reaches the ball or your eyes. You cannot see the ball, even though it is still there. Turning on the lamp makes the ball visible again. Light helps us see the people, places, and objects around us.
Observe With and Without Light
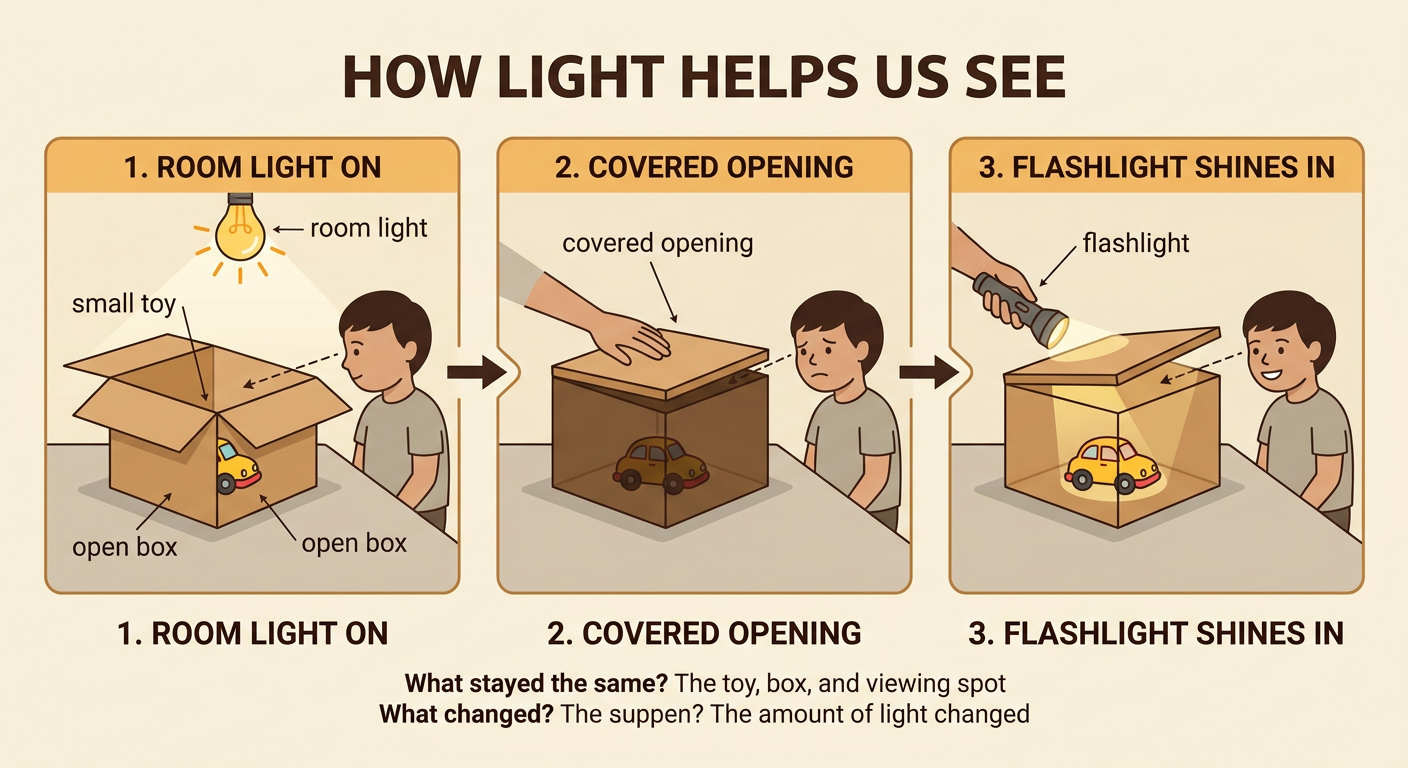
We can make careful observations to learn how light helps us see. Place a small toy inside an open box. First, look into the box when the room light is on. Describe the toy’s color and shape to a partner. Next, have an adult safely cover the box opening so that very little light enters. Do not climb into a dark place. Look again from the same spot. The toy may be hard or impossible to see because too little light reaches it. Then shine a flashlight into the box without pointing it at anyone’s eyes. The toy becomes visible again. Compare what you noticed with your partner. Tell what stayed the same and what changed when the amount of light changed.
Identify Light Sources
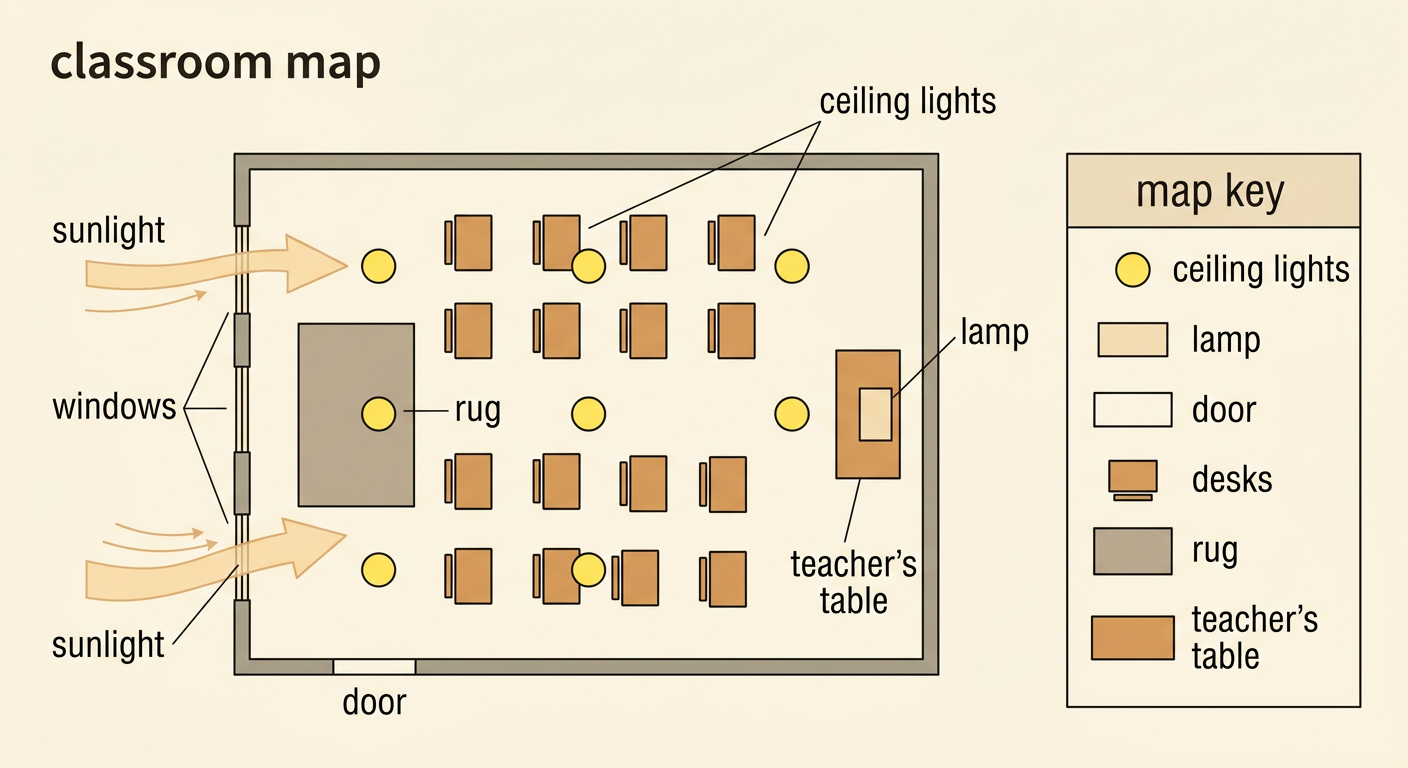
A light source is something that gives off light. The Sun is a natural light source. Lamps, flashlights, night-lights, and traffic lights are human-made light sources. A light source can illuminate, or light up, another object. For example, a flashlight gives off light that can illuminate a book. The book does not make its own light. It reflects some light toward our eyes, so we can see its pictures and words. Look around your classroom with a partner. Name objects that give off light and objects that only receive light. A ceiling lamp is a source. A desk is not a source, even when it looks bright. Remember never to look directly at the Sun or into a bright lamp or flashlight.

Explain the Evidence
Evidence is something we observe that helps us explain an idea. In our box investigation, the toy was easy to see when the room light or flashlight illuminated it. The toy was hard to see when the opening was covered and very little light entered. These observations are evidence that objects need light to be seen. Share your explanation with a partner. You might say, “I could see the blue toy when the flashlight was on. I could not see its color when the box was dark. This shows that light must shine on the toy for me to see it.” Listen while your partner speaks, ask a question, and compare ideas. Scientists use observations, evidence, and respectful conversations to build clear explanations.

Map Our Classroom Lights
A map is a drawing that shows where things are in a place. We can make a classroom map to show where light comes from. First, draw the classroom as if you are looking down from above. Add simple shapes for the door, windows, desks, rug, and teacher’s table. Then mark each light source. Draw circles for ceiling lights and a rectangle for a lamp. Show windows where sunlight enters, but remember that the Sun is the source of that light. Add a map key that explains each symbol. For example, a yellow circle can mean ceiling light. Compare maps with classmates and talk about which areas may receive more or less light. Your map is a representation of a familiar place and its light sources.