
What Dissolves in Water?
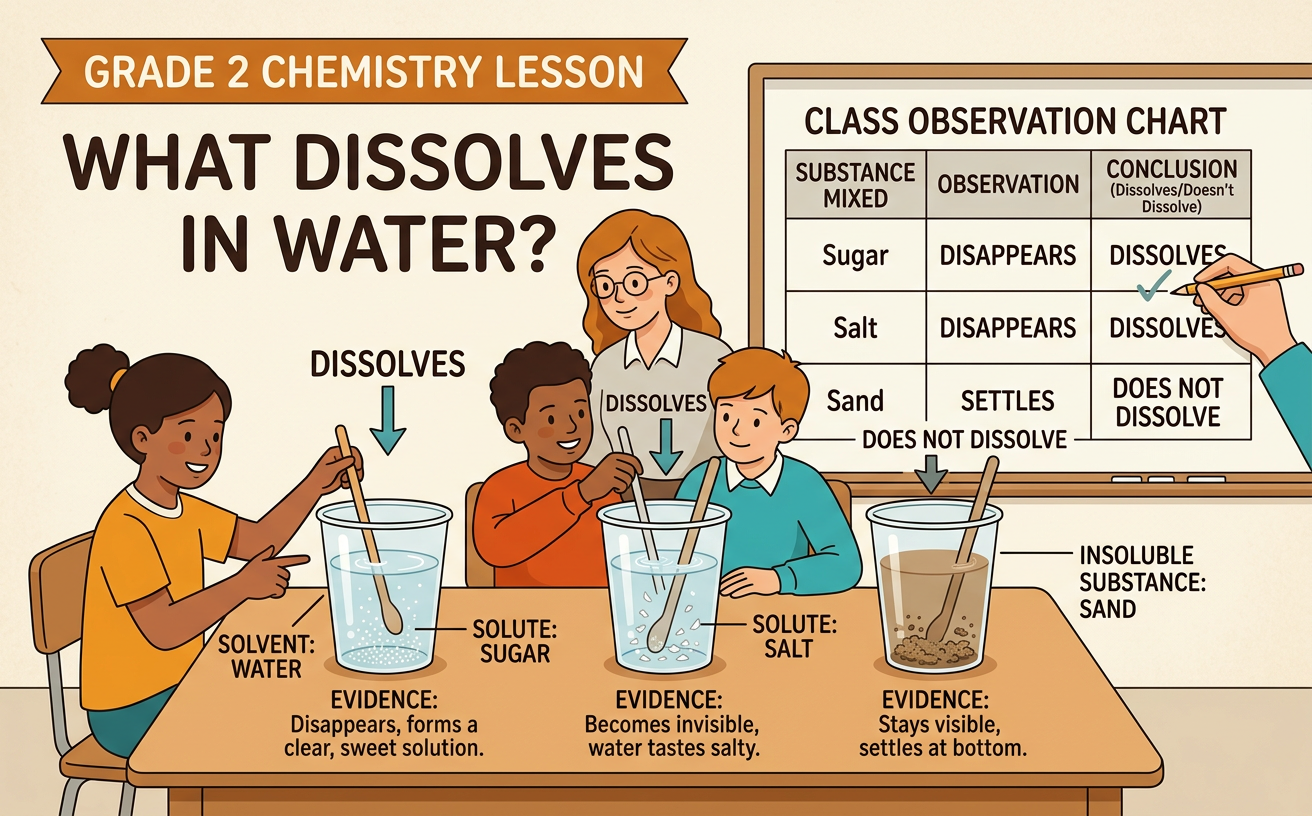
Students mix safe solids with water, observe which seem to dissolve, and record evidence in a class chart.
Illustrations are auto-generated and may be placeholders. They can be refreshed to match the narration.
Ask What Dissolving Means
When a solid dissolves in water, it breaks into pieces too tiny to see and spreads throughout the water. The solid may seem to disappear, but it is still there. The mixture is called a solution. For example, when a spoonful of salt is stirred into water, the salt crystals become invisible, and the water may look clear. Not every solid dissolves. Sand stays as visible grains and may settle at the bottom of a cup. We can use our senses safely by looking closely, but we must never taste classroom mixtures. Ask, “Can I still see the solid?” and “Did it settle?” These questions help us describe what happened using observable evidence.
Predict What Will Dissolve
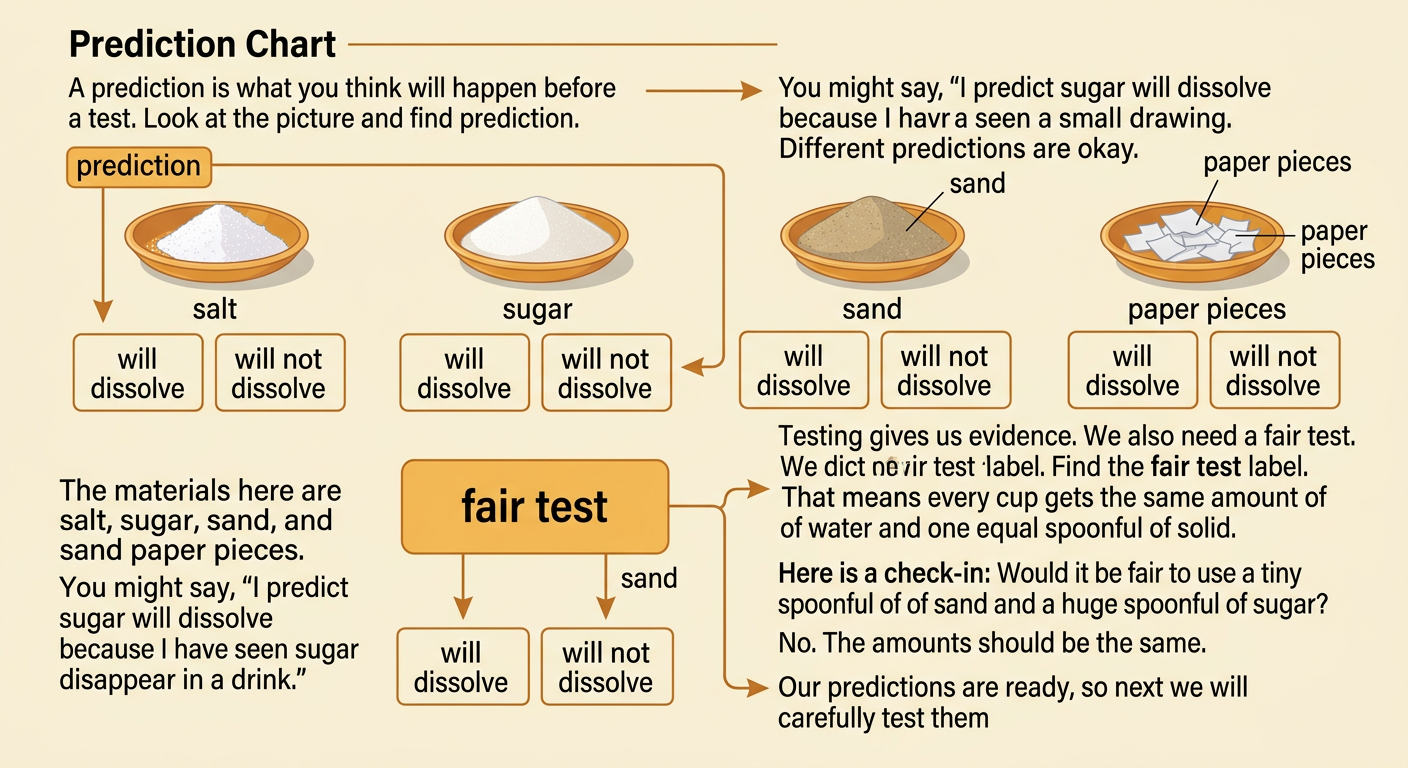
A prediction is what you think will happen before a test. Look at each safe solid, such as salt, sugar, sand, or small paper pieces. Notice its color, shape, and grain size without touching or tasting it unless your teacher gives permission. Predict whether each material will dissolve in water. You might say, “I predict sugar will dissolve because I have seen sugar disappear in a drink.” Record each prediction with a word, check mark, or picture. Different students may make different predictions, and that is okay. A prediction is not graded as right or wrong. Scientists test predictions and use evidence to find out what happens. Keep the amount of water and each spoonful of solid the same for a fair comparison.
Mix and Observe Safely
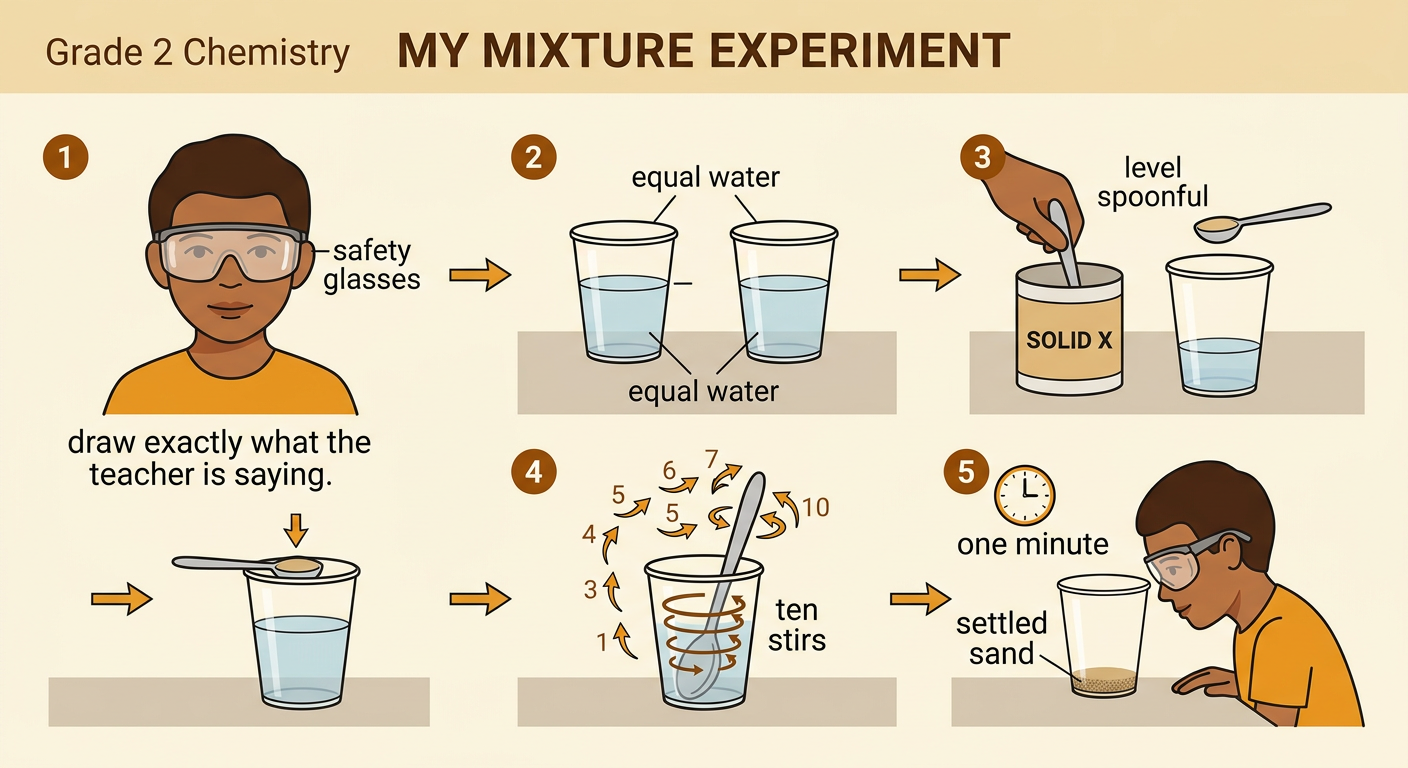
Wear safety glasses and follow your teacher’s directions. Use separate clear cups with the same amount of water. Add one level spoonful of a solid to the correct cup. Stir slowly the same number of times, such as ten stirs. Do not taste, splash, or smell closely. After stirring, look from the side and wait one minute. Record whether the solid is no longer visible, remains floating, or settles at the bottom. For example, sugar may no longer be visible after enough stirring, while sand usually remains as grains and settles. Use a clean spoon for each material so the tests do not mix. If water spills, tell the teacher and wipe it up as directed. Careful steps make the investigation safer and the comparison fairer.
Record and Graph Results
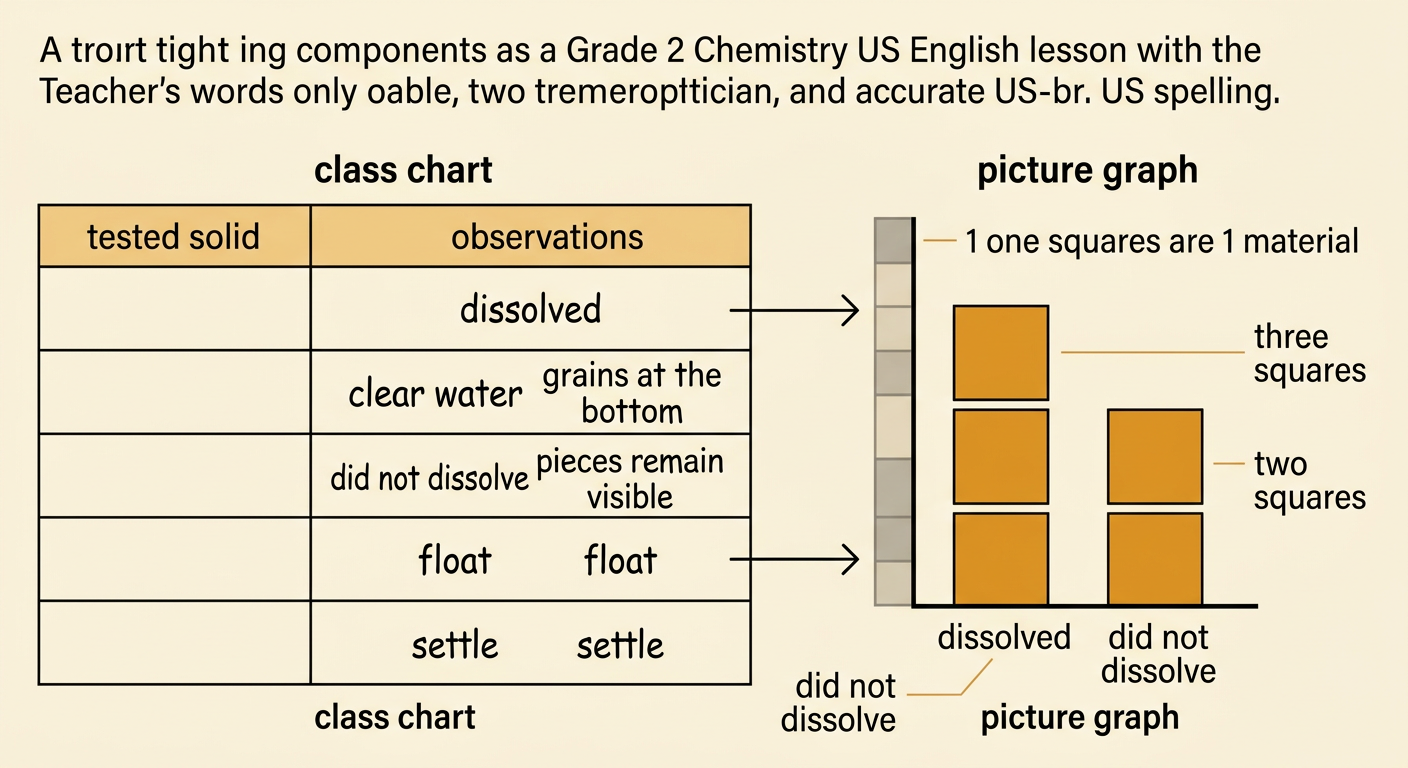
Create a class chart with one row for each tested solid. In the results column, record “dissolved” when the solid is no longer visible after stirring and waiting. Record “did not dissolve” when pieces remain visible, float, or settle. You can also write a short observation, such as “clear water” or “grains at the bottom.” Next, count how many materials are in each group. Make a picture graph or bar graph with one square for each material. For example, if three materials dissolved and two did not, the first bar should have three squares and the second bar should have two. Give the graph a title and label both groups. Use the graph to compare the results and write one class evidence statement.
Connect Findings to Clean Water
Community water can contain materials that dissolve and materials that do not. Soil or litter may be visible, but dissolved substances can be too small to see. Clear water is not always clean or safe to drink. People can affect water when they drop trash, use too much fertilizer, pour liquids onto the ground, or allow dirty runoff to enter storm drains. Water treatment workers use several steps to make community water safer, and they test it for substances we cannot see. A simple classroom filter may catch sand, but it does not remove every dissolved material or germ. We can help protect local water by putting waste in the correct place, using fewer harmful chemicals, and keeping storm drains clear. Never drink water from an experiment, stream, puddle, or unknown source.
