
Where Will Ice Melt Fastest?
Students compare ice placed in warmer and cooler locations, record melting data, and use evidence to explain how heating changes solid water into liquid water.

Illustrations are auto-generated and may be placeholders. They can be refreshed to match the narration.
Make a Melting Prediction
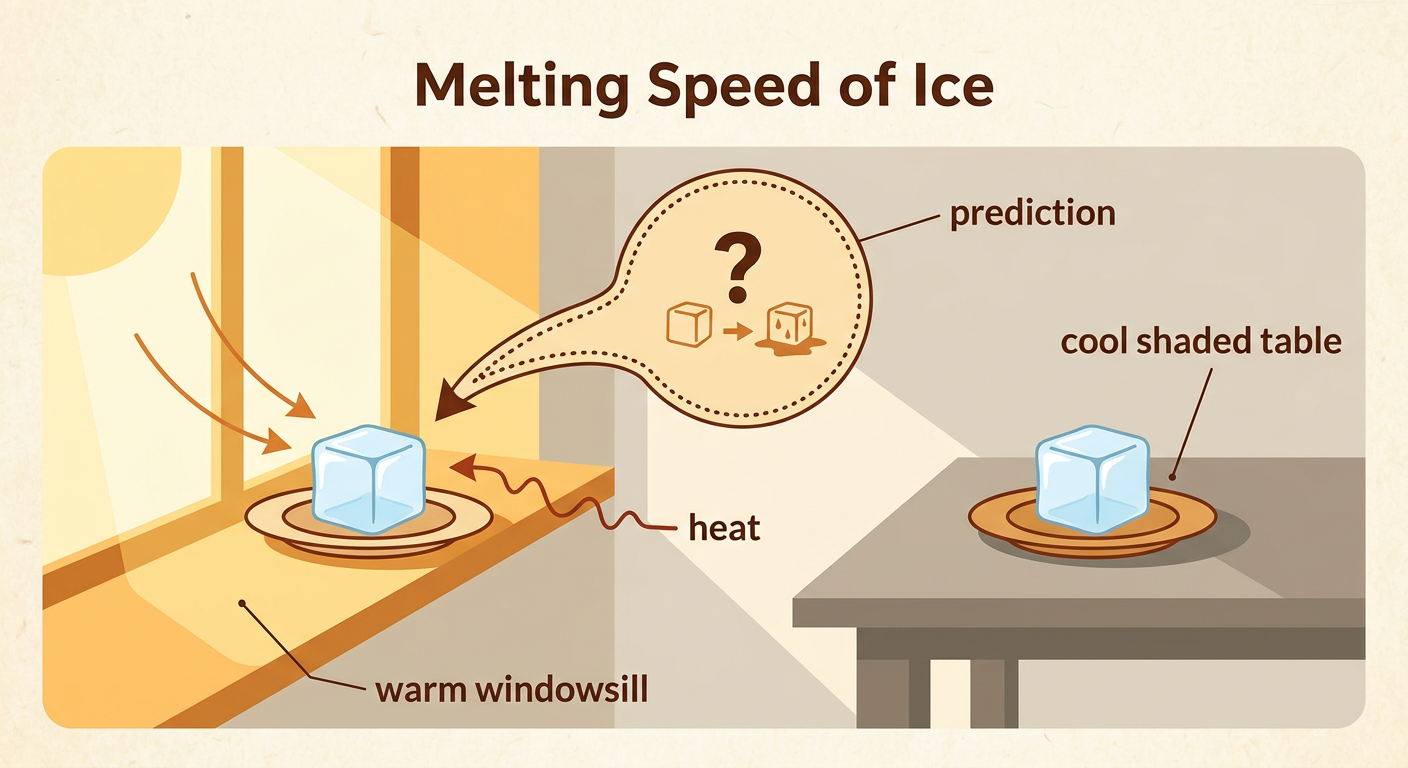
Ask the question: Where will an ice cube melt fastest? Think about two safe places, such as a warm sunny windowsill and a cool shaded table. A prediction tells what you think will happen before you test it. You might predict, “The ice on the warm windowsill will melt first because it gets more heat.” Heat moves from warmer surroundings into the colder ice. Keep everything else as much alike as possible. Plan to use ice cubes of the same size, matching plates, and the same starting time. Weather can affect the test. Sunlight may warm a room, while a cold day may keep a window area cool. Record the room conditions with your prediction so you can compare your idea with the evidence later.
Place Ice in Warm and Cool Locations
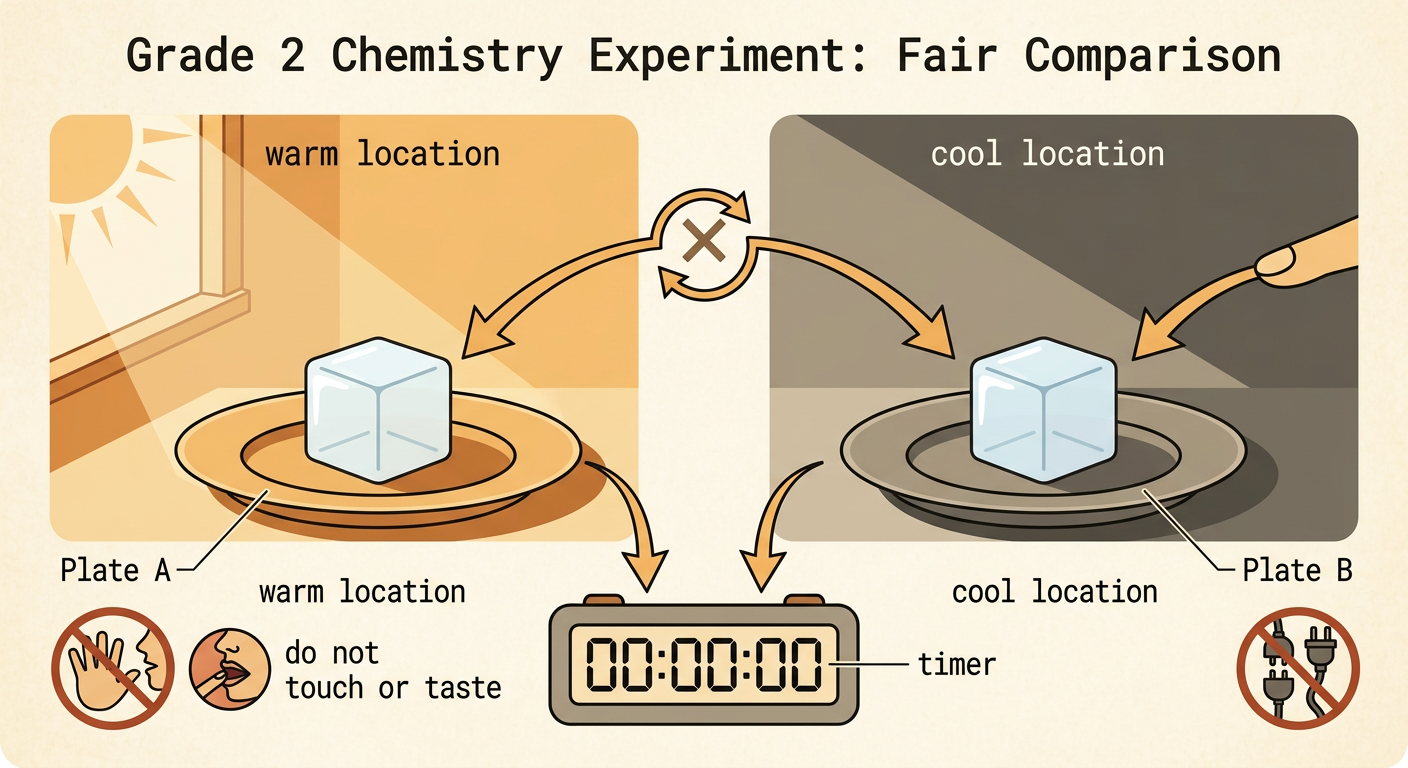
Put one same-size ice cube on each matching plate. Place one plate in the warmer location and one in the cooler location. Start a timer as soon as both cubes are in place. Do not touch or taste the ice, and keep the plates away from electrical items. The location should be the only planned difference. For example, do not put one cube in a metal pan and the other on a paper plate because the materials may transfer heat differently. Write down the starting time and describe each place. You might record, “Plate A is on a warm windowsill. Plate B is on a shaded table.” Careful setup makes the comparison fair and helps the class use evidence to answer the question.
Observe and Record Changes
Check both ice cubes at regular times, such as every five minutes. Look without moving the plates. Record what you see in a table. You can write “solid,” “partly melted,” or “liquid,” and you can draw the amount of ice and water. For example, after ten minutes, the warm-location cube may be much smaller with a puddle around it, while the cool-location cube may still be mostly solid. Melting happens when solid water gains heat and changes into liquid water. The water is still the same substance, even though its form has changed. Also record the time when each cube becomes completely liquid. If a cube has not fully melted by the end of the observation, write “not yet melted” instead of guessing.

Graph the Class Results
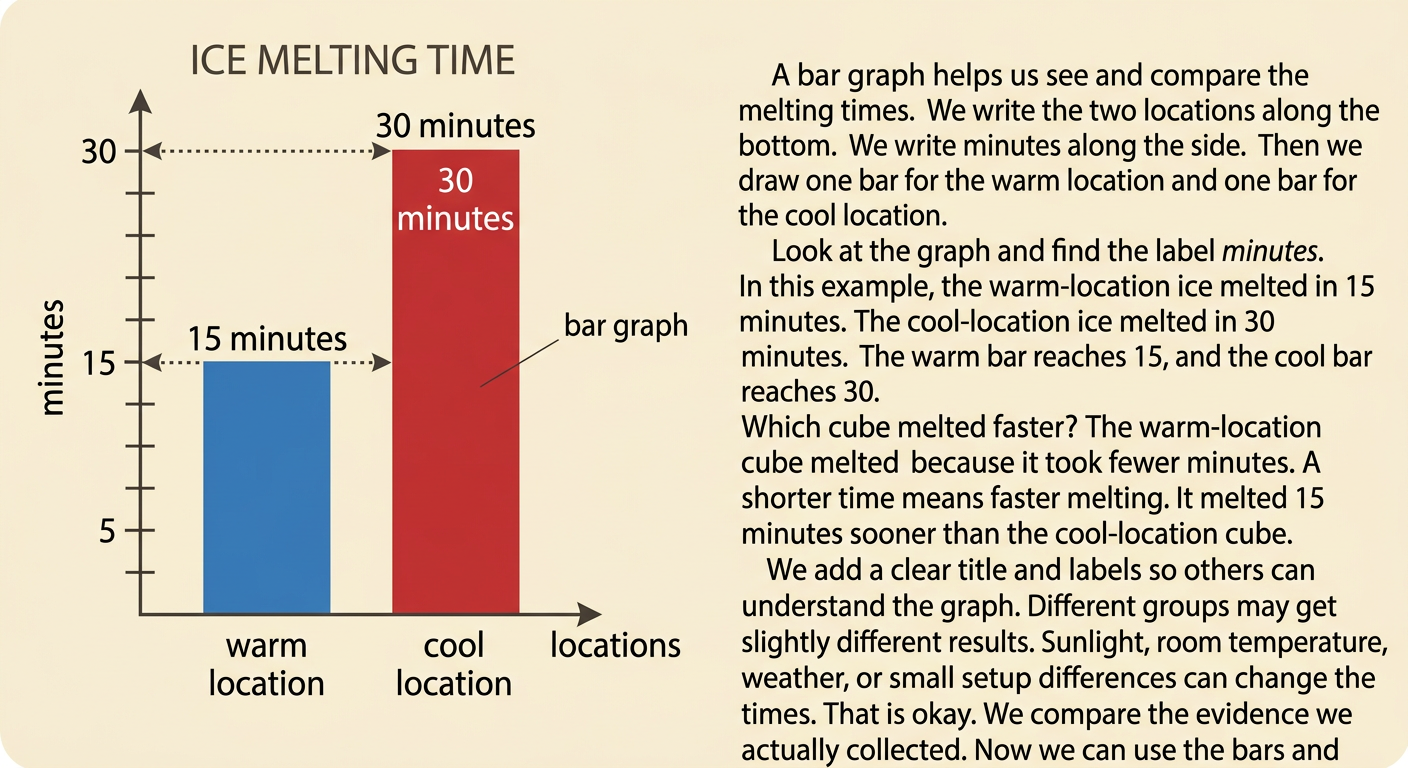
Use the class data to make a bar graph. The graph can show how many minutes each ice cube took to melt completely. Write the locations along the bottom and the number of minutes along the side. Draw one bar for the warm location and one bar for the cool location. For example, if the warm-location ice melted in 15 minutes and the cool-location ice melted in 30 minutes, the warm bar will reach 15 and the cool bar will reach 30. A shorter time means faster melting. Add a title and label both parts of the graph. Then compare the bars. You can say, “The ice in the warm location melted 15 minutes sooner.” If groups got different results, discuss weather, room temperature, or other setup differences.
Explain What Heat Did
Use your observations and graph to answer the investigation question. Begin with a claim, such as, “Ice melted fastest in the warmer location.” Next, give evidence: “The warm-location cube melted in 15 minutes, but the cool-location cube took 30 minutes.” Then explain that heat moved from the warmer surroundings into the ice, changing solid water into liquid water. This change can be reversed. If the liquid water is placed in a freezer and cooled enough, it becomes solid ice again. Connect the result to daily life. On a warm day, ice in a drink melts quickly, and snow or ice on sidewalks may melt. On a colder day, ice lasts longer, so people may need to watch for slippery places. Evidence helps explain how heating and cooling change water.
