Which Material Keeps Water Out?
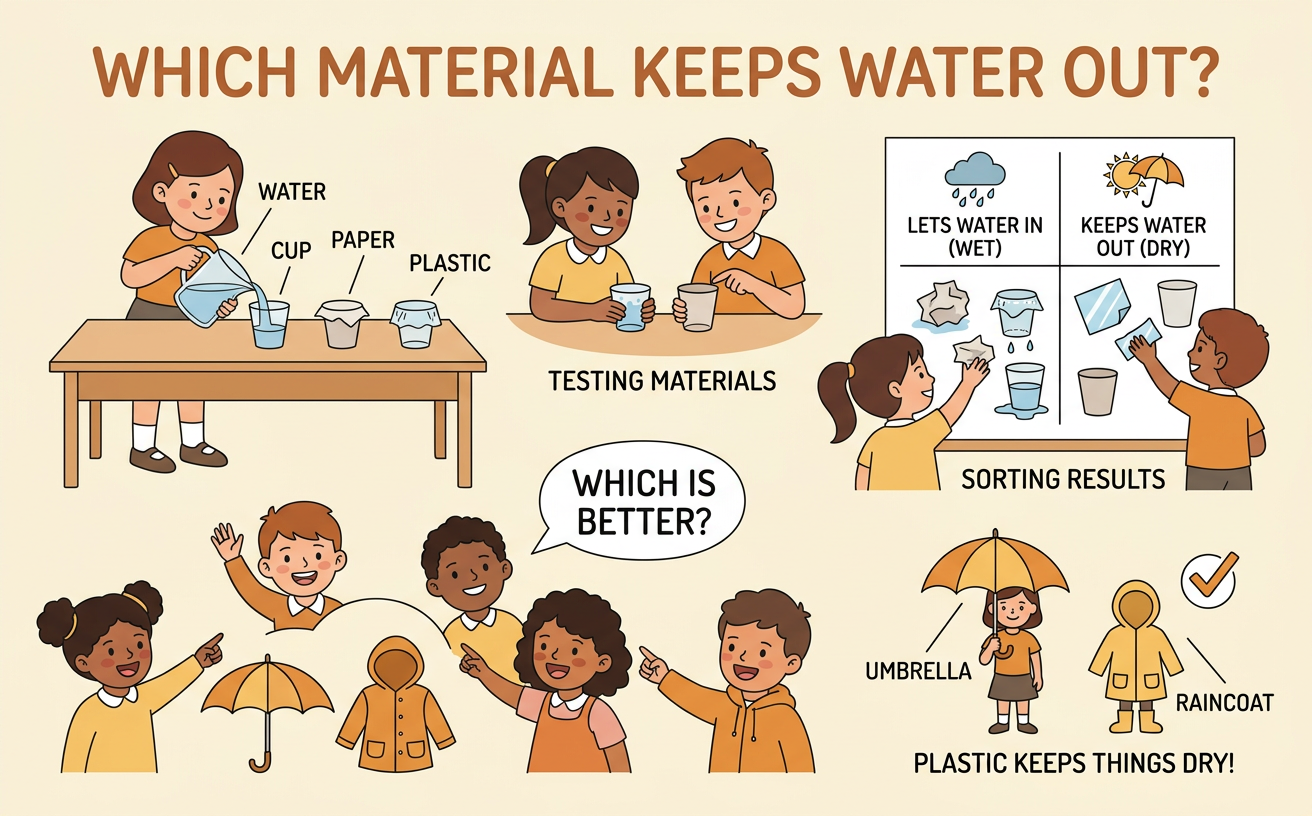
Students test paper and plastic coverings, sort the results, and explain which material would be better for making an item that keeps things dry.
Illustrations are auto-generated and may be placeholders. They can be refreshed to match the narration.
Notice Paper and Plastic
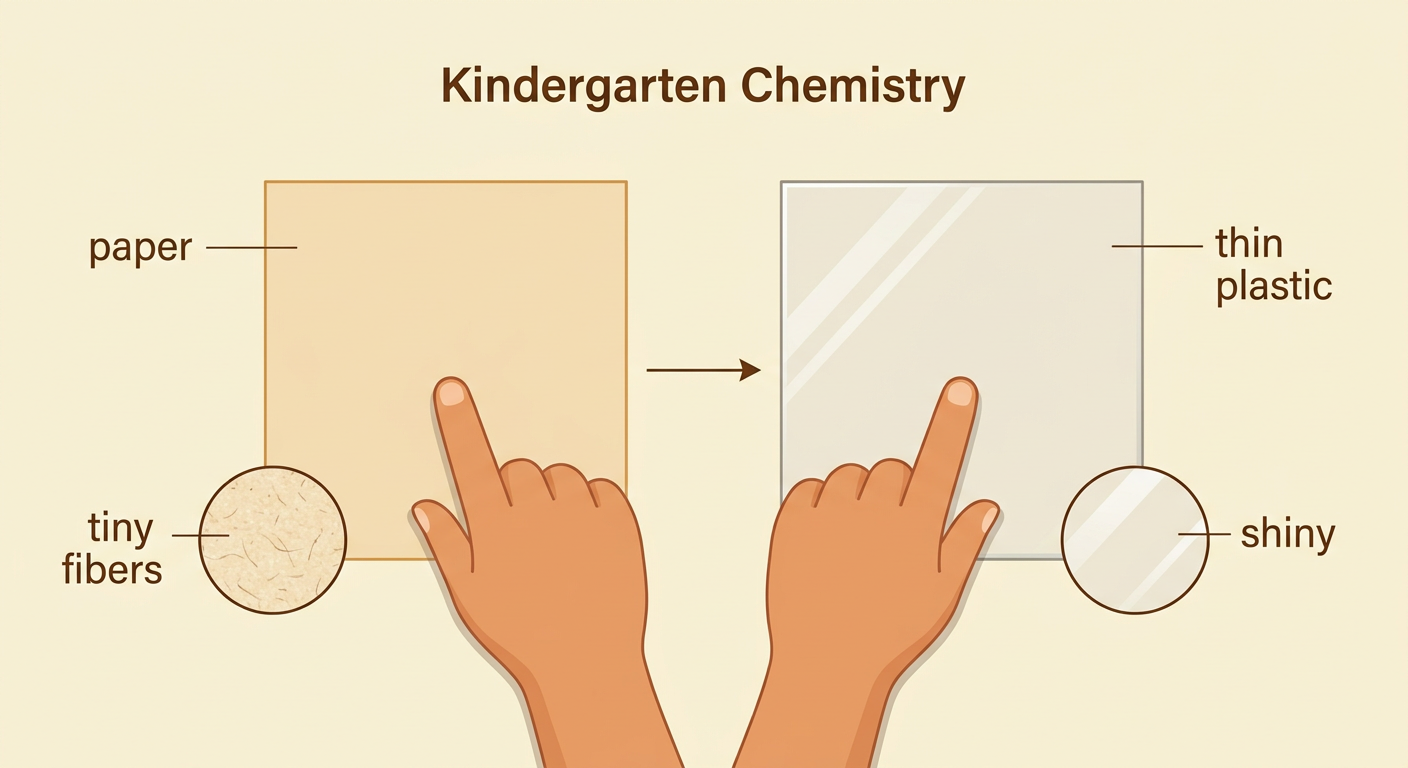
Paper and plastic are materials used to make many objects. Look closely at a piece of paper and a piece of thin plastic. Paper may feel soft, rough, or easy to fold. Thin plastic may feel smooth, bendable, and slippery. Talk with a partner about what you notice. Take turns speaking and listening. You might say, “The paper has tiny fibers,” or “The plastic looks shiny.” Think about objects made from each material. For example, a drawing can be made on paper, while a plastic bag can carry groceries. Both materials can cover an object, but they may act differently when water touches them. We will compare them to learn which one is better at keeping something dry.
Predict What Will Happen
A prediction tells what you think will happen before a test. We will place paper over one dry tissue and plastic over another dry tissue. Then we will add the same number of water drops to each covering. Think about whether the water will go through each material. Tell a partner your prediction and your reason. You might say, “I predict the tissue under the paper will get wet because paper can soak up water.” You might also predict that the tissue under the plastic will stay dry because plastic does not soak up water easily. Different predictions are okay. Listen to each idea without interrupting. After the test, we will use what we observe, not just our guesses, to decide which prediction matches the evidence.

Test Each Covering with Water
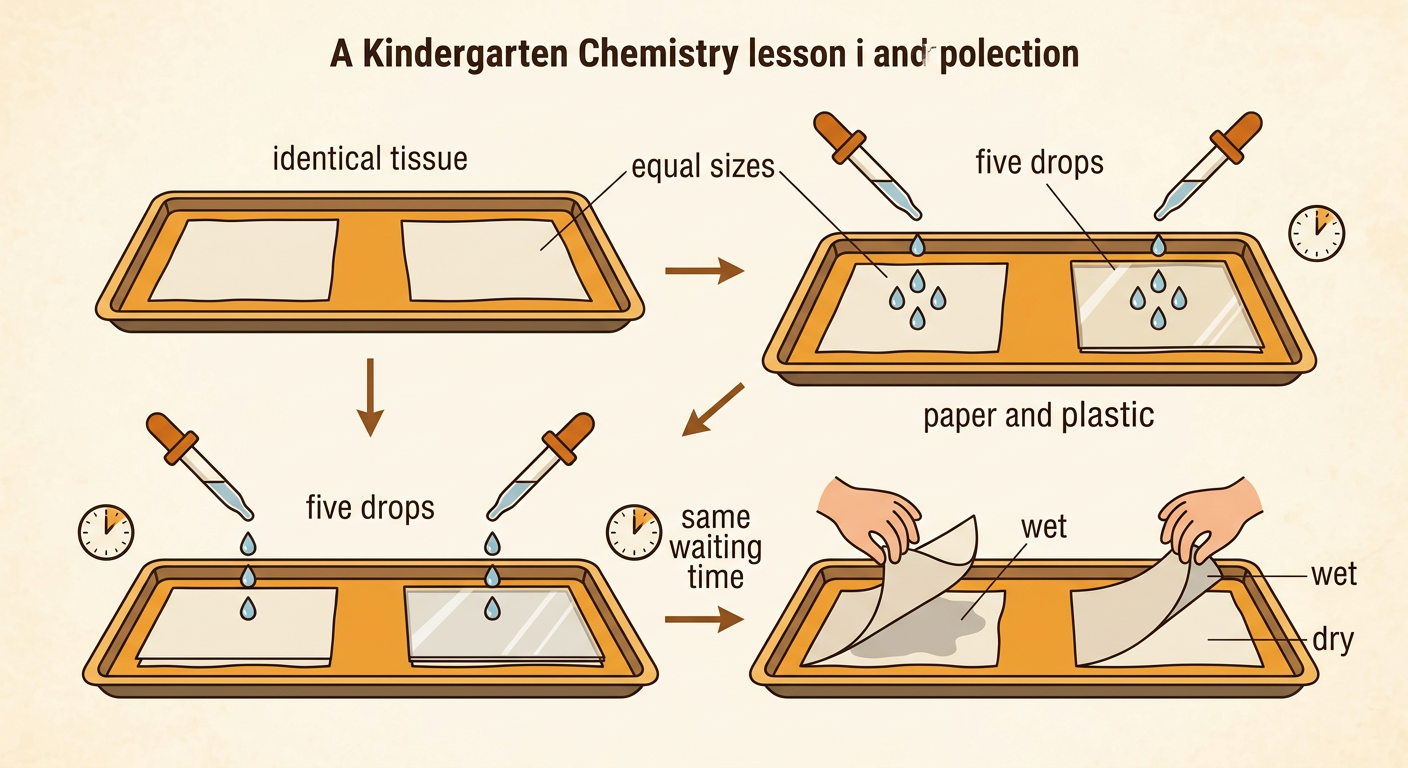
Now test both coverings in the same way. Place a dry tissue on each of two trays. Cover one tissue with a square of paper and the other with an equal-sized square of plastic. An adult or teacher can help keep the test safe and fair. Use a dropper to place five drops of water in the center of each covering. Count together: one, two, three, four, five. Wait the same amount of time, and then lift each covering carefully. Observe whether the tissue underneath is wet or dry. Do not taste the water or materials, and wipe up spills right away. Using equal sizes, equal drops, and equal waiting time helps us compare the materials fairly.
Sort Wet and Dry Results
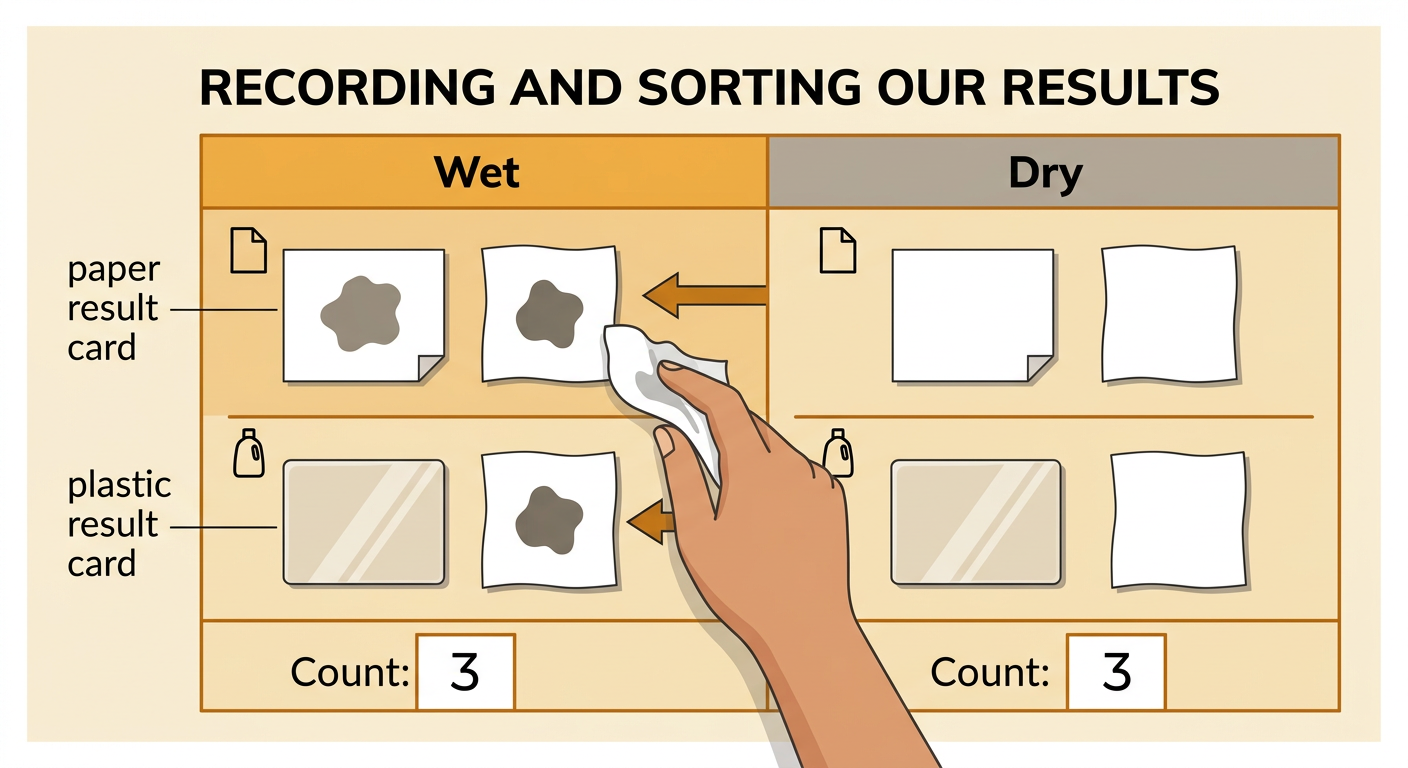
Record what happened in each test. Make two result groups labeled “Wet” and “Dry.” Touch only the edge of each tissue, or look for a dark water spot. Place a paper result card and a plastic result card in the matching groups. If the tissue under the paper has a water spot, put its card in the Wet group. If the tissue under the plastic has no water spot, put its card in the Dry group. Repeat the test if your teacher asks. Then count the cards in each group and say the totals. For example, you may count three wet paper results and three dry plastic results. Sorting and counting help the class see a pattern instead of depending on only one observation.
Choose the Better Material
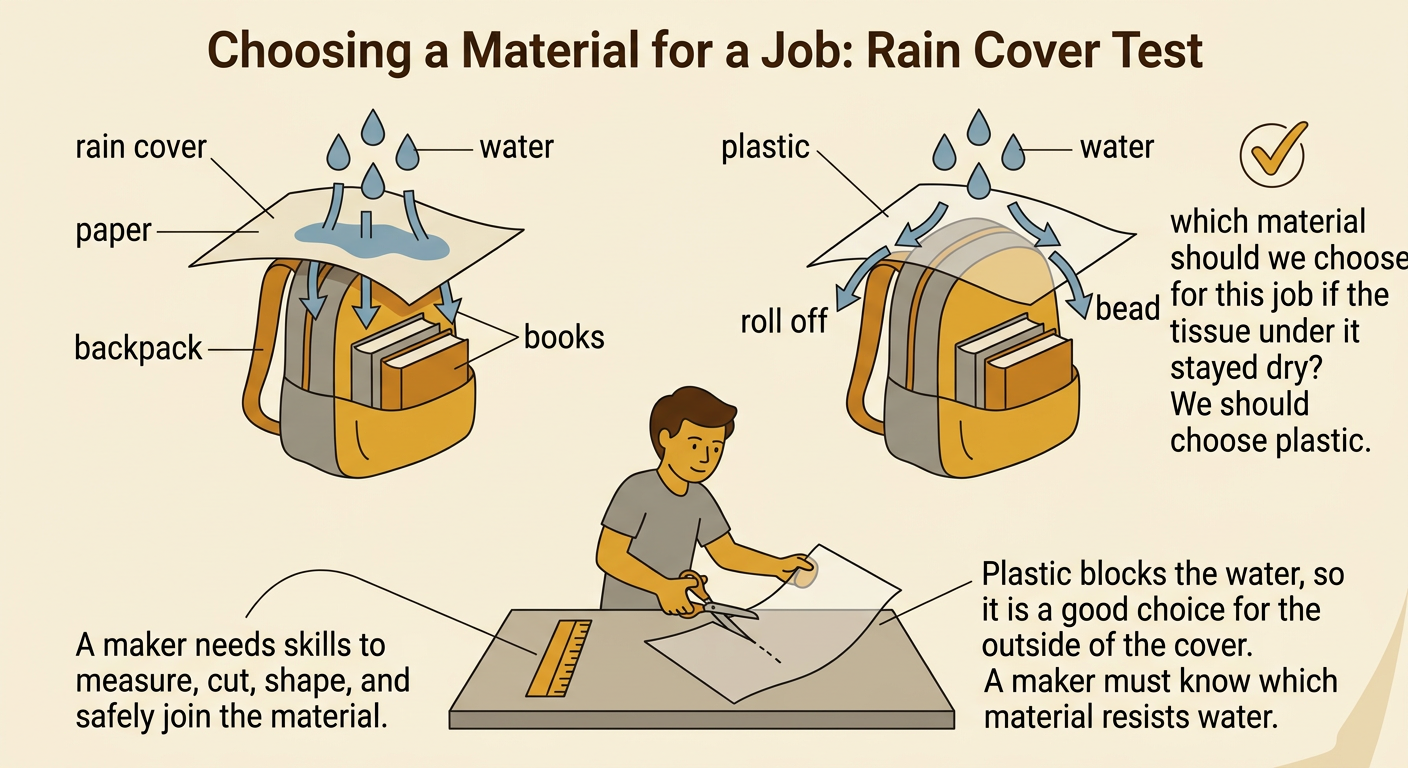
Use the class results to choose the better material for an item that must keep things dry. If water went through the paper but did not go through the plastic, plastic performed better in this test. For example, plastic would be the better choice for the outside of a rain cover for a backpack. The plastic blocks the water, so the books inside can stay dry. A maker needs knowledge about which materials resist water. The maker also needs skills to measure, cut, shape, and join the material safely. Paper may still be useful for drawing, writing, or making a label, even though it is not the best waterproof cover. Choosing a material depends on the job the finished item must do.
Share Evidence
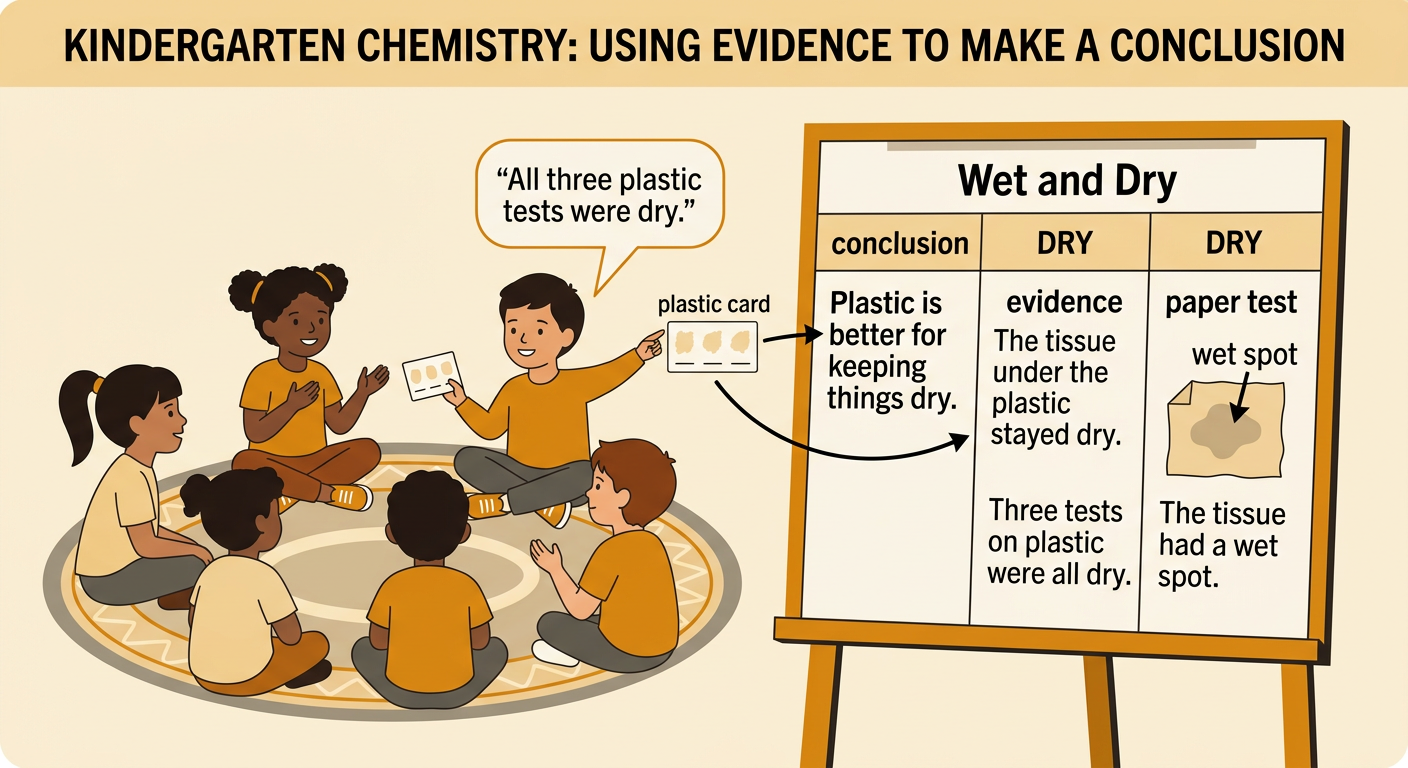
Share your conclusion with classmates using evidence from the test. A conclusion tells what you learned. Evidence is what you observed or counted. Take turns with a partner or speak during a class circle. You can say, “I think plastic is better for keeping things dry because the tissue under the plastic stayed dry.” Add a number if the class repeated the test: “All three plastic tests were dry.” A classmate may ask, “What happened under the paper?” Answer with an observation, such as, “The tissue had a wet spot.” Listen carefully when others speak, and ask a question if you need more information. Clear words, test results, and respectful listening help the class explain which material solved the problem better.