Which Materials Are Attracted to Magnets?
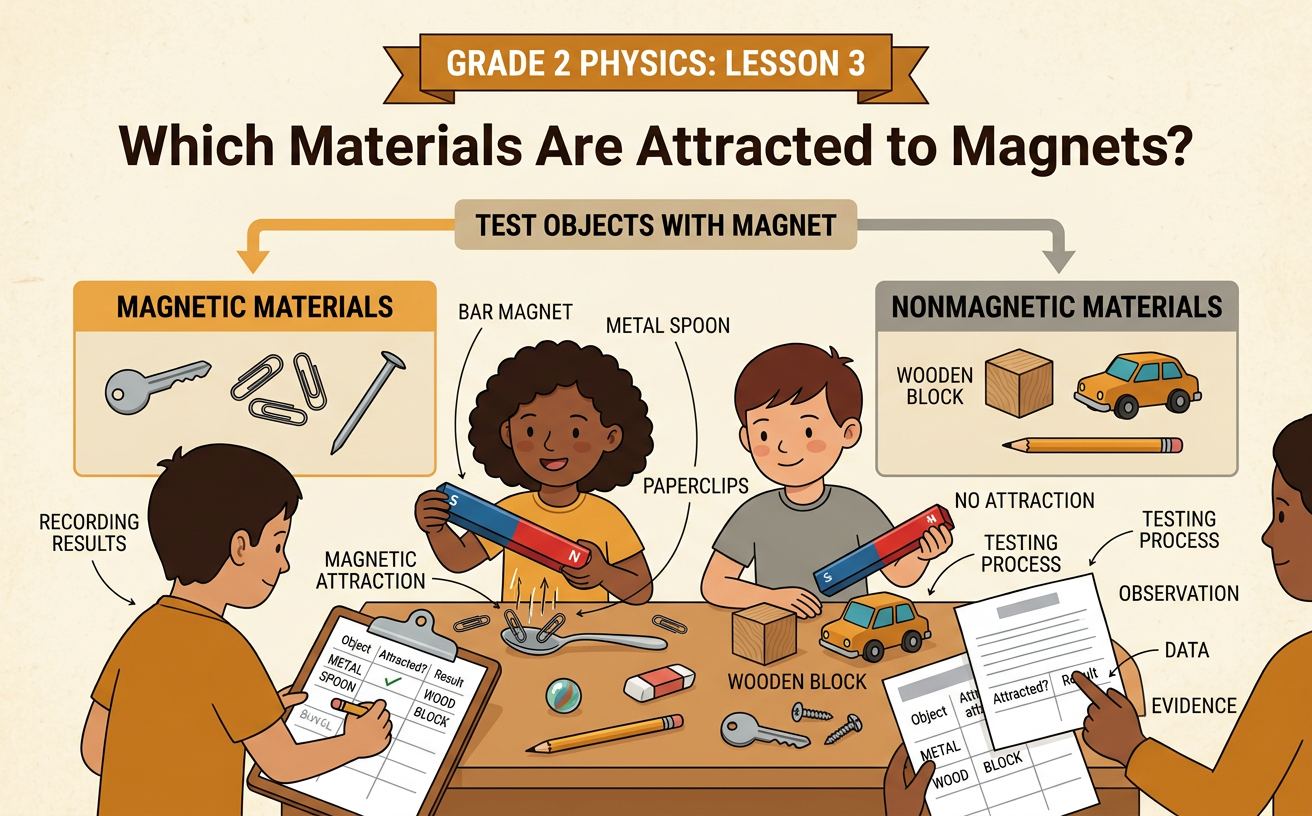
Students test classroom materials with a magnet, record results, and use evidence to classify objects as magnetic or nonmagnetic.
Illustrations are auto-generated and may be placeholders. They can be refreshed to match the narration.
Meet the Magnet
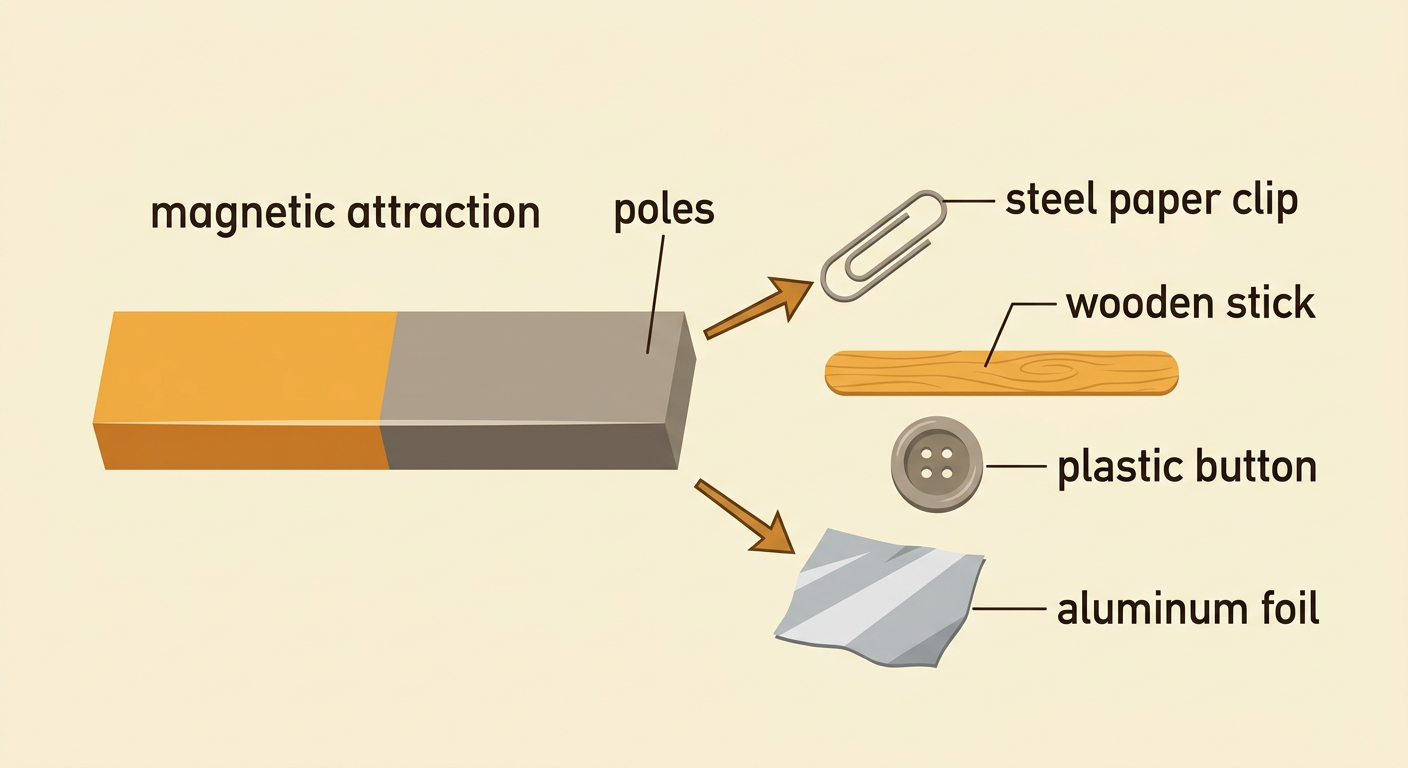
A magnet can pull certain materials toward it without touching them first. This pull is called magnetic attraction. Magnets attract objects made with iron or some kinds of steel. However, not every metal is attracted to a magnet. For example, a steel paper clip is usually attracted, but a piece of aluminum foil is not. Wood, plastic, paper, and rubber are also not attracted. A bar magnet has two ends called poles. The magnetic pull is often strongest near these ends. Today, you will observe one property of classroom objects: whether a magnet attracts them. You will use the same magnet for each test so that your observations can be compared fairly.
Predict Which Objects Will Be Attracted
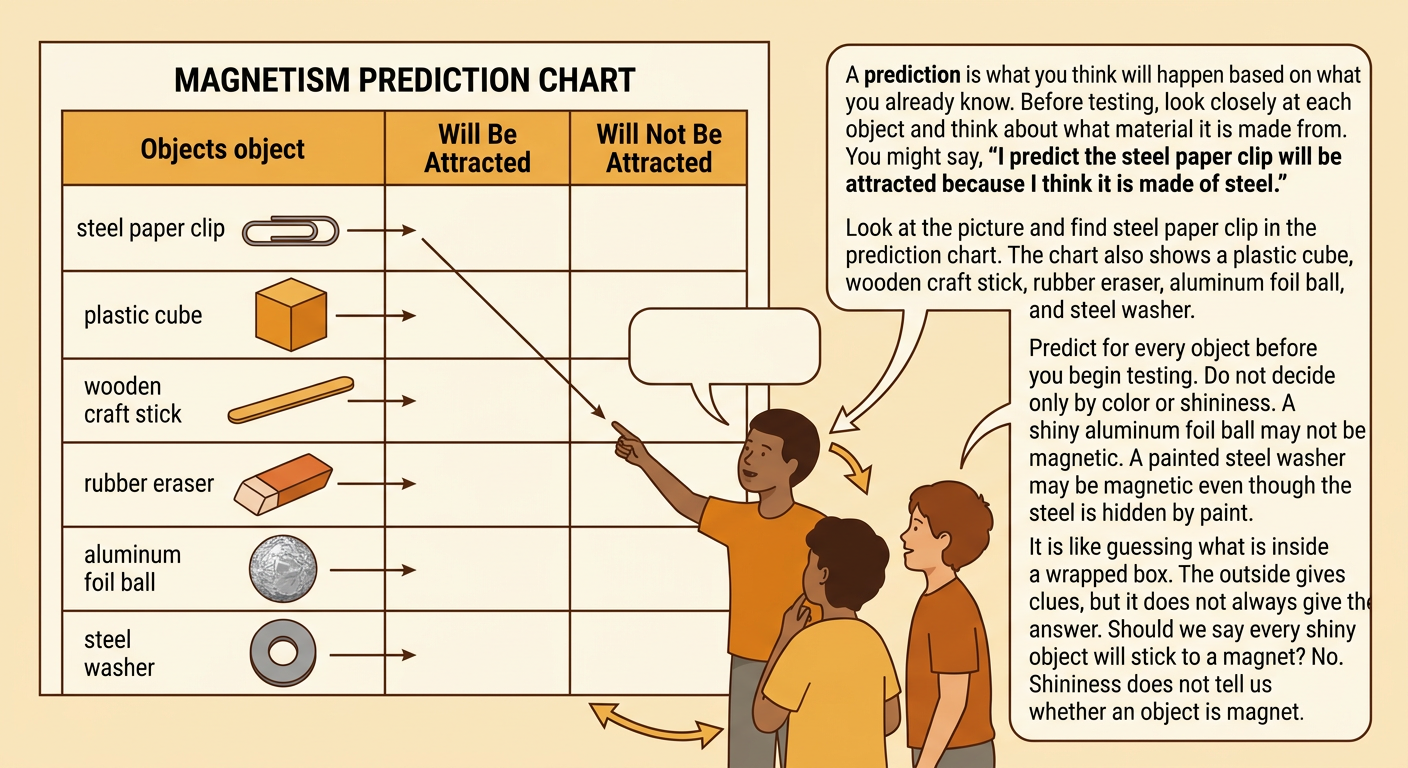
Before testing, make a prediction for each object. A prediction is what you think will happen based on what you already know. Look closely at each object and think about the material it is made from. You might test a steel paper clip, a plastic cube, a wooden craft stick, a rubber eraser, an aluminum foil ball, and a steel washer. Say, “I predict the paper clip will be attracted because I think it is made of steel.” Do not decide only by color or shininess. A shiny object may not be magnetic, and a painted object may contain magnetic steel. Listen to your group members and take turns sharing reasons. Record every prediction before beginning the tests.
Test Materials Safely
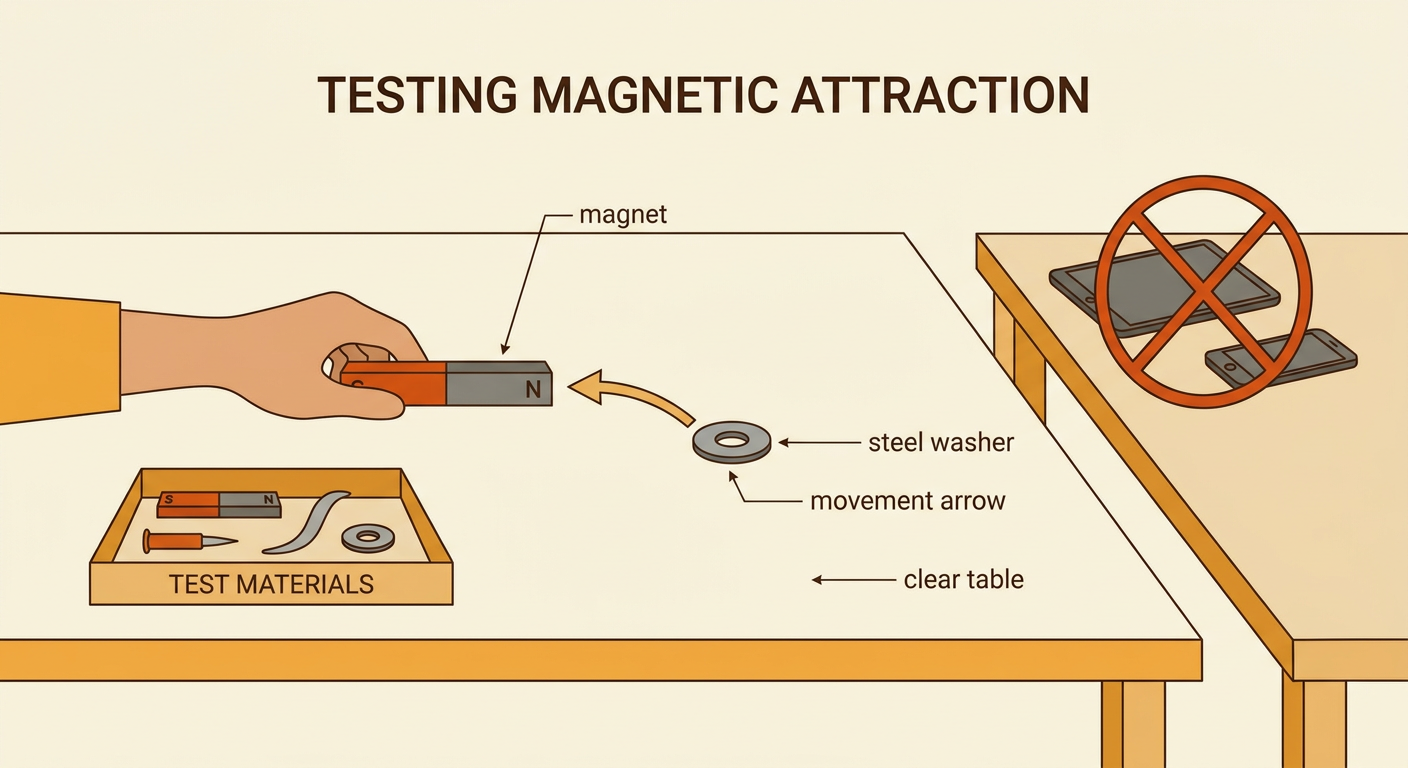
Place one object at a time on a clear table. Hold the magnet a short distance away, then slowly move it toward the object. Watch carefully. If the object moves toward the magnet or sticks to it, the object is attracted. If it does not move or stick, it is not attracted in this test. Try each object in the same way, and test it again to check your observation. For example, bring the magnet close to a steel washer without pushing the washer. If the washer slides toward the magnet, record that movement. Keep magnets away from computers, tablets, phones, credit cards, and anyone with a medical device. Do not put magnets or test objects in your mouth. Use only the materials your teacher provides.
Sort and Record the Results
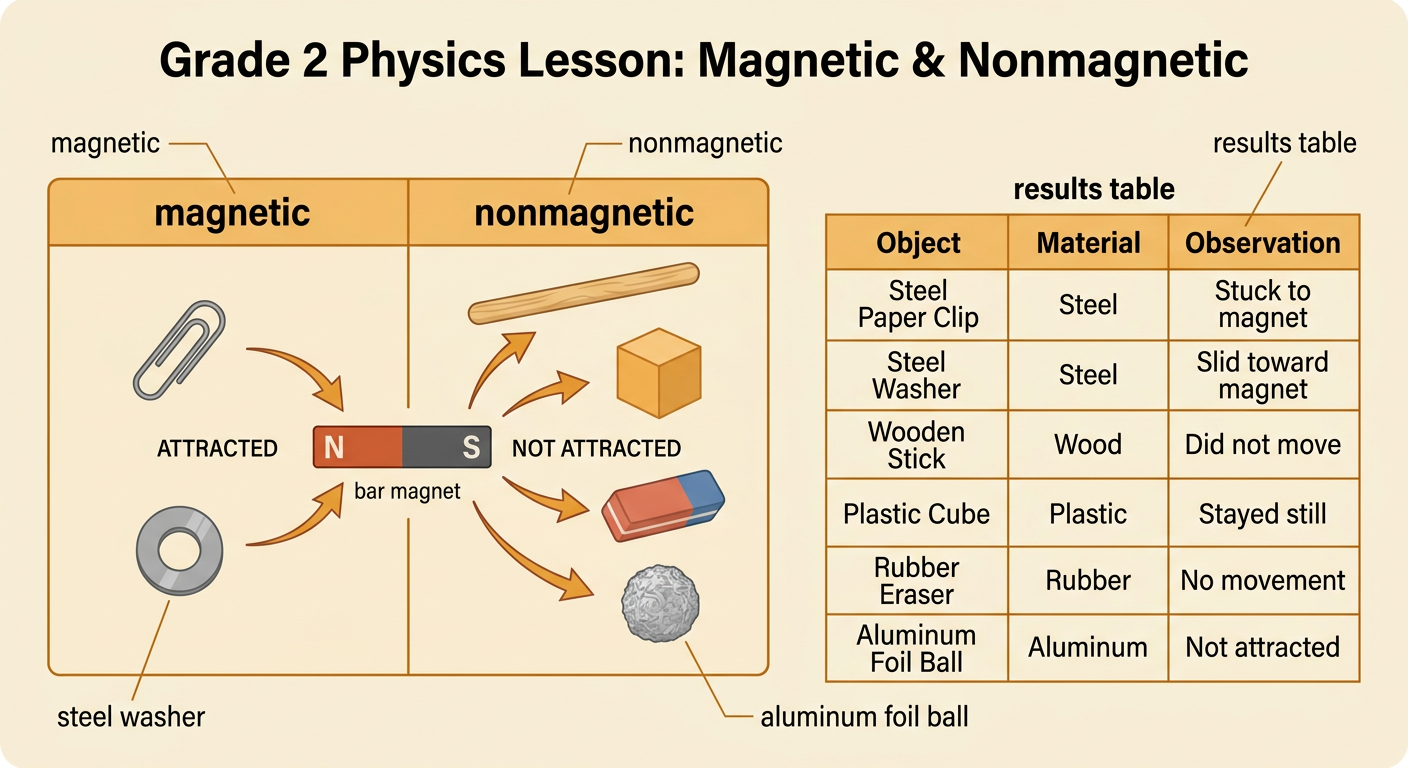
After each test, record what actually happened. Make two groups: magnetic and nonmagnetic. In this investigation, magnetic means the object was attracted to the magnet. Nonmagnetic means it was not attracted. Put the steel paper clip and steel washer in the magnetic group if they moved or stuck. Put the wooden stick, plastic cube, rubber eraser, and aluminum foil ball in the nonmagnetic group if they did not move or stick. Your results table should name the object, identify its material, and tell what you observed. Compare the results with your predictions. It is fine if a prediction was incorrect because observations provide new information. Work with your group to check that every object was tested and recorded in the correct group.
Make an Evidence-Based Claim
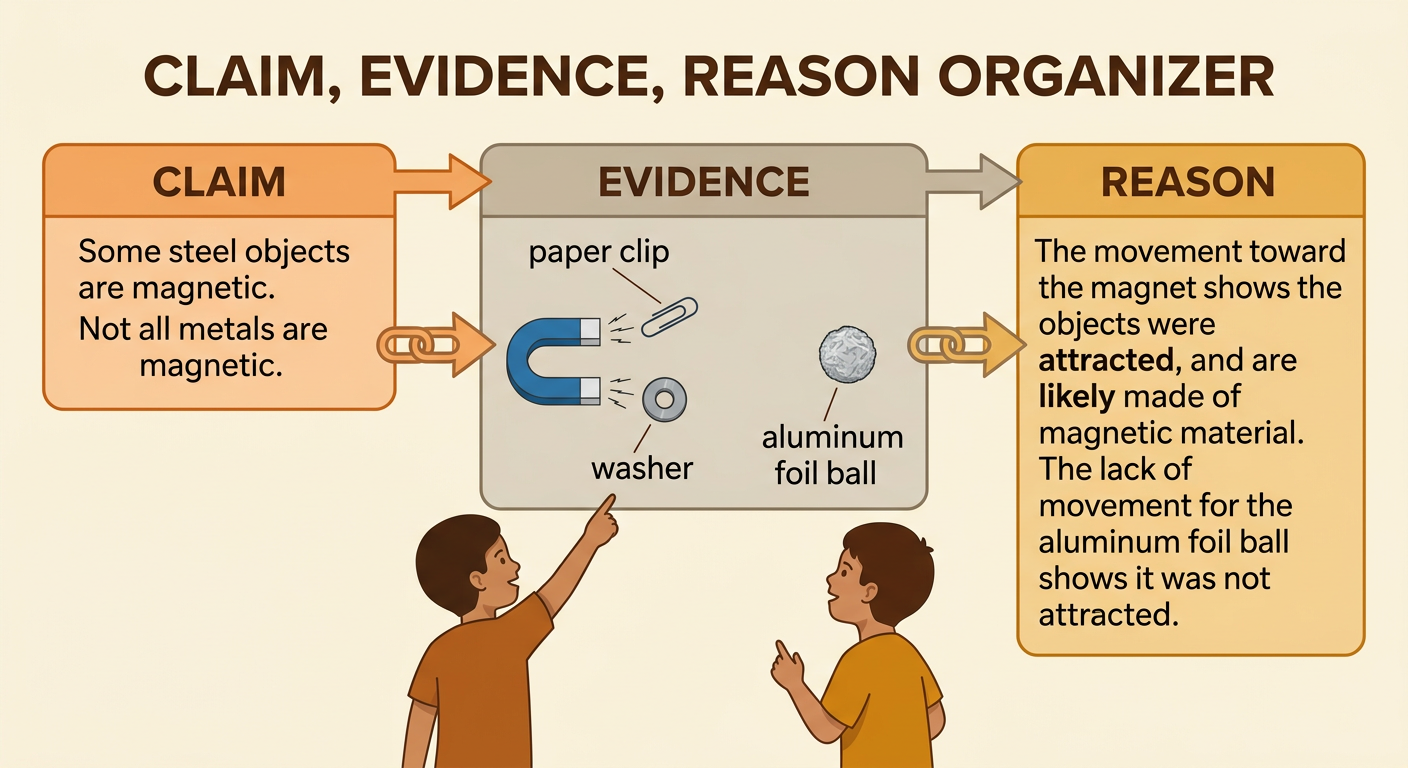
A claim tells what you learned. Evidence is the observation that supports your claim. A reason explains how the evidence connects to the claim. You might say, “My claim is that some steel objects are magnetic. The paper clip and washer moved toward the magnet, so their movement is evidence that they were attracted.” You could also claim that not all metals are magnetic because the aluminum foil ball did not move toward the magnet. Use only results from your investigation, and name the objects you tested. Share your claim with the group and listen to other claims. Ask, “What evidence supports your idea?” If classmates got different results, test the object again. A strong conclusion matches the observations and does not say that all metal objects are attracted to magnets.