
Why Seat Belts Keep Riders Safer
Students use a toy-car model to investigate how a restraint affects a passenger during a sudden stop and connect their evidence to seat-belt safety rules.
Illustrations are auto-generated and may be placeholders. They can be refreshed to match the narration.
Observe a Sudden Stop
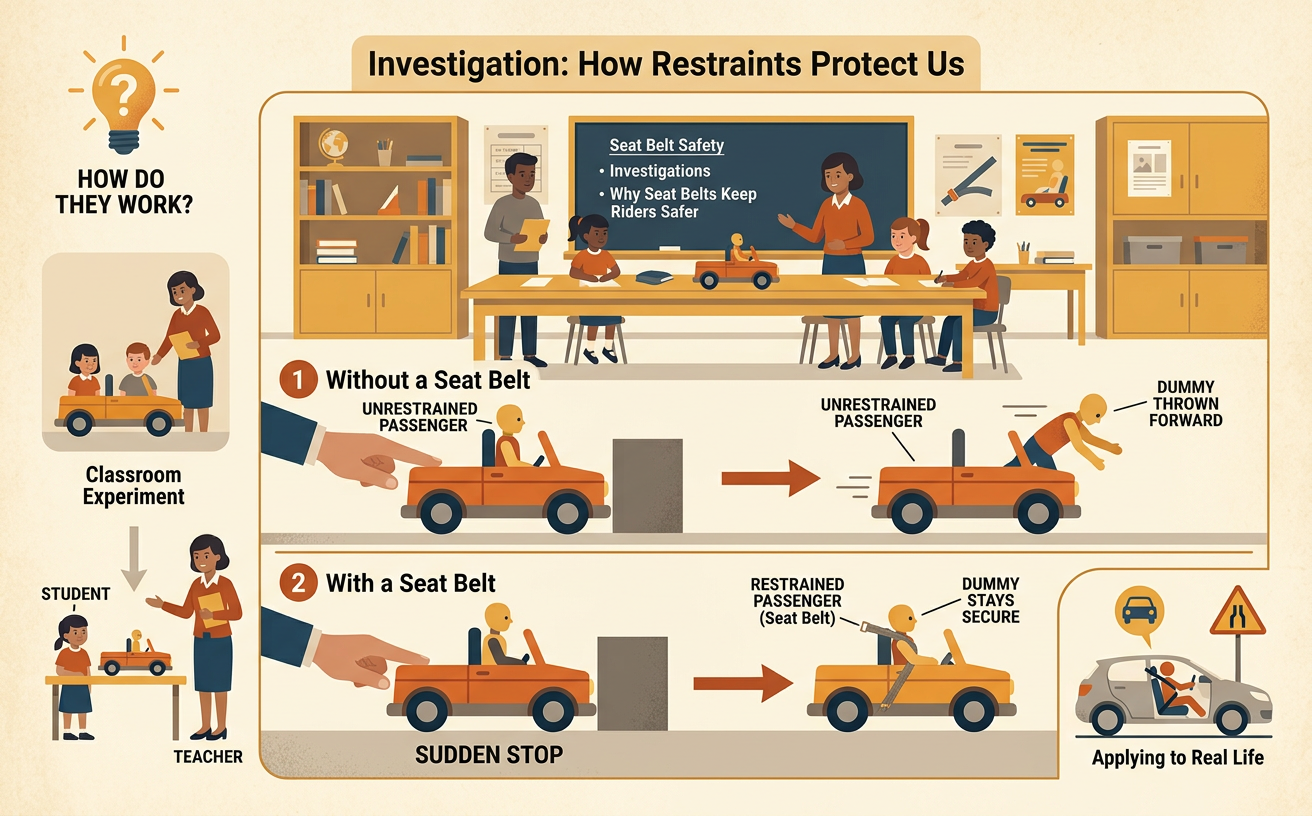
Place a toy car on the floor with a small block riding loosely on top. Gently roll the car toward a book that acts as a barrier. When the car hits the book, the car stops, but the block may keep moving forward and fall off. The barrier pushes on the car and changes its motion. The block does not receive the same stopping force at the same moment, so it continues forward. This model is like a rider moving forward when a real vehicle stops suddenly. Observe from the side and keep faces and hands out of the car’s path. For example, if the toy car is moving quickly, the loose block may travel several inches beyond the car. Record what you notice and discuss your observations with your group.

Build the Passenger Model
Build a model that can be tested safely and fairly. Use a toy car as the vehicle and a small wooden block, large eraser, or lump of modeling clay as the passenger. Place a book or sturdy box at the end of a short, smooth track. Mark one starting line with masking tape so the car begins at the same place in every trial. A folded strip of paper, ribbon, or soft rubber band can model a seat belt. It should hold the passenger against the car without being tied around any person. Check that the model passenger fits securely but can move when no restraint is used. For example, a block placed upright in the same spot on the car makes it easier to compare repeated tests. Assign group jobs such as launcher, observer, measurer, and recorder.

Test With and Without a Restraint
Plan two kinds of trials. First, place the passenger on the car without a restraint. Release the car from the marked starting line and let it strike the barrier. Observe where the passenger lands. Next, return every part to the same position and place the soft restraint across the passenger. Release the car in the same way. Repeat each kind of trial at least three times because results can vary. Change only one thing: whether the restraint is used. Keep the same car, passenger, track, starting line, and barrier. For example, the unrestrained block may fly off in all three trials, while the restrained block may remain on the car. Group members should take turns sharing evidence, asking questions, and checking that the test is fair. Use only toy materials; never test sudden stops with people or pets.

Measure and Compare Travel Distances
Measure how far the passenger travels after the car hits the barrier. Mark the passenger’s first landing place with a small piece of tape. Use a ruler to measure from the front of the stopped car to that mark. Measure to the nearest inch and record the result in a data table. If the restrained passenger stays on the car, record zero inches beyond the car. Collect at least three measurements for each condition. For example, distances without a restraint might be 7, 8, and 8 inches, while distances with a restraint might be 0, 0, and 1 inch. Display the data on a line plot with distance in inches along the bottom. Place one X above the correct distance for each trial. Compare the clusters and describe which condition usually produced shorter travel distances.

Explain the Safety Rule
Use the investigation evidence to explain why seat-belt rules help keep riders safer. In the model, the moving car stopped when the barrier pushed on it, but the loose passenger continued forward. The restraint provided a force that helped stop the passenger with the car and reduced how far the passenger traveled. A real seat belt is designed to hold a rider in the vehicle and spread the stopping force across strong parts of the body. The toy model is simpler than a real crash, but it shows an important motion pattern. Seat-belt laws require riders to buckle up because one person’s choice can affect families, emergency workers, and the community. For example, a rule reminding every rider to buckle up can increase regular seat-belt use and reduce serious injuries. Children should always use the correct seat belt or child safety seat with adult help.
