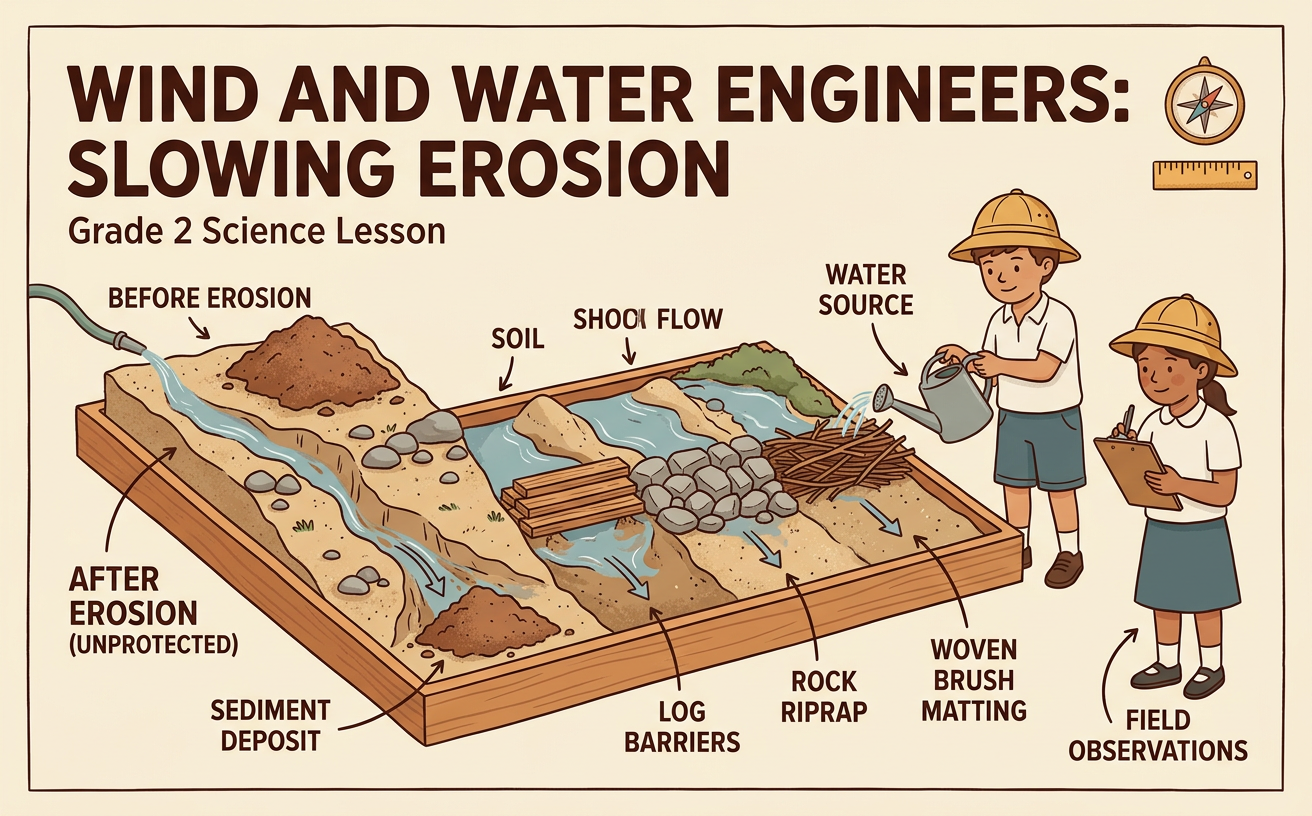
Wind and Water Engineers: Slowing Erosion
Students compare simple barriers in a model landscape and recommend a solution for slowing water erosion.
Illustrations are auto-generated and may be placeholders. They can be refreshed to match the narration.
Notice How Water Moves Soil
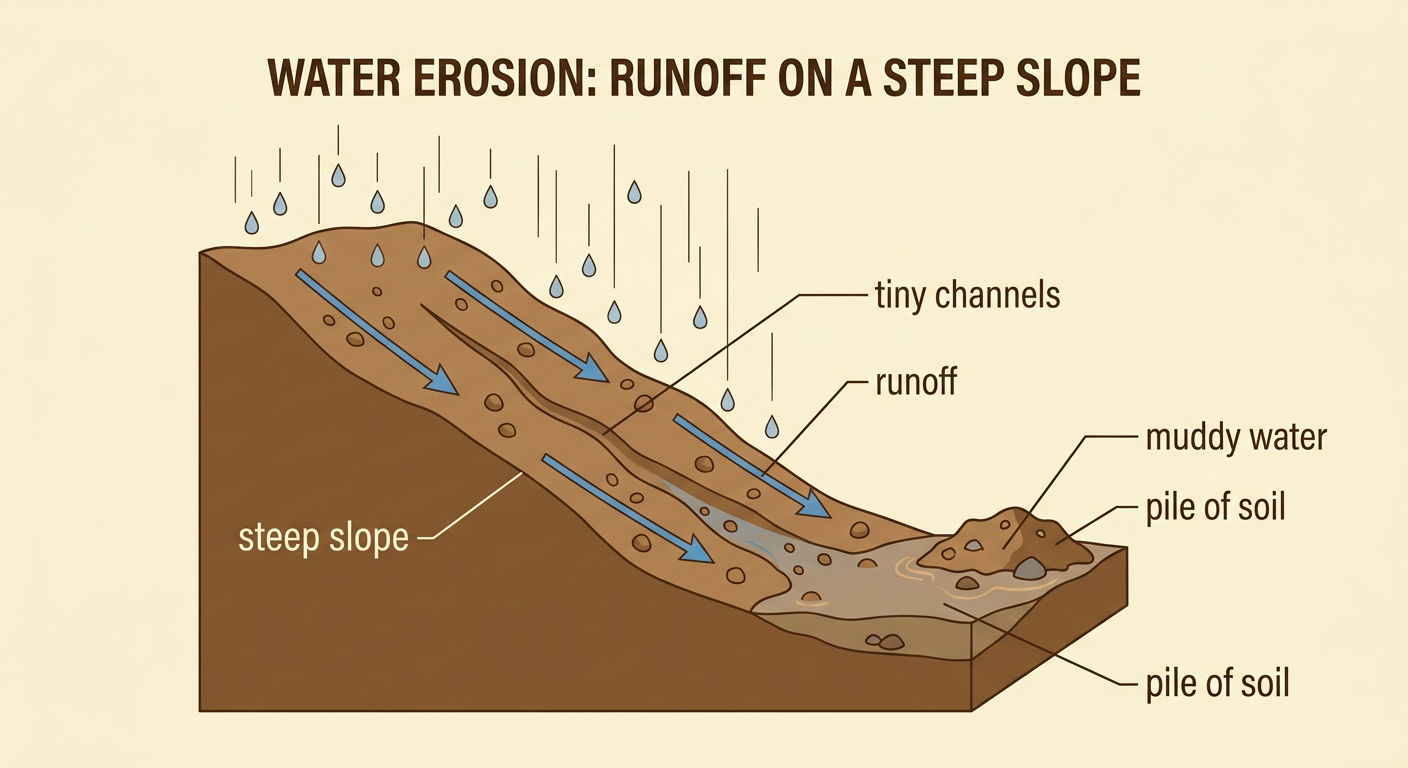
Water erosion happens when moving water carries soil and small pieces of rock from one place to another. Rainwater may flow downhill as runoff. Fast-moving runoff can loosen and carry more soil than slow-moving water. Look for clues such as muddy water, tiny channels, and piles of soil at the bottom of a slope. For example, after rain falls on a bare dirt hill, brown water may collect near the sidewalk below. The water has moved some soil downhill. Land shape matters, too. Water usually moves faster down a steep slope than across flat ground. This can affect where people build homes, roads, and gardens. Engineers study how water moves so they can design ways to slow erosion and help protect the land people use.
Build Model Landforms
A model is a smaller, simpler version of something in the real world. To model a hillside, place the same amount of damp soil in each shallow tray. Shape the soil into equal slopes, with one end higher than the other. Press the soil gently so each slope begins in the same condition. Put a collection cup or basin at the low end of every tray. It will catch runoff and eroded soil. Keep one tray as a bare-land model. The other trays will hold different barriers. Real landscapes have hills, valleys, plants, rocks, roads, and buildings. These features affect where water flows and where people can safely live. A classroom model cannot show every feature, but it can help us compare ideas under controlled conditions.

Test Erosion Barriers
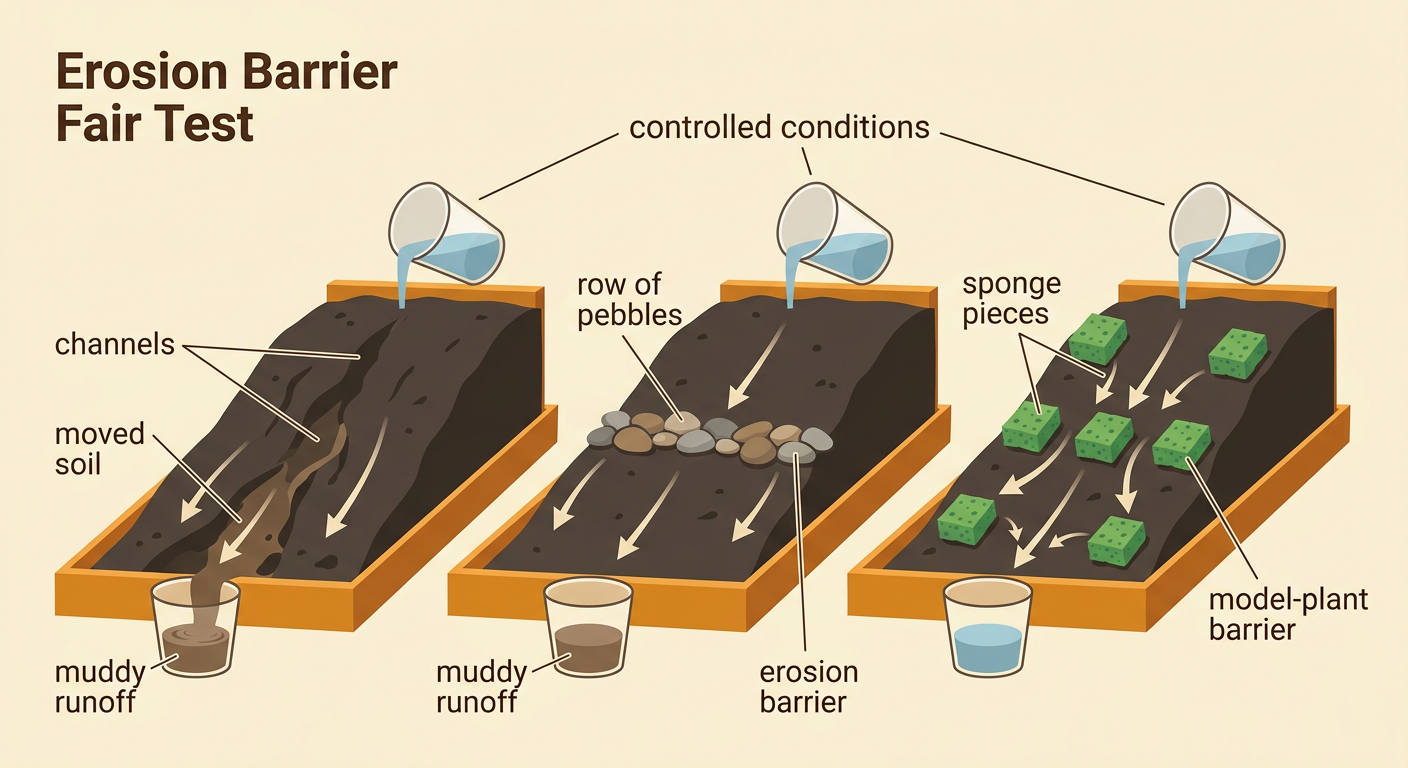
An erosion barrier is something placed in the path of moving water to slow it, spread it out, or trap soil. Test a different barrier on each model slope. One slope might have a row of pebbles. Another might have sponge pieces that represent plants. Leave one slope bare for comparison. Place each barrier across the slope so runoff meets it while moving downhill. Then pour the same amount of water from the same height and at the same speed onto every tray. These are controlled conditions that make the test fair. Watch what happens behind, between, and below each barrier. For example, pebbles may trap some soil, while water may flow through spaces between them. Record any channels, moved soil, or muddy runoff you observe.
Compare the Results
Use observations and measurements to decide which barrier slowed erosion best. Compare the amount of soil in each collection cup, the cloudiness of the runoff, and the size of any channels. Less collected soil usually means less erosion occurred in the model. Suppose the bare slope lost four teaspoons of soil, the pebble slope lost two teaspoons, and the model-plant slope lost one teaspoon. In this example, the model plants slowed erosion the most. Results may differ if the slope, soil, or barrier changes, so repeat the test when possible. A useful results chart lists each design and its evidence. Do not choose a winner only because it looks strong. Use the measured results and observations to explain how well each solution protected the model land.

Recommend a Solution
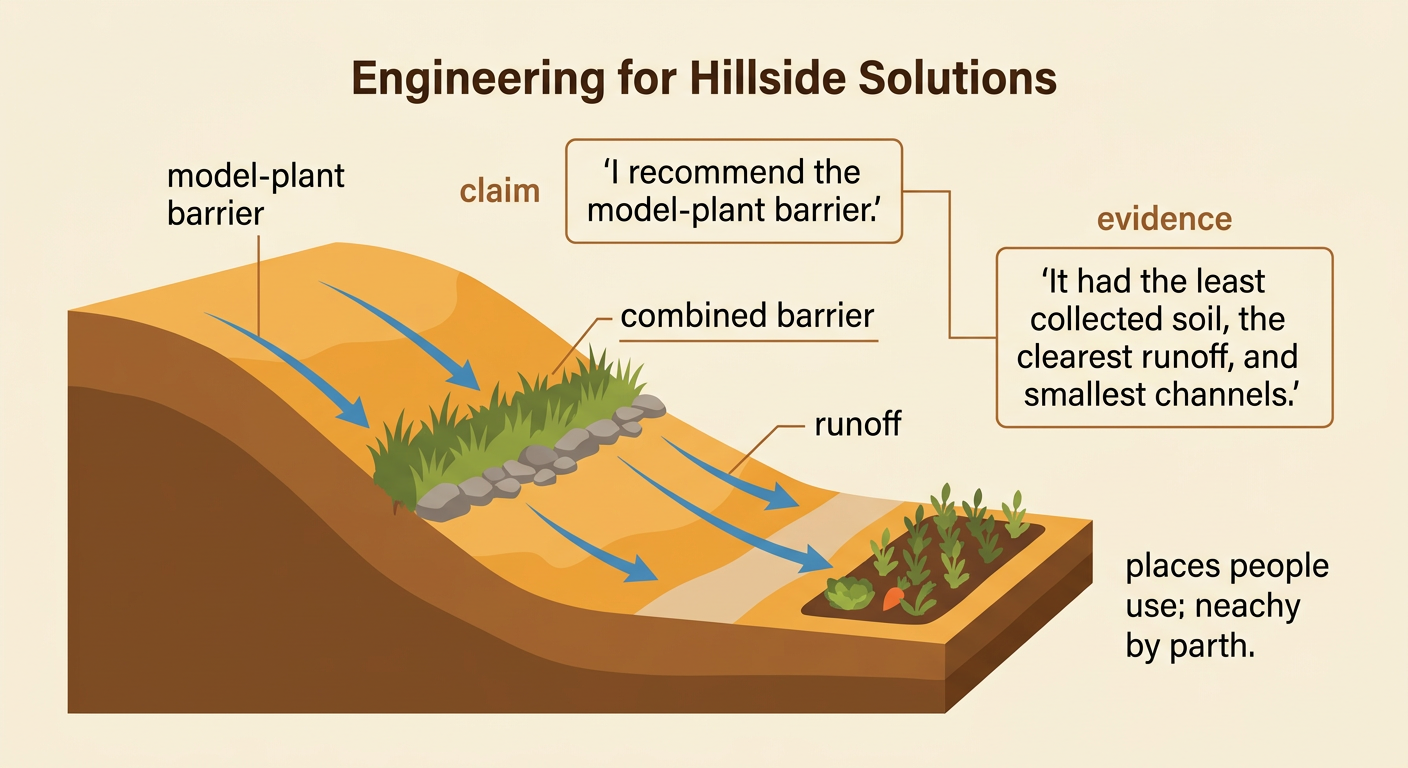
Engineers recommend a solution by stating an opinion and supporting it with evidence. Begin with a clear claim, such as, “I recommend the model-plant barrier.” Then give reasons from the test: it produced the least collected soil, the clearest runoff, and the smallest channels. Explain why the choice matters to people. On a rainy hillside, slowing erosion can help protect gardens, paths, roads, and soil around homes. Also consider limits. Plants need time and water to grow, while rocks may work right away. A strong recommendation might combine plants with a small rock barrier if the evidence supports both designs. End by explaining why your solution fits the place. The steepness of the land, amount of rain, soil type, and ways people use the area can all affect the best choice.